Astrolotl
Terrarian
Creating a Texture Pack - A Guide for the Inexperienced
Never made a texture pack before? No Problem! In this guide I will teach you from the ground up.
-Introduction-
Welcome to the Texture Pack creation guide! Let's start this tutorial off with a list of things you will need:
Contents:
Locating Texture Files
Exporting Texture Files
Editing Texture Files
Importing Texture Files
Troubleshooting
-Locating Texture Files-
Alright, the very first thing you're going to want to do is locate the .xnb files that Terraria uses. You can find them through Steam or through your files explorer. Here is how you find them with Steam:
 The next method is locating them through files explorer: This (C:\Program Files (x86)\Steam\SteamApps\common\Terraria\Content\Images) is the pathway where mine are located; you might be able to locate yours by opening your files explorer and copying and pasting that into the address bar, but only if your Steam and Terraria programs are installed similarly.
Have no idea what I'm talking about? Screenshots are under the spoiler.
 If your .xnb files are not located here, you can find them by locating your Steam program files, clicking the "SteamApps" folder, then the "common" folder, then the "Terraria" folder, then "Content" then "Images".
-Exporting Texture Files-
Once you have found them, you'll notice they are all in the .xnb format, which cannot be opened by image editing programs. To rectify this, you can download and install a .xnb converter, or TCCL: Terraria Custom Content Loader or TExtract and use any program to turn the .xnb files into .png files so you can edit them. Once they are converted to .png, they will have to be converted back to .xnb in order to be used by the game (unless I can get TCCL to work, which is able to get the Terraria client to use .png files as textures) Or, if you don't want to use either of these programs, you can download the .png files here (link provided by stupidjesse) and skip to the next step
Using .xnb exporter: Download .xnb converter. Create a new folder anywhere and extract all the contents of the zip file into the folder; it should look like this:
 The zip contains a text file with instructions, but I'll put them here anyway. Copy the .xnb files you wish to convert into the input folder. Run the .exe file. Converted files can now be found in the output folder. Simple. Done? Go to the next step.
Using TExtract: Download TExtract. Make sure it gets put into the Terraria folder. Run the .exe file. Extracted assets can now be found in the folder "TerrariaAssets" or TerrariaAssets_X". This includes music, fonts, and sound files in addition to texture files. Done? Go to the next step.
Using TCCL: I have gotten TCCL to work, and it has converted some of the .xnb files to png files, although it seems like most of them got corrupted somehow and are completely blank. I'm wary about using this program to apply .png textures because it seems to crash a lot and causes a significant amount of lag within the game. Here's how you do it though: Download the TCCL installer and run it, installing it inside your Terraria folder:
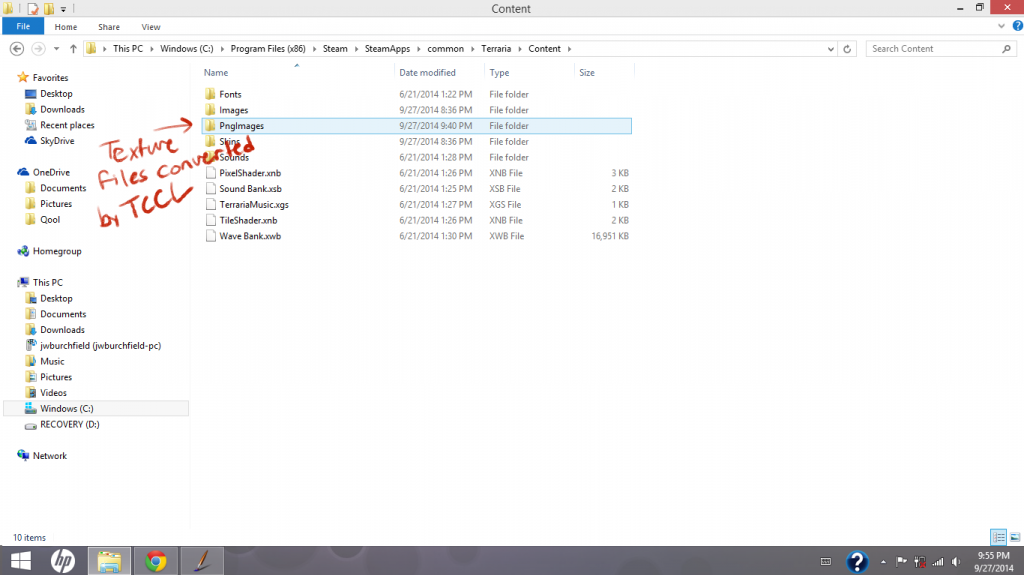
 Once you've done that, launch TCCL.exe to make sure everything has installed correcty. Then drag the "Content" folder over the TCCL.exe file, and it should begin to convert the .xnb files into .png files. If you get a black screen, you can wait for it to finish or ctrl+alt+delete to go back to the desktop. It will then say "Image conversion succesful" and you can close it out. Now you can find all your shiny new .png files inside a folder that TCCL creates
 Upon opening it up though, I found many of them were broken
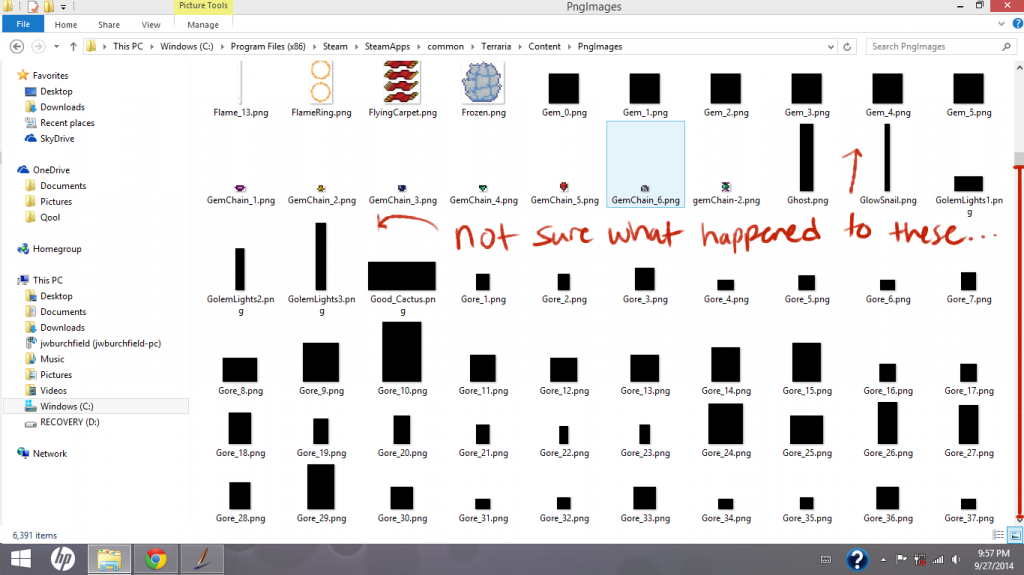 I have tried waiting for them to load or opening them up, but they seem pretty much nonexistent. I did get some working files, so we can start editing those right away. Considering the problems I have with TCCL, I would recommend a different program. Done? Go to the next step.
-Editing Texture Files-
Now that we've got some .png files we can work with, we need an image editor to alter them to our liking! You can use MS paint or Gimp or Photoshop or whatever you happen to have installed on your computer, but I would recommend FireAlpaca. It works with PC and Mac, and is a very nice, free image editing tool. It also gives you a handy 1 pixel grid when zoomed in on images, like this:
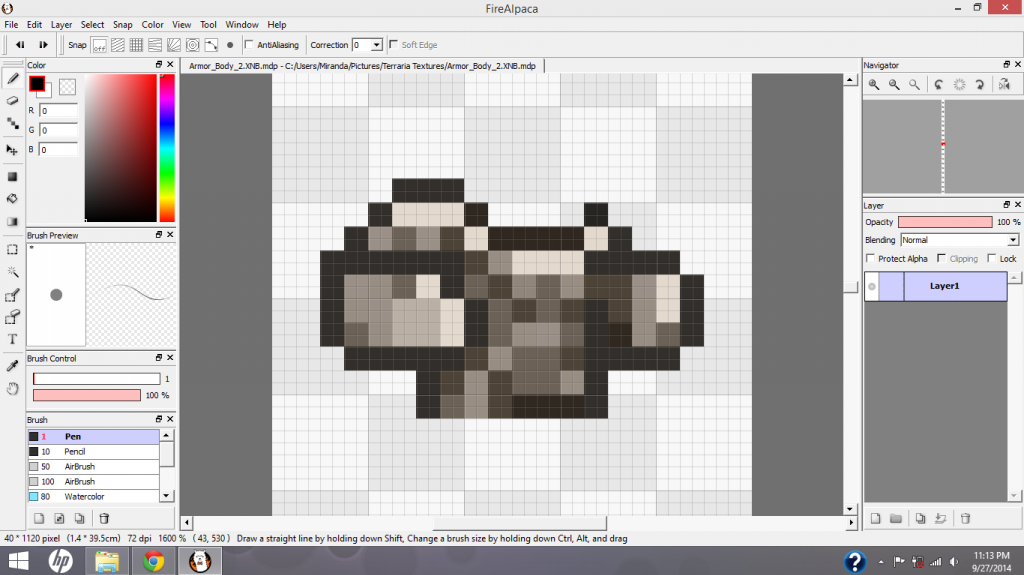 Make sure you use the pen tool set at 1 pixel and 100%. If you have trouble drawing straight lines, draw one pixel where you want the line to start, hold down shift, and put the other pixel where you want the line to end. This works for diagonal lines too. If you want to sample a color you previously used or a color already in the image, hold down the Alt key and click the pixel with the color you would like to sample. When you go to save, make sure you save it as a .png file with transparency.
Creating a separate file folder for all of your edited texture files is a good idea. It'll make them easier to find later when we have to convert them all back into .xnb format.
-Importing Texture Files-
to be added
-Troubleshooting-
to be added
Never made a texture pack before? No Problem! In this guide I will teach you from the ground up.
First off, let me just say I'm constructing this guide because there seems to be a lack of people creating texture packs, and the only people that were are no longer active. I think Terraria is a great game and has a great community, and said community could produce some really great stuff; so I decided to make this guide. Keep in mind that I have never made a texture pack before either, so there will be mistakes made! However, I will correct them as often as possible and keep everyone updated about what I've learned in my texture pack endeavors. Onward with the learning!
-Introduction-
Welcome to the Texture Pack creation guide! Let's start this tutorial off with a list of things you will need:
- Basic knowledge of computers
- a computer
- the Terraria client
- an image editing program
- a .XNB exporter or TExtract or TCCL
- Microsoft XNA Studio
- some new file folders
- empty disk space
Contents:
Locating Texture Files
Exporting Texture Files
Editing Texture Files
Importing Texture Files
Troubleshooting
-Locating Texture Files-
Alright, the very first thing you're going to want to do is locate the .xnb files that Terraria uses. You can find them through Steam or through your files explorer. Here is how you find them with Steam:
Have no idea what I'm talking about? Screenshots are under the spoiler.
-Exporting Texture Files-
Once you have found them, you'll notice they are all in the .xnb format, which cannot be opened by image editing programs. To rectify this, you can download and install a .xnb converter, or TCCL: Terraria Custom Content Loader or TExtract and use any program to turn the .xnb files into .png files so you can edit them. Once they are converted to .png, they will have to be converted back to .xnb in order to be used by the game (unless I can get TCCL to work, which is able to get the Terraria client to use .png files as textures) Or, if you don't want to use either of these programs, you can download the .png files here (link provided by stupidjesse) and skip to the next step
Using .xnb exporter: Download .xnb converter. Create a new folder anywhere and extract all the contents of the zip file into the folder; it should look like this:
Using TExtract: Download TExtract. Make sure it gets put into the Terraria folder. Run the .exe file. Extracted assets can now be found in the folder "TerrariaAssets" or TerrariaAssets_X". This includes music, fonts, and sound files in addition to texture files. Done? Go to the next step.
Using TCCL: I have gotten TCCL to work, and it has converted some of the .xnb files to png files, although it seems like most of them got corrupted somehow and are completely blank. I'm wary about using this program to apply .png textures because it seems to crash a lot and causes a significant amount of lag within the game. Here's how you do it though: Download the TCCL installer and run it, installing it inside your Terraria folder:
-Editing Texture Files-
Now that we've got some .png files we can work with, we need an image editor to alter them to our liking! You can use MS paint or Gimp or Photoshop or whatever you happen to have installed on your computer, but I would recommend FireAlpaca. It works with PC and Mac, and is a very nice, free image editing tool. It also gives you a handy 1 pixel grid when zoomed in on images, like this:
Creating a separate file folder for all of your edited texture files is a good idea. It'll make them easier to find later when we have to convert them all back into .xnb format.
-Importing Texture Files-
to be added
-Troubleshooting-
to be added
Last edited:

 Is it very hard??
 If not, doesn't matter. Really helpful guide so far!