Xylia
Terrarian
TEMPORARY EDIT: SCREENSHOTS ARE BROKEN UNTIL I CAN FIX THEM.
In the meantime if you want to see the screenshots, right click the broken screenshot, click "View Image", and when you get the error message, change "cloud-4.steampowered.com" to "cloud-4.steamusercontent.com" and the screenshot should then display. I'll fix it ASAP.
(Note: This is a WIP, I will be adding screenshots as I find them. Also be wary of some minor inconsistencies; I will hopefully repair those as I get screenshots for the guide itself. The guide was written a few months ago, and some things I've decided to change in it since then.)
v1.5
Guide for Newbies (For PC v1.2.4)
Hello Terrarians!
I've decided to write a guide for newbies, as the game has so much stuff, it can easily leave peole confused and scratching their heads, wondering what they're supposed to do next, or how they are supposed to overcome obstacles, and all of the other things that we experienced players take for granted.
A thing to note while reading this guide: There are many different weapons and armor in Terraria; there are many, many, many ways to kill enemies and bosses. That said, this is mostly for Melee-Heavy Characters and we will not be exploiting terrain, or traps in this guide; this guide is meant to be a "simple" way to progress through the game. I view wiring, traps, and magic spells as a more advanced type of play, something a person may dabble in, once they are comfortable with the game.
This guide also assumes you are playing on PC.
That said, let's get started!
Part 1: The Beginning and Your House
Making a character is very self-explanatory (make SURE you set it to SOFTCORE!): There's no stats to worry about, it is just you, and the items you have on you at any given time, along with your health and mana meters. There are no other traits or stats. So once you've made your character, then you make a world. For newbies, I highly suggest making Medium worlds, especially if you are playing alone, offline. The reason for this is simple: Large maps may have more resources, treasure chests, loot, etc but they also take much, much, much more time to traverse. Ultimately, there are ways to cut down on travel times, but when you're early-game and you've died in the Dungeon (which is always near the edge of the map) and it takes you 15+ minutes to get from your house to your dungeon, then you are going to wish you had created a smaller world. The reason why I suggest Medium, rather than small, is because of issues having to do with the ground level and sky enemies spawning while you're on the ground.
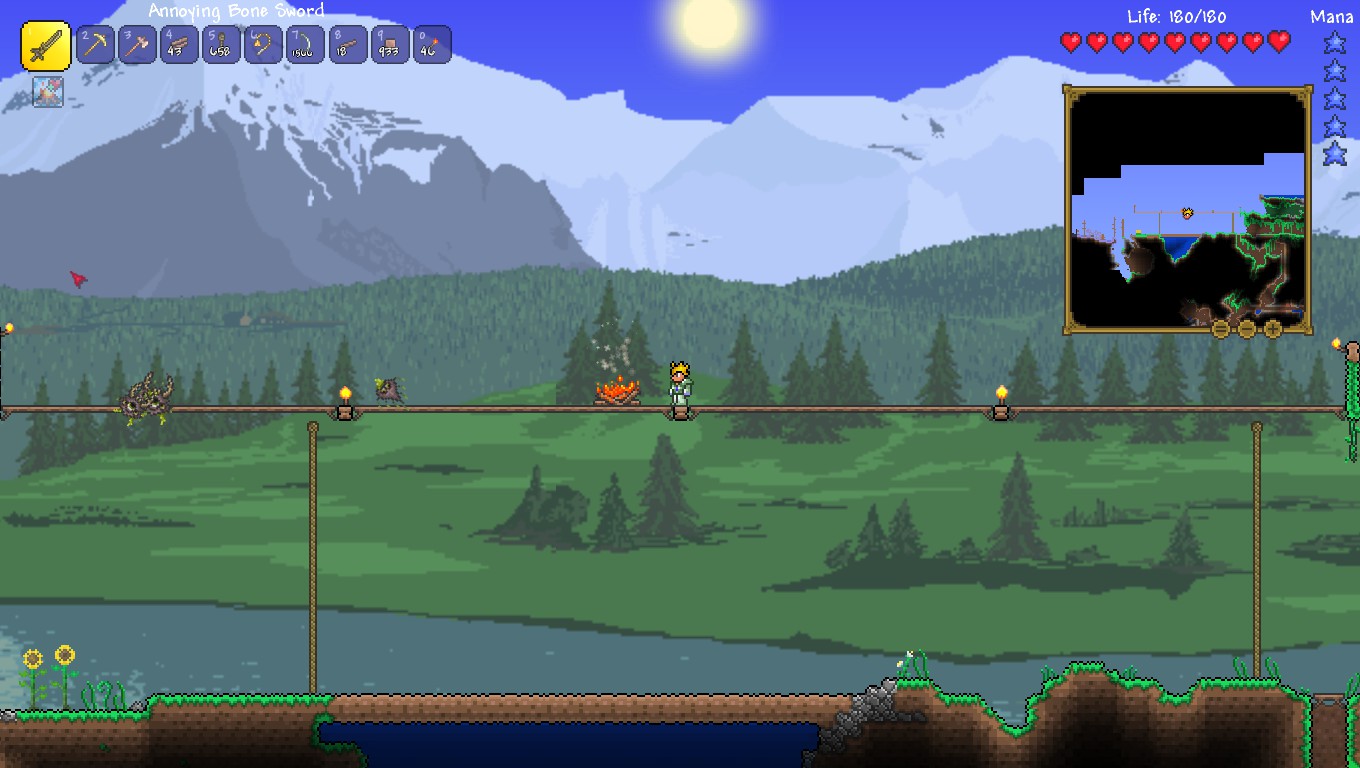
Once you've started your world, the game dumps you in the middle of a Forest with only 3 items on you: A copper shortsword, a copper pickaxe, and a copper axe on your hotbar. The hotbar buttons correspond to the keyboard numbers 1 through 9 as well as "0" being the last item on the hotbar.
To start our adventure, proceed to select the Copper Axe, and click on the very base of the nearest tree, at the center of the trunk. If you are close enough to the tree, you will start to swing your axe; it will take quite a few hits before you finally topple the tree. Repeat this for several trees; you want as much wood as you can find. Keep an eye on the sun above you, though -- when it is about two-thirds of the way across the screen, you need to think about building some kind of shelter for yourself.
While you're chopping down trees, slimes will occasionally spawn and start pestering you; you'll need to switch to your copper shortsword to kill them (your axe will likely only do 1 damage per hit and they have 30+ HP). They will drop gel; you need these.
Once you've found a good flat stretch of land, and you've gotten at least a few hundred wood on you, it is time to think about building a home. Start by selecting the wood (hit Escape to see your full inventory, you might want to move some of those items off the hotbar), and clicking on the ground next to you to start a floor. You can then get up ontop of the wood to place the rest of the floor. How large you make the house is up to you, but you will want at least 6-8 blocks for the floor. Once you've made the floor, go to one end and place 4 blocks of wood ontop of it, vertically. Then once you've done this, start a ceiling ontop of the wall you made, and continue building over towards the other end of the floor. If you did it right, there should be a full block between the top of your head and the ceiling. On the other end, place a single block of wood down from the ceiling so that the end of the floor and the end of the ceiling has a gap of 3 blocks (the exact height of your character).
Once this is done, hit escape. You'll notice a list of items in the bottom-left underneath your inventory. You can scroll this list up or down with the mousewheel; you will want to select a Workbench. Click on this and you will make one Workbench. Place the workbench near the wall (but not up against it). Take a few steps away from the workbench, and then make sure you are facing the workbench and then open your crafting list if it isn't already open, and make a Chair (make sure you are standing next to the workbench, or the chair will not appear in the list of items to make!). Click on the ground right next to the workbench and you should place the chair right next to the workbench, facing it. If you were facing away from the workbench when you placed the chair, the chair will be facing away from the workbench and it might look a touch silly. To fix this, select your pickaxe and hit the chair with it (don't worry, you won't break it!). When you do this, you will pick the chair up just like you did the wood earlier. Then you simply open your inventory, select the chair, and place it again hopefully right this time.
Now, open your inventory again, and craft as many torches as you can; hopefully you've gotten at least a few gel from the slimes you killed. Place two torches -- one in each top corner. Next, stand next to the workbench and make a Door. Placing a door is slightly more tricky than the other items you've placed thusfar -- you need to have exactly a 3-block gap with a solid object at the top and bottom. If you built the room right, you should already have this. Have the door selected, and click on the space just below the top of the gap and you should place the door. To open the door, simply right click on it. Doors open both ways; which way you open the door depends on which way you were facing when you clicked on it. This comes in handy later, if you ever accidentally place a piece of furniture up against a door; simply turn your back to the door to open it the other way.
By the time you've done all of this, it is probably getting dark out! This is dangerous for a newbie with no equipment. Select your pickaxe and dig a hole right in front of your door; it needs to be two blocks wide by at least 3 blocks deep, but don't dig it so deep you can't jump back out of it. The reason why I suggest doing this is simple: Zombies will spawn at night, and they can break your door down. However, they can't if they can't stand right next to it. They'll fall down the hole and try jumping up at the door which will not allow them to break it down which gives you complete safety (at least for now; later enemies will have ways to get into your house).
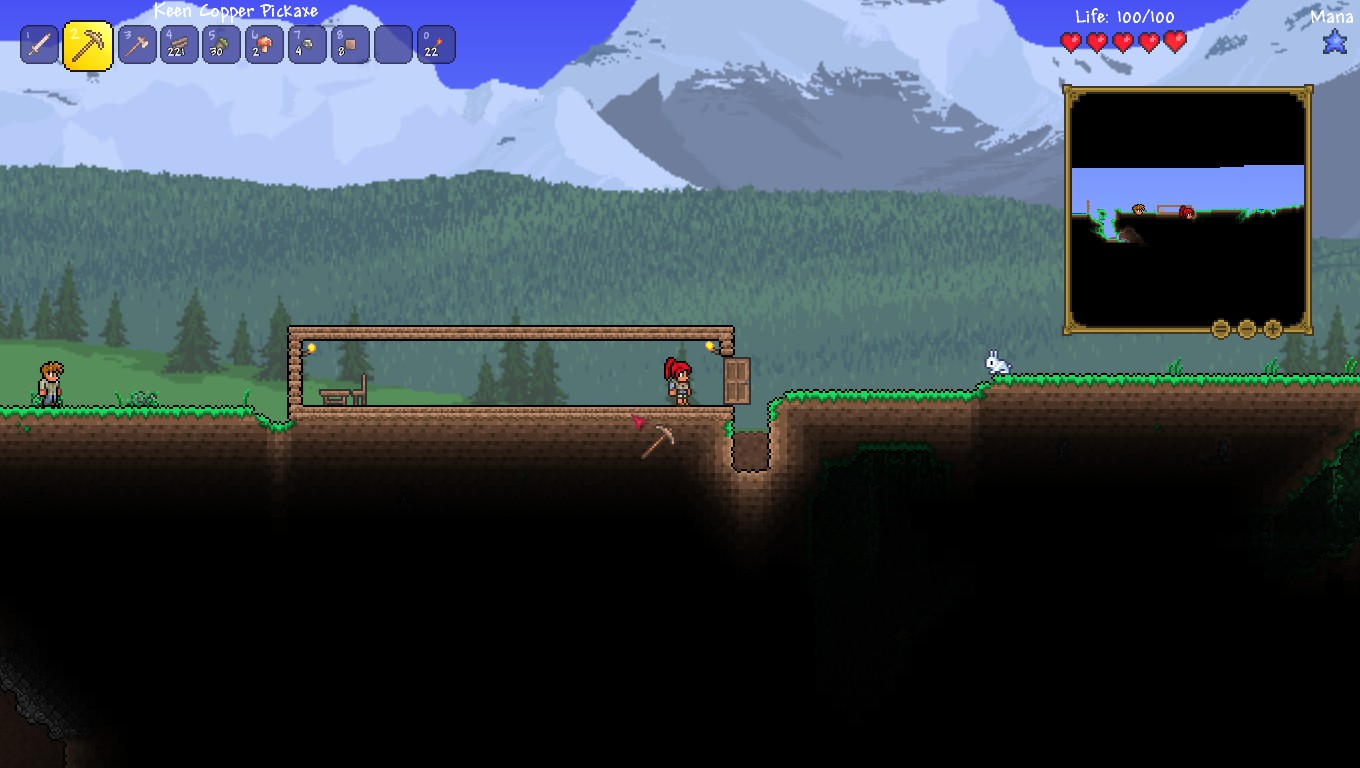
A house frame with chair, workbench, door, torches, and zombie-proof pit.
If night has indeed fallen (the music will change), go into your house, close the door and go to your workbench and make a Wooden Broadsword. If the name of the broadsword is in grey font and has a word like "Blunt", "Annoying", etc, then make another one. Weapons have random prefixes; some are bad. Also, look at the stats; it'll tell you if it has good or bad stats. If you wanted to, you could try to fish for good stats on your sword but it really isn't necessary. Also, if you have enough torches, make a campfire and stick it somewhere in your house, assuming there is room to do so. This will cause you to regenerate health more quickly if you are near it.
Once you've made your sword, you have a choice: The zombies (and the flying eyes) drop items you need, but they are strong and will probably kill you if you're not experienced or comfortable with the game by now. If you die, you will drop a gravestone and a portion of your money where you died and you'll respawn at your spawn point (which is usually somewhere on the surface at the center of the world), unless you accidentally set your character to Hardcore during character creation. You don't really lose anything by dying (since you have almost no money by this point). You can use a pickaxe on the gravestones to get rid of them. The Zombies can drop a variety of items, but the thing you're looking for is a Shackle; this is an accessory that gives you 1 Defense, and can have up to +4 Defense with the right prefix (Warding). A Warding Shackle gives 5 Defense, which is nearly half of the defense of a suit of Silver/Tungsten Armor! They can also drop Zombie Arms (vary rarely) which does surprising damage. The floating eyes will be much harder for you to kill at this point, but they drop Lens which will be very valuable later; you'll likely need at least 6 eventually. If you don't wish to risk dying, you can simply stay in your house until Night is over.
Once the "Night" Music stops and the "Day Music" starts, any flying eyes will leave, and the zombies will wander around until they eventually go offscreen and eventually disappear. Go out of your house, and look for some stone and use your pickaxe to gather some stone (while killing any slimes you see). You'll want a lot of it; at least 50+ if you can find enough. Go back to your house, make any torches you can, and see if a Furnace is available. You need 3 Torches, 4 Wood, and 20 Stone Blocks to make a Furnace. Once you've made this, place it somewhere in your house. If you're running out of room, you made your house too small. To expand it, simply extend the floor and ceiling past the door 10-20 blocks more, and put another door in there (leave the first door there!), along with another workbench, and another chair, and more torches.
Go to a workbench, and if you've any stone left, you'll see "Stone Wall" listed in your craftable materials. Make as many of those as you can, and start placing them. These are background walls; you can place them inbehind the walls, and furniture without disturbing them. You'll want to fill the entire house with this wall material. Once you've done so, you may notice that the guy that was next to you (the Guide) will eventually wander into the house. You can also hit escape and click on the little house icon near the equipment boxes on the right side of the screen and then click on the inside of the two rooms, it'll say whether or not it is valid housing.
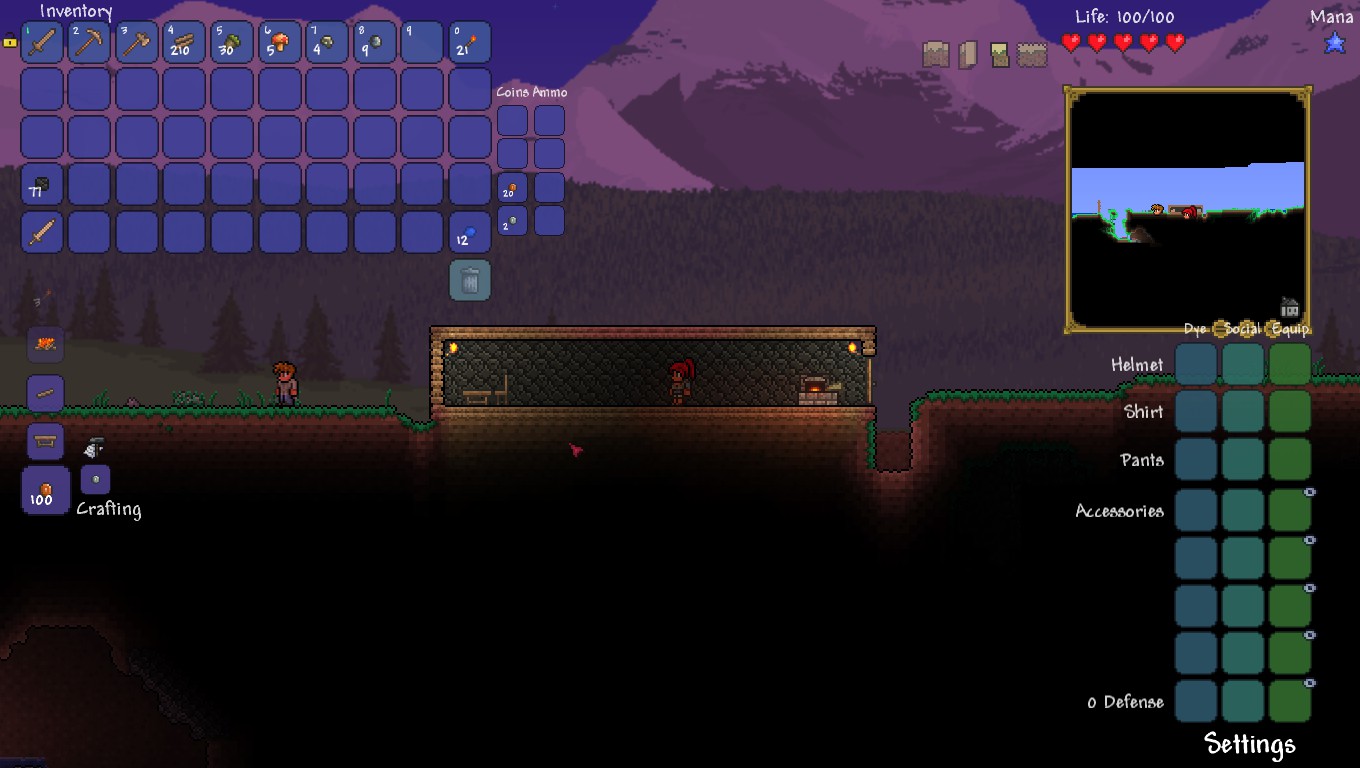
A finished house, with background wall. The NPC will move into the house whenever I save & exit, or, when you go offscreen. During Nighttime and Rain, the NPC will stand in one spot somewhere in the house, but will wander around during the daytime.
The next thing you should do at this point, is make some more rooms; you'll want at least 5 rooms. If you want to build horizontally, simply extend the walls and ceiling, put another door in, chairs, workbenches, etc. For a house to be valid it needs the following:
-1 Chair
-1 Table-type object (I recommend workbenches; having a workbench in every room allows you to craft basic items nearly anywhere in your house)
-1 Light Source (torches are easiest)
-1 Entrance (Doors or Wooden Platform floor/ceiling)
-1 1 Solid Block to stand on that isn't occupied by furniture (wood platforms do not work for this purpose).
-Must be entirely enclosed, including background wall.
A house may be made of anything, but I highly recommend against making your house out of Dirt, or Stone. The reason comes into play later in the game, when Corruption, Crimson, and Hallow begins to spread through your world. If your house becomes Corrupted with Corruption or Crimson, your NPCs will move out. Dirt and Stone are Corruptable if used as walls; Wood is not. Stone background walls made by the player are not corruptable.
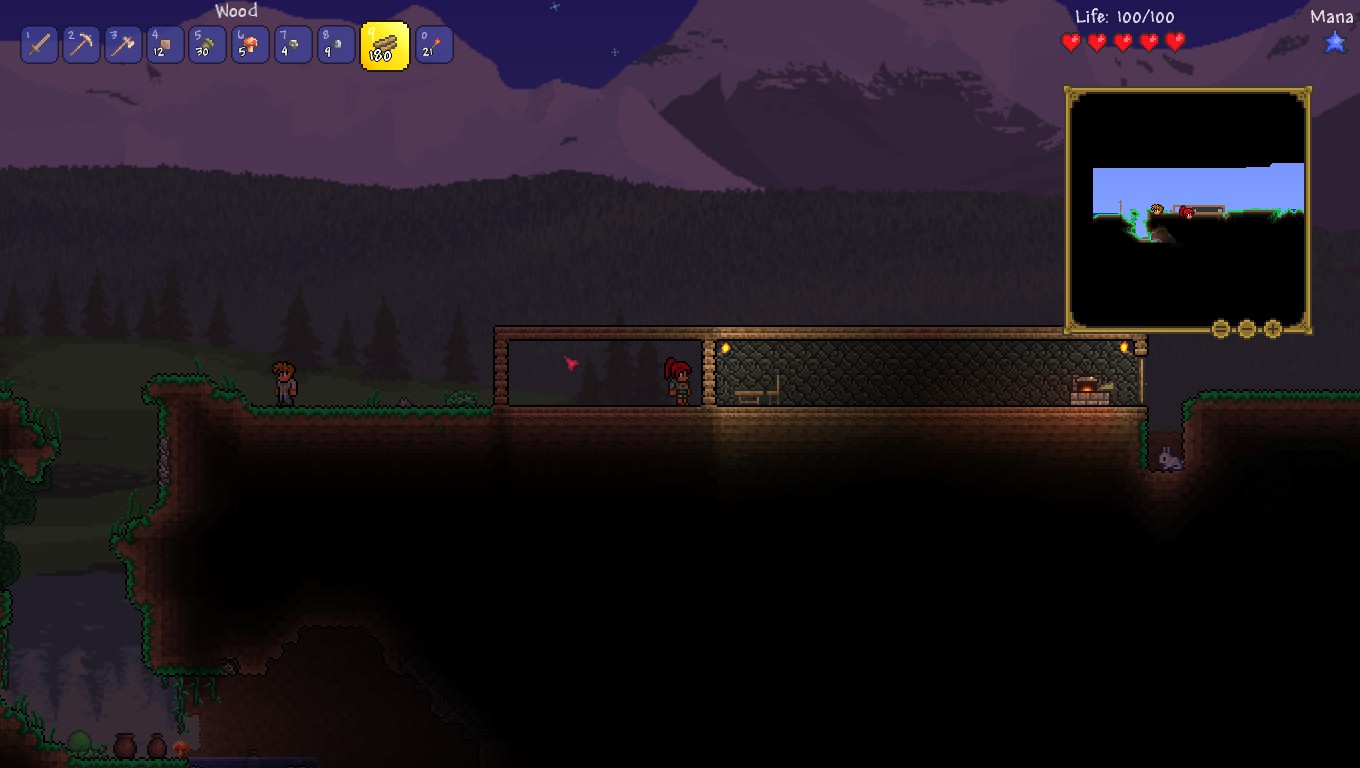
Merely add another 'frame', then mine out the first 3 wooden blocks and place a door.
To build vertically, you need to knock out portions of the ceiling and replace them with Wooden Platforms. Wooden Platforms can be jumped through, but also stood upon. To go down through a wooden platform, simply press the down key while standing on it and they also count as an "entrance". I recommend making these two blocks wide to make them easier to go through. Once you've built vertically, you may want to place wooden platforms on the outside walls of your house, otherwise you won't be able to go around your house without going through it.
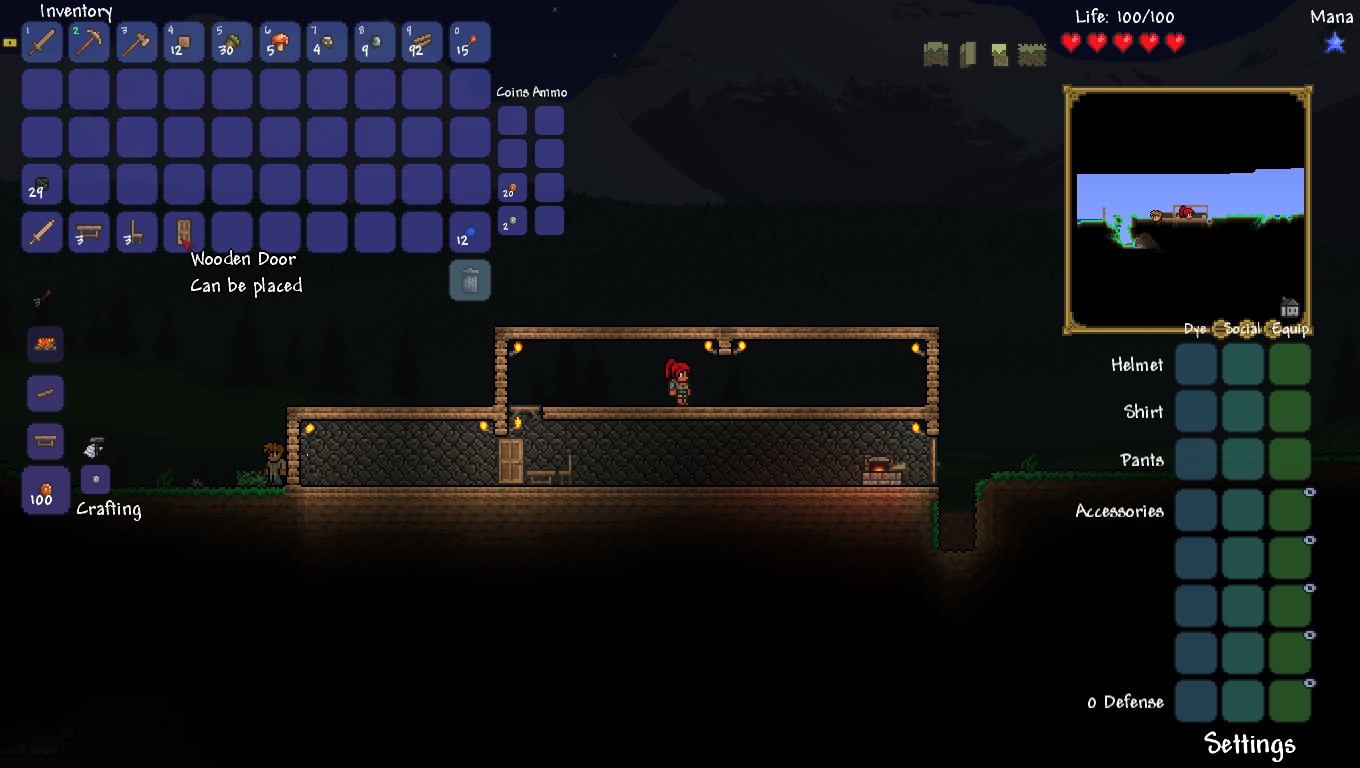
Note that I placed 1 block in the center downwards; I'm actually building two rooms here. I just simply need to place a door and furniture, like so:
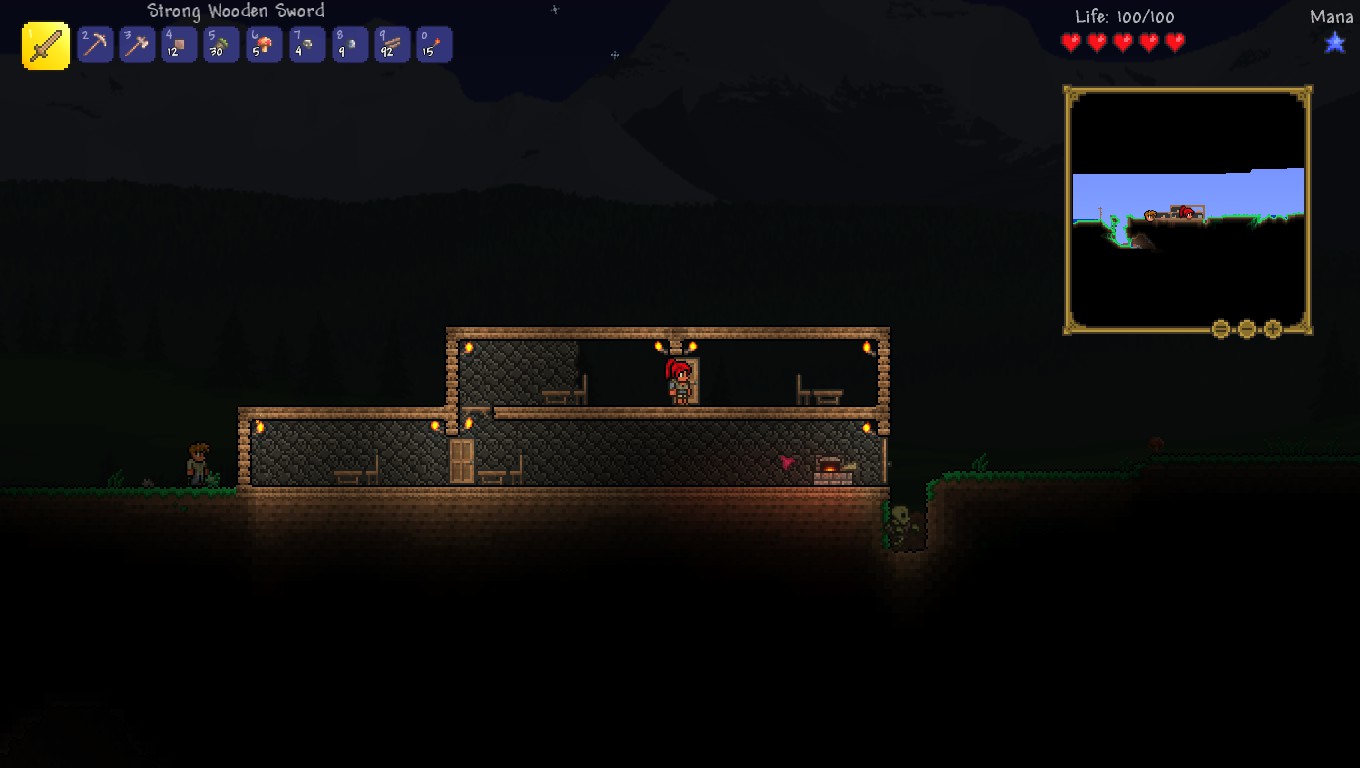
Note that the Stone Background Blocks are not finished; I ran out of stone and I will need to wait until morning to get some more. Also note the zombie in the pit; he cannot break my door down at all no matter what he tries to do. He'll just harmlessly jump up at the side of the house, as long as the door stays shut (this is why you don't want to make more than one exit from your home so you don't forget to close doors and let monsters into your house). This house will now support 4 NPCs and has a large area for crafting machines.
One final tip about your house: Only make 1 exit door for now. Later on, when invasions happen, you don't want NPCs opening doors and allowing monsters into the home. If you only have 1 entrance, you can easily keep that guarded. Just keep in mind that you will be expanding your house quite often as there are a lot of NPCs you will want to accomodate. You will likely want 1 easily-accessible room to act as your "crafting center"; you'll need some room for all the different crafting machines to be found in the game, as well as space to place treasure chests for item storage. I normally make this "crafting center" room as the entire length of the house, and build smaller rooms above it for the NPCs to move into, but that is of course your decision how you wish to do it.
Once you've gotten a few rooms, it is time to attract the first couple NPCs! NPCs will appear under various conditions, but they will only appear if you have a house available for them to move into (which is why I told you to make all of those houses/rooms above). Start exploring the surface to either side of your house, and if you should come across a large round orange flower, or a blueberry bush, use your pickaxe to harvest it to get either a marigold or blueberries. This should cause the Dye Trader to arrive (if it is currently daytime). Once he arrives, you can now sell all of your useless junk to him: Sell the Marigold/Blueberry (because it is worth a lot of cash at this point), your old copper shortsword if you kept it as well. Hopefully you have at least 50 silver by now. If you do, the Merchant should spawn as well, which is the last major goal of this section of the walkthrough. The Merchant sells you two very important items: A Piggybank (which you may or may not be able to afford yet), and Rope. You can find Rope in various vases and treasure chests, but the bulk of it will come from this very helpful guy. Buy 400-500 rope, or however many you can afford and stick this rope on a hotkey slot. It stacks to 999 and you should always have a good healthy supply of it on you at all times. You could farm some slimes for some money to buy more rope if you wish.
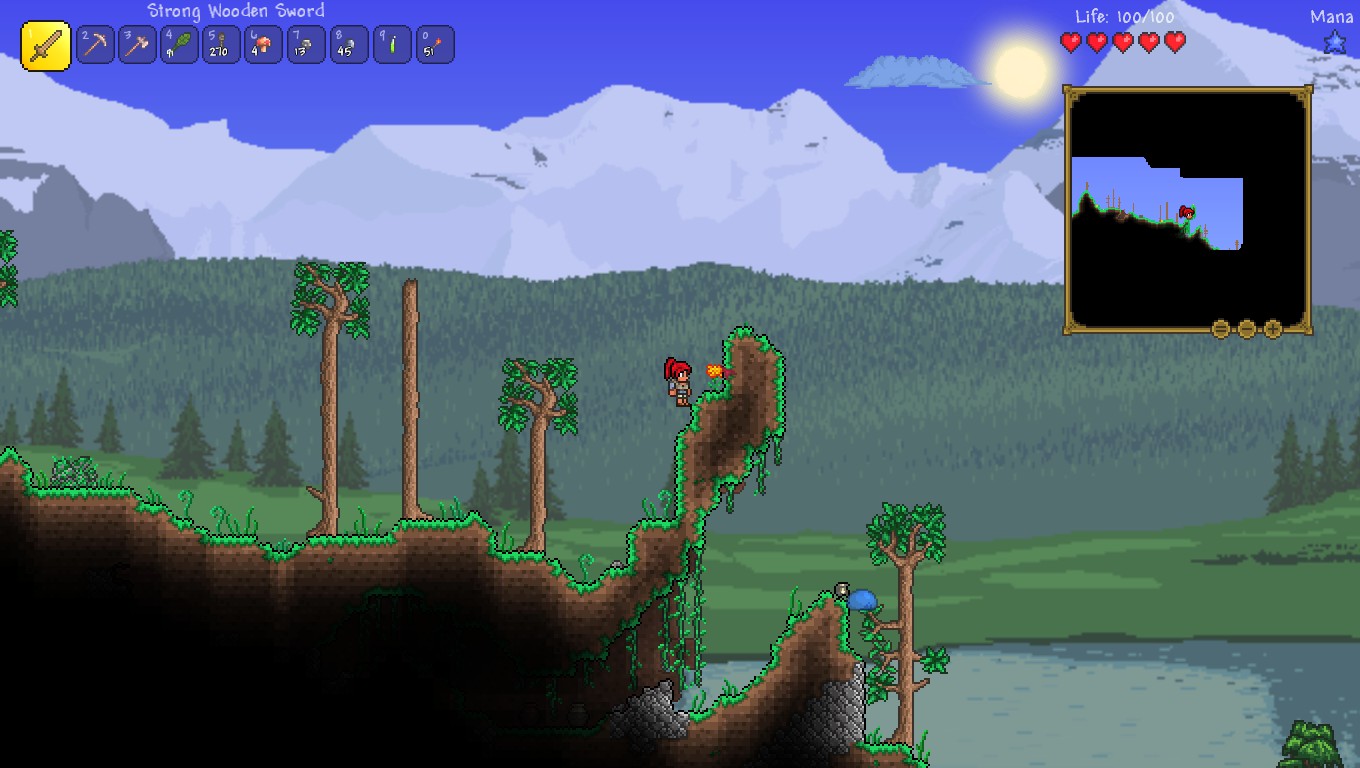
A Marigold! One of these is worth 20 silver alone, almost half of the amount you need to spawn the Merchant. This will also spawn the Dye Trader as noted above, whom you can sell more stuff to (shuriken, etc) to, to get more money.
To use some Rope, select it and click on an empty square right next to a solid object (dirt/stone walls, trees, wooden platforms, nearly anything works). Continue to click that square to add more rope (which will extend the rope downwards until it hits a solid object). You can also build rope upwards by clicking an empty square above the rope, too! Once you've a rope set, you merely need to hold the "up" key while near the rope to latch onto it, which allows you to move up and down freely. You can also build side-to-side using ropes, but wooden platforms are far better for this purpose, as your movement speed side-to-side is slow and enemies can knock you off the ropes until you get an item that prevents knockback.
So there you have it, you are now ready to do some serious exploring. While going through the rest of this guide, I am going to assume that you will be continuing to expand your house; always leave at least 2-3 empty "houses" open for NPCs you meet while you explore, so that they can move in when you meet their conditions. If you get an NPC, build another house so that more can arrive. If an NPC gets killed for any reason, they will spawn the next day provided you continue to meet their conditions.
Part 2: Getting to Know Your World/Gathering
Every world is unique, as Terraria has "Procedurally Generated Worlds". What this means, is that the game randomly creates a world with certain parameters in mind. Assuming you chose a small world as I recommended, your world will always have the following:
1). A Forest Biome near the Center (where you started).
2). Two Oceans, one at either edge of the map.
3). One Dungeon, which is near one of the Oceans.
4). A Jungle (sometimes multiple jungles can spawn).
5). A Corruption, -or- A Crimson, but never both. Sometimes multiples can spawn, and Corruption areas seem to love spawning near Jungles.
6). At least one small desert area.
7). A Lihzarhd Temple (deep in the Jungle)
8). Hell/Underworld (the very bottom of the map)
9). 3 Sky Islands
10). A Snow Biome (Common)
In addition to that, you might get:
1). One or more Beehives
2). A Pyramid (Rare, spawns in the desert)
As you explore, use Ropes and Wooden Platforms (Don't forget to keep your supply of wood flowing!) to bridge large gaps, and to create ways to pass steep cliffs and dangerous drop-offs. Open any treasure chests you can find, preferably emptying the chest altogether even if the items are bad. You can use your pickaxe on the chest to take the chest and place it in your house; I recommend getting several of these to make a storage area.
A Few things to note while exploring the surface:
1). If you run into the Dungeon (it will look somewhat like a castle and have an old man wearing red in it), whatever you do, *do not* go down into the dungeon or you will die, and *do not* talk to the Old Man at night, or he will murder you horribly at this point.
2). If you run into Crimson or Corruption, turn back. These areas are very dangerous at this point and you would very likely get killed.
3). Snow and Ice areas are slippery as they should be; be careful of cliffs and deep holes.
4). If you find a Jungle, make sure you stay at the surface. I recommend turning back for now, if you find one. The enemies in the Jungle Underground are very powerful and would make short work of you.
5). Grab any ore you find: Copper, Tin, Iron, Lead, Silver, Tungsten, Gold, Platinum. You'll occasionally find small bits of these at the surface level.
6). Fallen Stars at Night: 5 Stars makes 1 Mana Crystal. Use this, to permanently increase your mana maximum by 20 (1 blue star). Maximum of 200.
This is the Corruption. You are not ready for this; going in here will very likely get you killed at this point unless you seriously know what you're doing. A Crimson area looks very similar, only the trees are red instead of purple and the background is a bit different. They both have their unique music that plays when you get close.
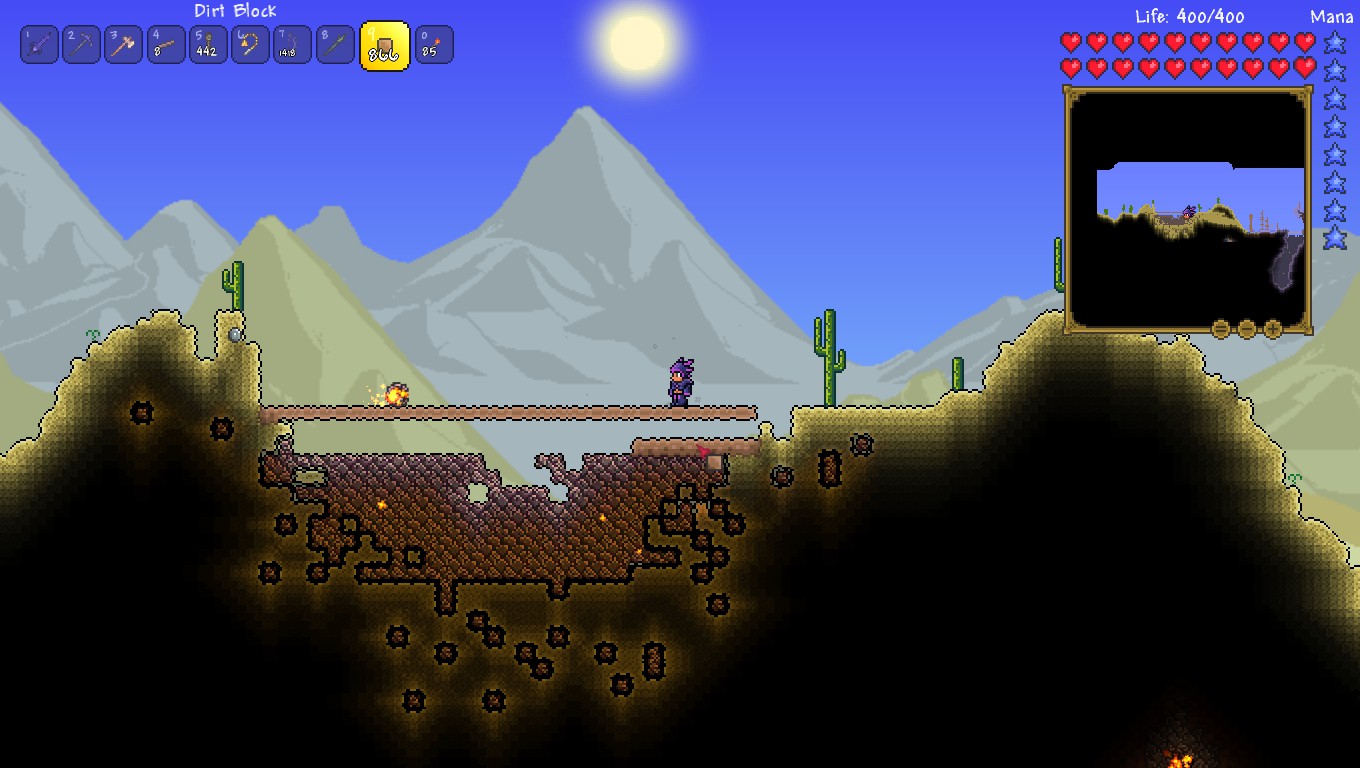
If you find a Desert Area, use your axe on some cactus if it is safe to do so (some desert enemies spawn that hurt nearly as much as demon eyes do, but sometimes you can grab a few cactus plants with minimal trouble). Take these cactus blocks back to your workbench to make a Cactus Sword, which has 2 more damage and slightly better knockback and range!
Once you've mapped out as much of the surface as is safe, you should have found at least one or two entrances to caves by now. Make sure you've a stack of 99 torches, some gel and wood to make more, and clear out all of your excess items and dive right in! Here are some things to note while you do:
1). Ropes, ropes, ropes. Don't try to dive in without first dropping a rope.
2). Torches are required; this game is very realistic about light. You can't see without light.
3). Be careful of water, drowning is very easy to do if you're not avoiding the big water pools.
4). Sometimes you need to tunnel with your pickaxe, just be careful you're not about to dig into a huge underground lake that will flood your tunnel. If this happens, try to very quickly dig two blocks directly above you. If done correctly, this will make an air pocket that you can catch your breath with. While tunnelling horizontally, it is a good idea to place several of these air pockets (along with a torch to keep it lit) along the way in case you do accidentally break into a large pocket of water.
5). Keep your eye out for anything that looks like a log cabin. These almost always have golden treasure chests inside (or ice chests if you're in the ice underground). These usually have incredibly valuable items in them (usually accessories).
With that in mind, gather all the ore and items you can. If you are getting full, you can return to your house by either using a Return Potion, the Magic Mirror if you find one, or you can hit escape, go into Settings, and click Save and Exit, and then reload your character and your world. Be warned, doing this will cause any items laying around on the ground that aren't placed to disappear forever.
You will get a ton of items while exploring the underground:
1). Ore: Smelt all ore into bars (open your crafting window while standing near a furnace) except Iron or Lead. Do not smelt any more iron/lead than you need. You will want to smelt 8 Iron/Lead Bars: 5 of these are for an Iron/Lead Anvil, 1 of them is for Chains, and the last two are for a Sawmill.
2). Throwing Knives/Shurken/Bombs: I always sell these. You can try using them if you want, but I normally find the money more valuable. You will want to keep at least 1 bomb, grenade, or dynamite in one of your treasure chests at all times. Picking any sort of explosive up will spawn the Demolitionist NPC who will move into a house provided you have one available. Keep a bomb in one of your treasure chests in case he gets killed, that way you can merely retrieve the bomb to cause him to spawn again.
3). Gemstones: There are a variety of gemstones; keep all gemstones you get until you have 15 of any given color. Once you have those, you can create a grappling hook made of that kind of gemstone. If you find a Hook (dropped from Skeletons and Piranhas) you can instead use 3 chains to make a grappling hook instead. Once you have a grappling hook, you can sell the gemstones or keep them in a chest, either/or. They are used in a few recipes, show them to the Guide and then decide for yourself if you wish to keep them or not.
4). Accessories: You will want to equip accessories as you find them until your accessory slots are full. Some of the more valuable ones at this point in the game include Cloud-in-a-Bottle, Hermes Shoes, Flurry Boots, Shoe Spikes, Climbing Claws, Band of Regeneration. There are also Aglets in some of these chests; you will want to keep one in your treasure chest (unless you have an open slot for it, might as well wear it). Aglets don't give you that much of a boost (unless it has +Defense on it!), so it is probably not worth using one over the other accessories I listed above. It is used in a crafting recipe, however, and you will want to hang onto it.
5). Glowsticks: You might find shallow pools of water with jellyfish, or you might find these in vases or treasure chests. You'll want to keep a full stack on you. When you select them and click, you'll toss one and it will stay lit for several minutes and unlike torches, they work underwater. You can also hold the Shift key down to pull out a glowstick temporarily without using it to light the area around you if you fell into water and can't see. Like torches, they only stack to 99. If you get more than that, you can sell the excess as there's really no reason to keep more than 99 glowsticks.
6). Enchanted/Ice Boomerang: This is a fairly nice early-game re-usable ranged weapon. It will likely do far more damage than your wooden sword is capable of doing and can provide small amounts of light temporarily while you throw it if you should happen to end up needing to see what you can't reach with a torch.
7). Life Crystals. These are red heart-shaped stones that pulsate. Whack it with your pickaxe and it will drop a Life Crystal. Use this to increase your maximum HP. Beware: *do not* increase your HP maximum past 180 yet. If you are lucky enough to find more crystals, hang onto them. Increasing your HP to 120 will cause the Nurse to spawn and move into your house if there's one available.
8). Bone Sword. Rare drop off of skeletons. If you get one of these, consider yourself very lucky.
9). Cobwebs: Save these for later; stick em in a treasure chest. They'll stack to 999 so you won't need more than 1 slot to carry them for a long time.
10). Glass Bottles: Keep these, you'll need lots of them later.
11). Clay: You'll want to keep some of this for later.
12). Glowing Mushrooms: Keep some of these, you'll need them later too.
So after you've done some exploring of the underground, you will hopefully have a good bit of ore. Other than making an Anvil, and a Sawmill, you will want to make the following:
1). A new Pickaxe. I recommend spending your Gold/Platinum on this first. The sooner you get a good pickaxe, the faster you'll be able to explore the underground.
2). A bow. You will need a bow very shortly. If you don't have any more Gold/Platinum left, then I recommend using Silver/Tungsten instead.
3). Armor. This will likely take you the longest to get ahold of: Armor takes a Lot of bars. Don't bother using Copper for armor; the defense is simply too low. Don't waste Iron or Lead on it either; you'd be far better off to use it for Ironskin Potions instead. Most likely, you'll use Tungsten or Silver; make the Body First, then the Helmet, and Then the Legs if you happen to have enough ore laying around.
4). A Sword. I wouldn't bother making a sword; you'll be replacing it very soon.
Once you've gotten a Pickaxe, a Bow, and some Armor, you may want to take a side-road and make yourself some furniture: Assuming you've made a Sawmill, standing near it will allow you to make a Loom. Once you've made a Loom, you can now make Silk out of Cobwebs. Once you've made those, you can now make a Bed. Assuming you've placed the Bed in a valid house, you can right-click the bed to set this as your new spawn point (whenever you load the game up, if you get killed, or if you use a Return Potion/Magic Mirror).
With that done, here's a checklist of things you should have:
1). A Gold or Platinum Pickaxe.
2). A Gold/Platinum, or, Silver/Tungsten Bow.
3). A Suit of Armor made of Gold/Platinum or Silver/Tungsten.
4). At least 160 maximum health.
5). At least 12 Lens.
6). 100+ Stone.
7). 300+ Wood.
8). 100+ Gel.
9). Some Healing Potions.
Now it is time to make some arrows. Standing near a Workbench, you can combine a stone and a wood to make 5 arrows. The amounts of materials I listed above is generous, especially since you should have found several wooden arrows in vases and chests, but it still can't hurt to be cautious. You will want to make wooden arrows until you have 500-700 of them. Once you've made those, make sure you have lots of Torches, and then make Fire Arrows (1 torch + 5 Wooden Arrows = 5 Fire Arrows). Alternatively, you can buy arrows (and torches!) from the Merchant NPC if you don't mind spending a bit of cash.
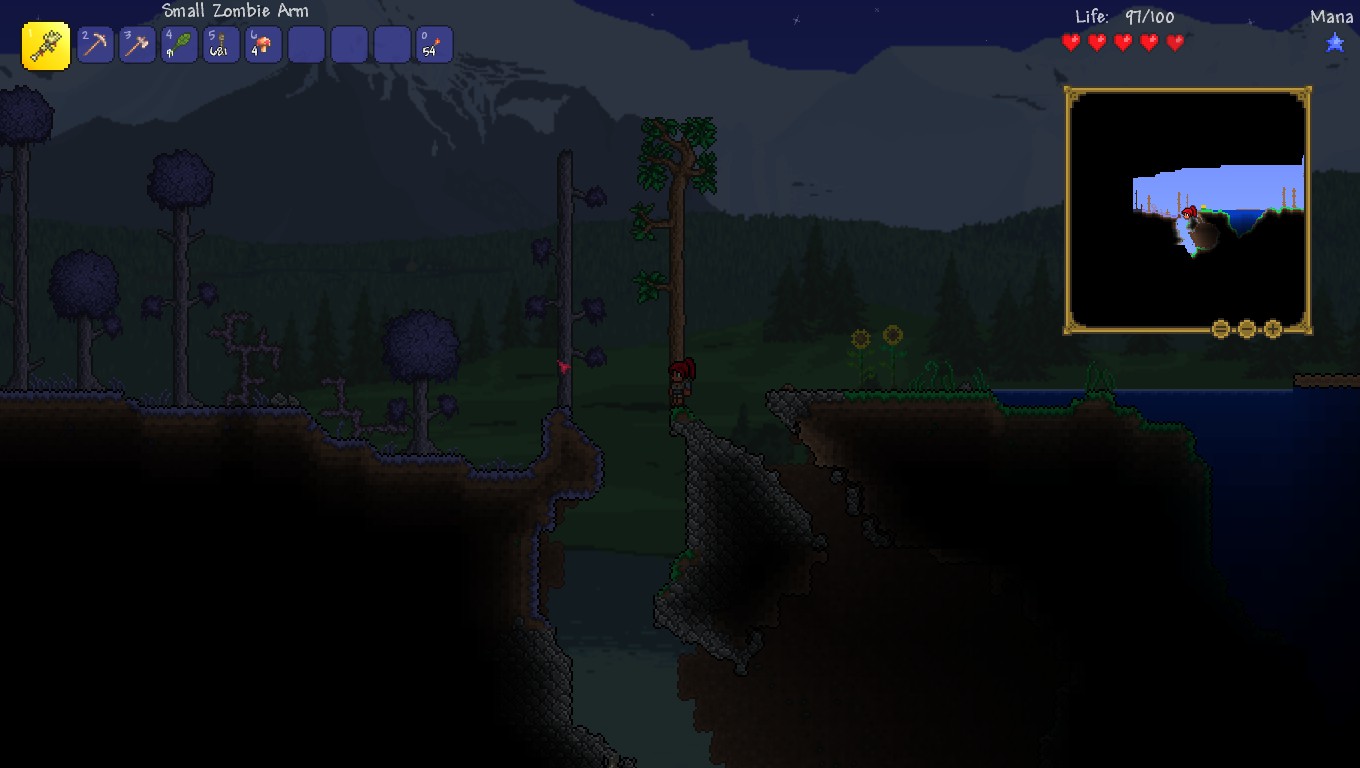
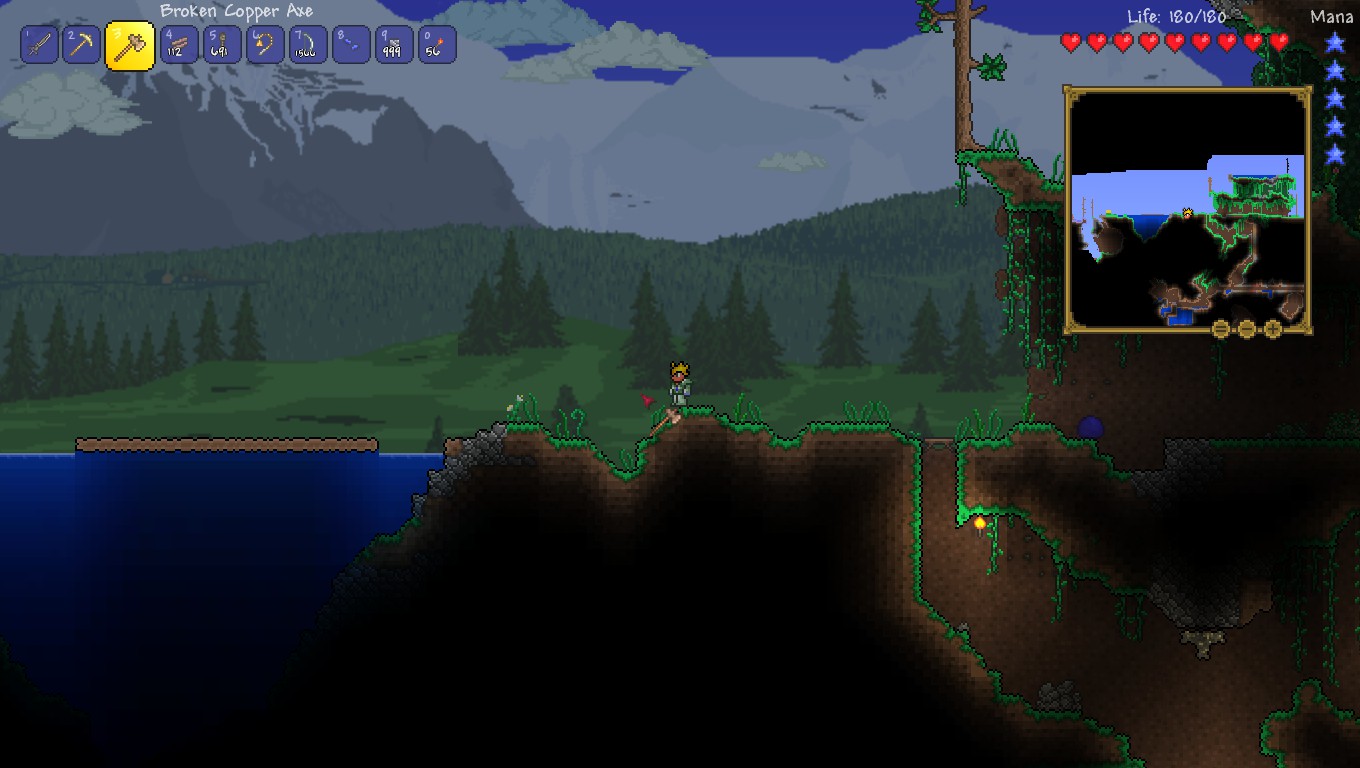
Go out and replenish your stock of wood and torches if you're running low at this point, and then go left or right of your house, and look for a cliff or some other raised landmark, and build a wooden platform bridge, but this time, you will want to place a stone, dirt, or wood block every 10 wooden platforms or so, and stick a torch on that one block. Drop some rope down from the platform on either end of it. Ideally, you'll want the platform to be about a screen length and a half, and on either end, place 2-3 blocks high so that you do not accidentally run off either end of this platform (which will cause you to fall and hurt yourself). This will be your first "Boss Arena". Place a Campfire in the middle of this bridge.
Not the best place to put an Arena for two reasons: 1, I like the ground to be just slightly off-screen and 2, too close to the Corruption area. But for now, this location will do as it was one of the only viable places to put one on this particular world.
Here is the Arena, finished and ready for the first boss. Note, I filled in the lake completely so that I will not accidentally fall into it, and the torches are spaced to where they will keep the whole area lit so I can see the battle raging on and I can see my enemy at all times during even a New Moon night.
With that, you're ready for the next part!
Part 3: Your First Boss!
With the Boss Arena complete, there is only one more thing you need to do: You will want a few buff potions. To make Potions, you need to make an Alchemy Station. To do this, take a Glass Bottle and place it ontop of any workbench. If you haven't found any glass bottles, mine some sand and make glass at the furnace, and then turn the glass into bottles. You'll want 10+ bottles for now. Go find some water, and stand near it. Open your crafting inventory and you should be able to make Bottles of Water. Once you've done that, it is time to look for some Dayblooms. Only do this during the day! Use your pickaxe on the small round yellow flowers you see scattered around (NOT the ones taller than you, those are Sunflowers and you will want to leave those alone!). You should get Dayblooms and Daybloom Seeds. If you found any Clay, make some Pots. Place the Pots somewhere near your house and then place the Daybloom Seeds on the Pots to start growing Dayblooms. You'll want to only harvest the Dayblooms during the day, to get seeds back from them. If you harvest them at night, you won't get any seeds.
With Dayblooms, you can make many Potions:
1). Archery Potion: Bottle of Water + Daybloom + Lens (Make sure to keep at least 12 of these!)
2). Ironskin Potion: Iron/Lead Ore + Bottle of Water + Daybloom
3). Regeneration Potion: Bottle of Water + Mushroom + Daybloom
4). Lesser Healing Potion: Bottle of Water + 2 Gel + Mushroom
5). Healing Potion: Lesser Healing Potion + Glowing Mushroom
I wouldn't bother making Healing Potions unless you had less than 10 of them or if you really have extra bottles of water laying around or something. Opening treasure chests and breaking vases should easily get you the maximum stack of 30 easily.
With at least 1 of each buff potion on hand, and some healing potions, now it is time to fight your first boss. Get your 12 Lens, and find a Demon/Blood Altar. There's usually one underground near your house. Keep looking until you find one. While standing near it, open your craft window, and you should see the option to craft a Suspicious Looking Eye. Make two of those now, with the 12 Lens I told you to save.
Yay! I found a Demon Altar, finally! (took a good 45min of looking for it to find it) There's only one problem though: it is submerged in Water. We'll have to see about That, won't we?
I simply enlarged the pit underneath (see minimap), then used some stone to block the passage behind me so that it doesn't get flooded. The chamber I dug out wasn't quite big enough, so I had to dig another one on the other side of the altar, like so:
Last step, put a stone floor so I don't accidentally fall into the water reservoir, and Voila! Done. Afterwards, I simply dug upwards so I don't have to navigate a maze of tunnels anytime I need to use this altar for anything.
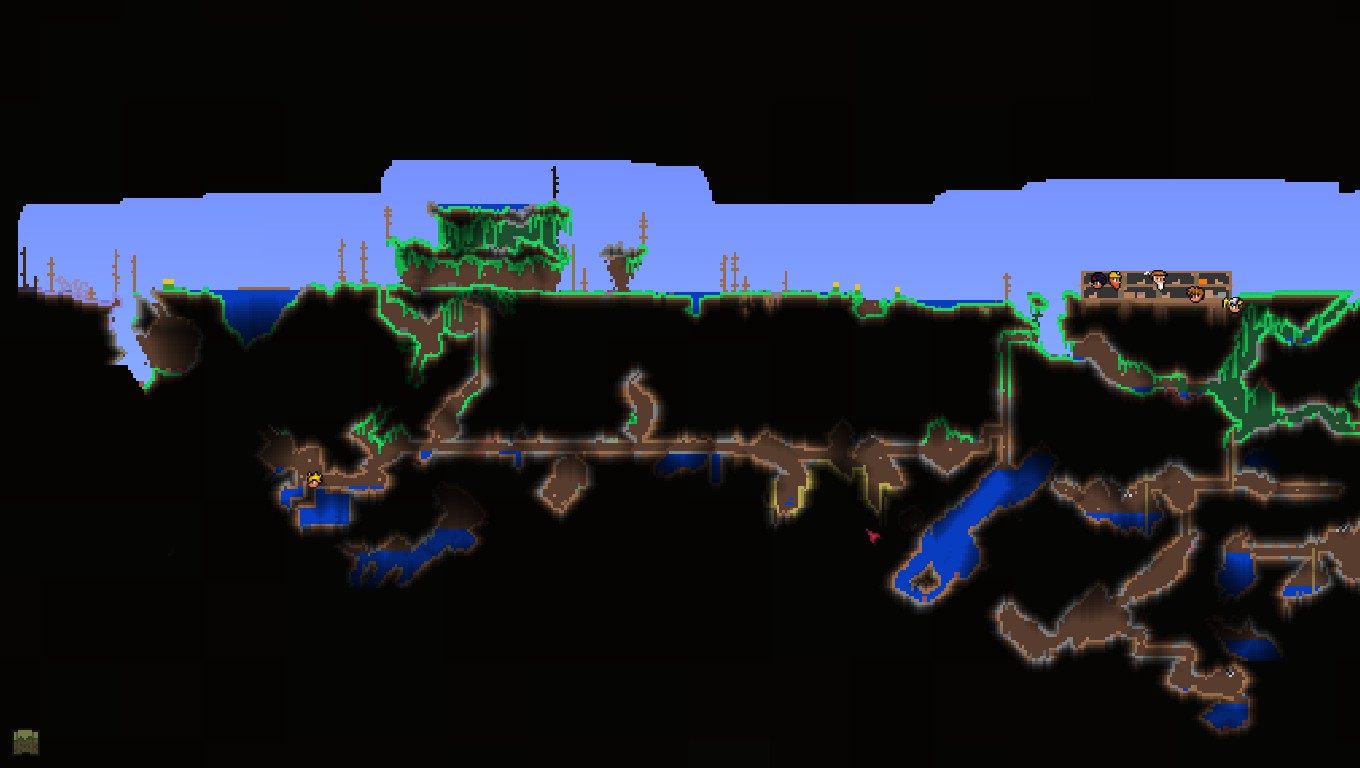
This map screenshot gives you an idea of how far away from the center of the world this altar was. I built my house right next to my spawn point and you'll note the depth -- almost deep enough to get Underground music, but not quite. Most worlds spawn at least 1 altar in such a location and you can see them from a good distance away, so keep searching for it!
You should have at least 1 gold on you by now. If you haven't bought a Piggy Bank yet, do so now. Once you've bought a Piggy Bank, place it on a workbench like you did the Bottle. You can now use that Piggy Bank as a storage chest; I highly recommend regularly dumping your money in here before going out on a trip, or doing anything remotely dangerous. If you die, money will not be taken out of your Piggy Bank. You can also buy a 2nd Piggy Bank to carry around on you, along with a workbench; you can access the Piggy Bank's contents using any Piggy Bank -- the one in your house, and the one you carry around on you act as one and the same, which is convenient for increasing your carrying capacity.
Go back to your house, get rid of all mushrooms and lesser healing potions and if you have 180 Health and some Life Crystals from exploring the underground, go ahead and use those Life Crystals now to boost your health up. Once you've done this, go to your Boss Arena, and wait for Night to fall. If you have 200+ Health Maximum, the Boss (Eye of Cthulhu) can now spawn randomly until you kill him (which is why you didn't want to increase your life this high earlier). Wait about 30 or seconds after the Night music begins to play and if you don't see a message that you are being watched, go ahead and use one of the Suspicious-Looking Eyes. You will only want to use *one*, and this causes the boss to spawn immediately and he will attack you within seconds. Hit the "B" key to drink all 3 of your buff potions simultaneously and Select your Bow.
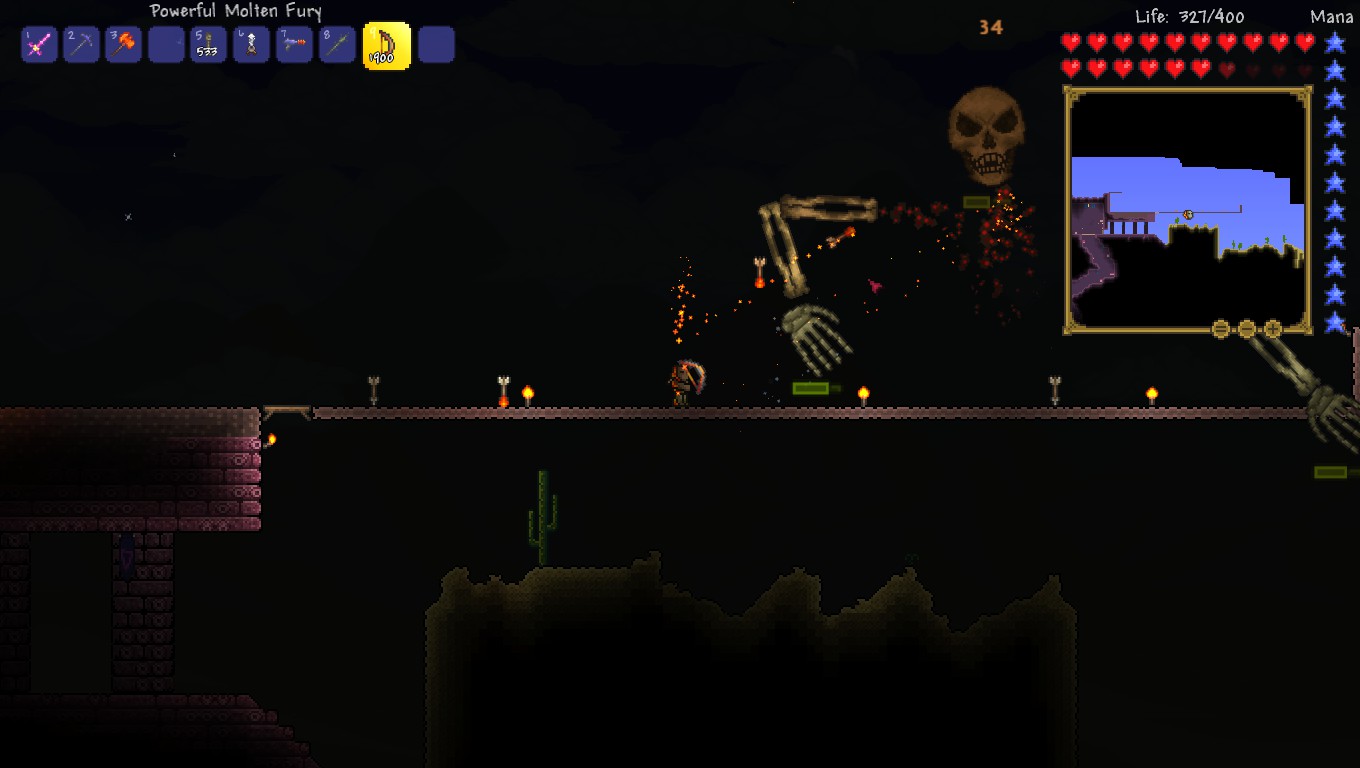
Killing the Eye is pretty easy; merely run back and forth on the platform while shooting arrows at him. If you made Fire Arrows like I suggested, you'll set the boss on fire and he will continually take damage. A Silver/Tungsten Bow is strong enough to kill the little eyes in one shot usually, and they can drop hearts. Use a Healing Potion by hitting the "H" key anytime you fall 100 health below your maximum health. Don't wait until you're about to die; potions have a cooldown. Once you reduce him to 1400 (Half) of his health, he'll spin around and change; he'll have teeth where his eye was. The little eyes will cease to spawn, but he will try to ram you over and over again and you will take more damage. If you used an Ironskin Potion, and are wearing Silver/Tungsten or better armor, you still shouldn't take much of any damage. Just keep plugging him with arrows until he dies. Once he dies, he will drop a large number of Money, Unholy Arrows, Demonite/Crimtane Ore, and a bunch of Hearts.
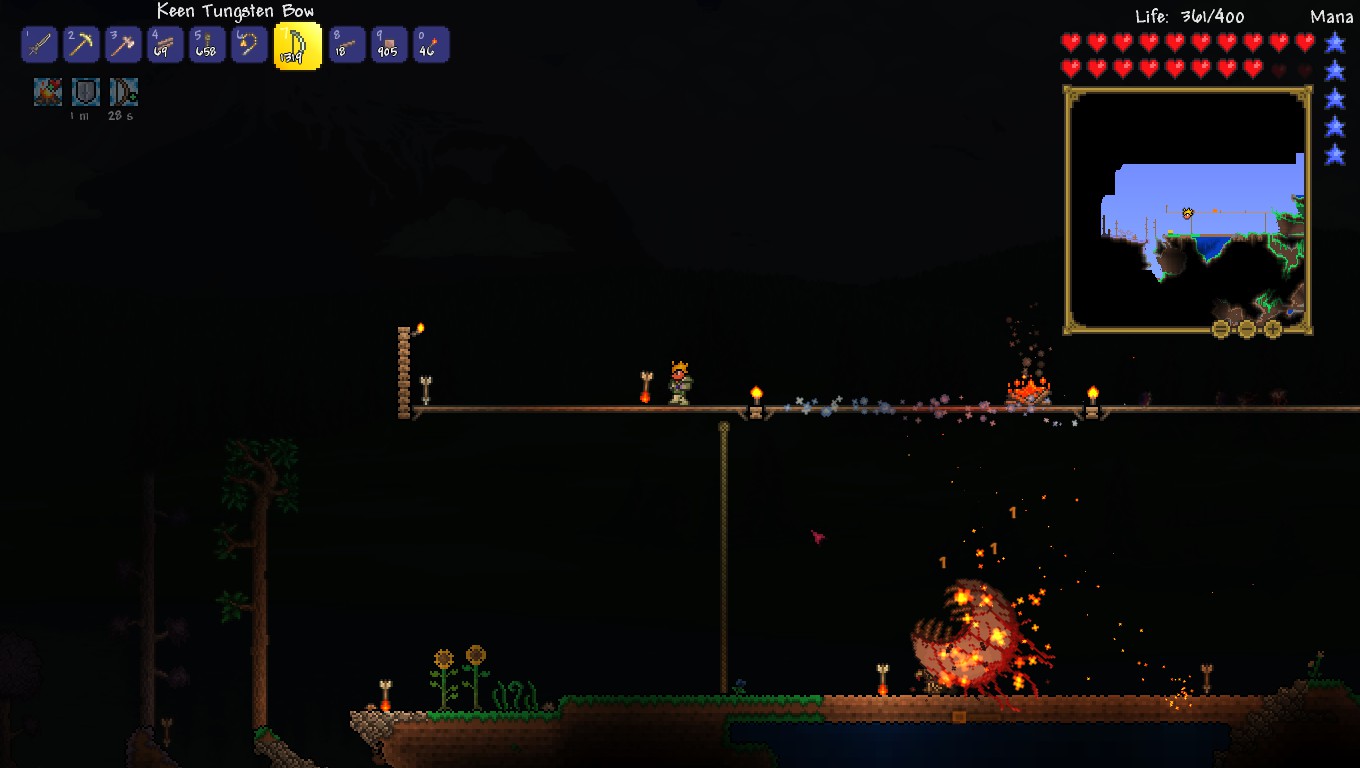
The Eye's second form. I actually fought the eye twice in this night, with nothing but a normal Tungsten Bow and Fire Arrows, easily killing the Eye both times, with at least 2+ minutes to spare. I started about 10 seconds after the music changed to the BGM heard at Night.
Take the Demonite/Crimtane back to your house, smelt it into bars and make yourself a Demon/Tendon Bow. If it comes with bad stats, you'll have to make another one if you have enough Ore. If the Bow turned out good, and if you have enough, make yourself a Sword as well. There's no need to make the Axe. I know that copper axe is getting old, but trust me, you'll have a much better one soon without wasting Demonite/Crimtane.
Wait for the rest of Night to pass, optionally killing more zombies and eyes trying to get a Warding Shackle and/or more Lens. Once Morning Comes, pick up any arrows laying around from your battle, replenish your stock of Fire Arrows, and kill some Slimes while waiting for Night to fall again. The Dryad should move in during the day if you've a house open for her. Once you've fought the eye, you might not need buff potions again (especially now that you've got a significantly more powerful bow which should kill it noticeably faster), but that is up to you. When Night comes again, go to your Arena, and use the other Suspicious-Looking Eye to summon the Boss again, and proceed to kill him again, collecting the drops. Smelt your Bars, and stick the bars in storage for now.
With that, you're done with this part!
Part 4: Getting the Other Half (World #2).
Every World in Terraria can be placed into two groups: Crimson Worlds, and Corrupted Worlds. Your World can only be one, *or* the other, but never both as I've said above. If you started with a Corruption World, now would be an excellent time to start a new world with the same character (don't worry about your other world, it will continue to remain in the same condition you left it!). Start a new world, and go left or right of your starting location until you reach a Crimson or Corrupted Area. If you had a Corruption on your first world, you'll want to find some Crimson in this world and vice-versa: If you started with Crimson, you're looking for a Corruption. If you got the same thing again, you can delete the world and make another one, and keep doing this until it gives you the right one. Note you will have to chop trees down and build houses in this new world if you want to actually do any long-term work in this world.
So, why two worlds?
There are several reasons:
1). The Crimson Armor is much more powerful and effective than the Shadow Armor.
2). The Vilethorn is an excellent early-game magic weapon, and is only available in Corrupted Worlds (The Crimson Equivalent is a spear that doesn't have anything special).
3). The Panic Necklace, when combined with a Honeycomb, is a decent early-game accessory but is only available in Crimson Worlds.
4). Two Endgame Weapons: Vampire Knives and Scourge of the Corruptor can only be obtained in Crimson and Corrupted Worlds respectively.
With this in mind, I highly recommend that you do the next part in a Corrupted World first, and then a Crimson World later. The 2nd boss in the Corrupted World (Eater of Worlds) is a much, much easier fight than the Brain of Cthulhu, and wearing the Shadow Armor while fighting the Brain will give you a much better chance at defeating it the first time.
With that said, if your first world was a Crimson World, go ahead and start a Corrupted World (making/deleting new worlds until you get one). Build a good starting house with enough houses for everybody to move in, and take some bombs with you so the demolitionist will spawn, and make sure you've got 50 silver so the Merchant will spawn. If you kept a Marigold or Blueberry, you can spawn the Painter too. You'll have to kill the Eye of Cthulhu again to get the Dryad to spawn again. Keep in mind the Eye can spawn at any nighttime if you have 200 or more Maximum Life, so you might want to build a Boss Arena (like you did earlier) before starting on your house in case you get that "You are being watched!" message. You also might want to make sure you have enough arrows to kill it, too.
Part 5: The Eater of Worlds, Nightmare Pickaxe, Shadow Armor.
Now that you've got a house, you've killed the Eye of Chulthu in a Corruption World (assuming your first wasn't the Corruption), you're ready to take on the 2nd boss. Go to the Dryad, and buy 30-50 Purification Powders. This will take a small chunk of cash to do, but you'll be needing them as you can't go on without them. Make sure you have no less than 300 ropes and a whole stack of wood platforms, along with a full stack of torches. You also need a Grappling Hook, I highly recommend against attempting this without one. You will also need to make a Wooden Hammer, do this before leaving your house. If you don't have at least 4-5 Mana Stars, I suggest farming them at night, every 5 Fallen Stars will make 1 Mana Star. Make it, and use it to permanently boost your MP Maximum.
Go to the Corruption Area. You'll notice there are many chasms going straight down; build Wooden Platforms over the top of each, and drop ropes down them. Place torches on the background wall to keep things lit. Most of these will be dead-ends, some of them having water at the bottom. You're looking for a horizontal cave system, and it might take a few holes until you find which one leads to the horizontal cave. Once you've found it, look for orbs in the wall; they'll have a hole in the wall around them. Use your Purification Powder to turn the Purple Ebonstone Blocks into regular Stone Blocks that you can mine with your pickaxe. Once you reach the Orb, use the Wooden Hammer on it to break it and receive one of four items: A Vilethorn, a Musket, a Shadow Orb, or a Ball o' Hurt. The Shadow Orb is mildly useful, but doesn't provide enough light to be that valuable of an item. The Vilethorn is insanely useful; equip that to a hotbar slot ASAP. The Musket will cause the Arms Dealer to spawn, so you will want to hold onto this for your other world and/or if the Arms Dealer gets killed.
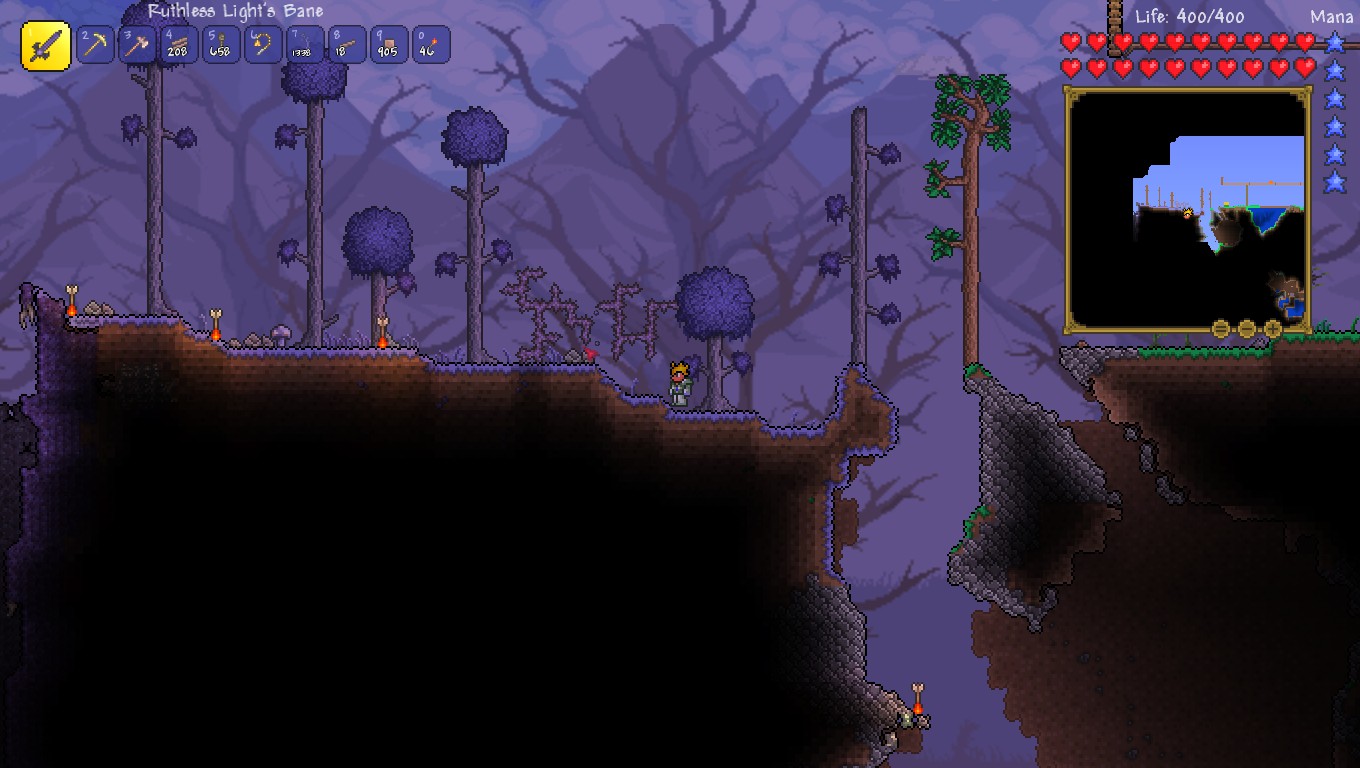
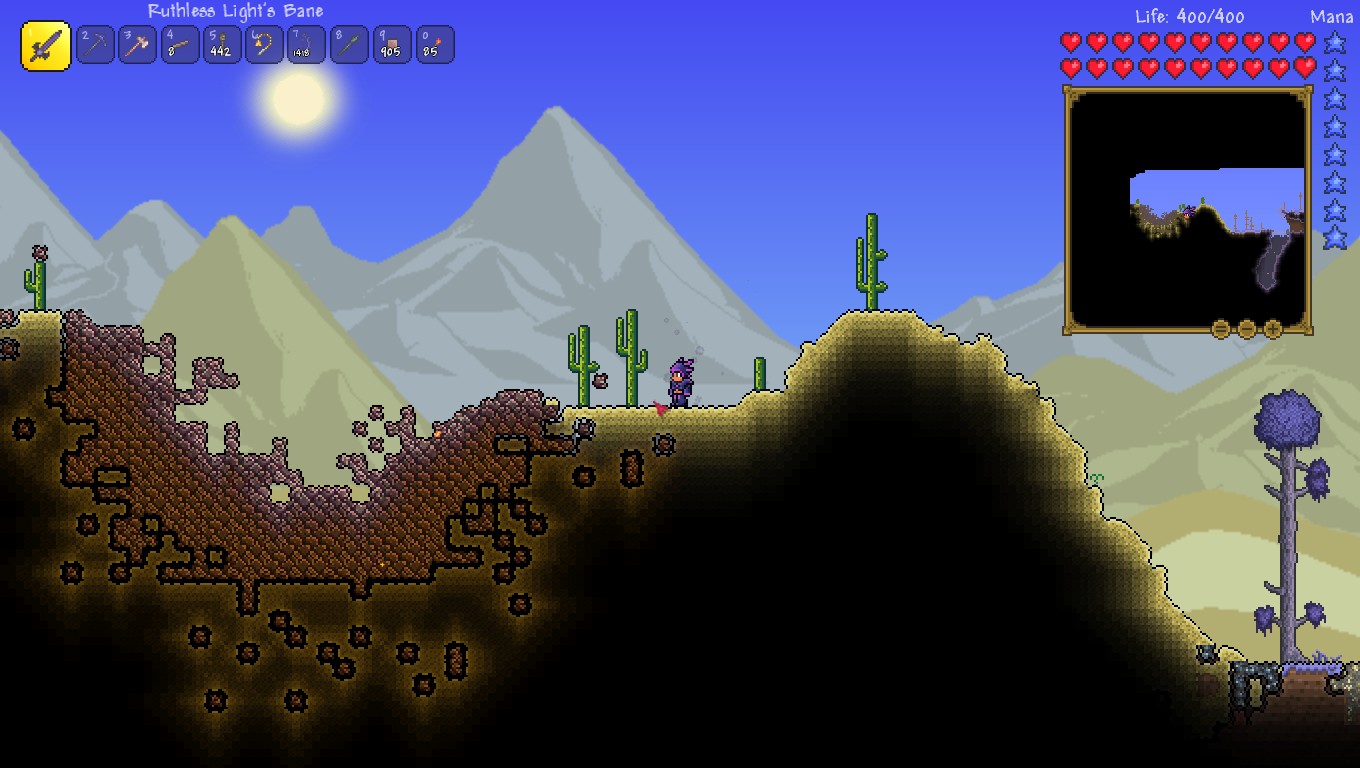
Use your sword to cut the thorny vines you see to my left in the screenshot. Might also want to pick up the fire arrows, and don't forget to collect any mushrooms (like the one you see near the 2nd tree from the left).
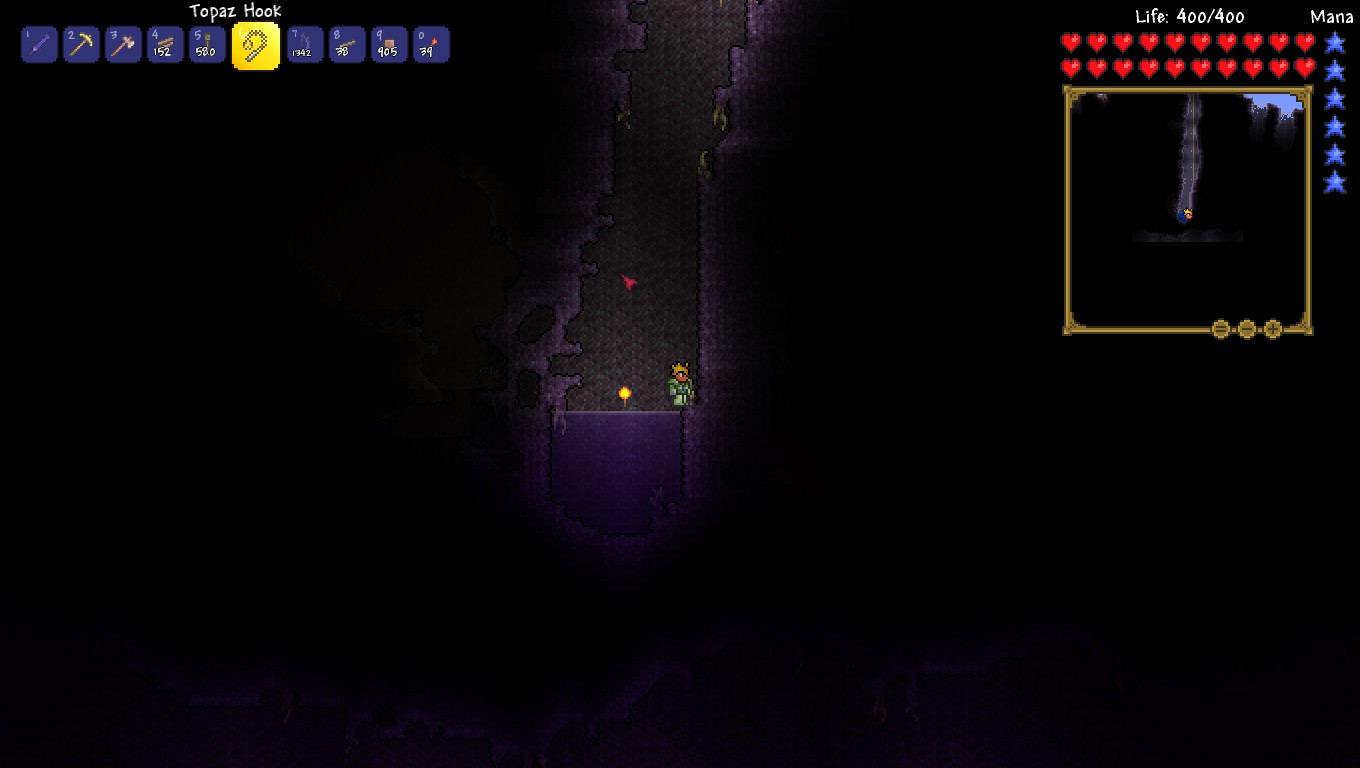
Whoops, dead end. Wrong Guess. Gotta try another hole.
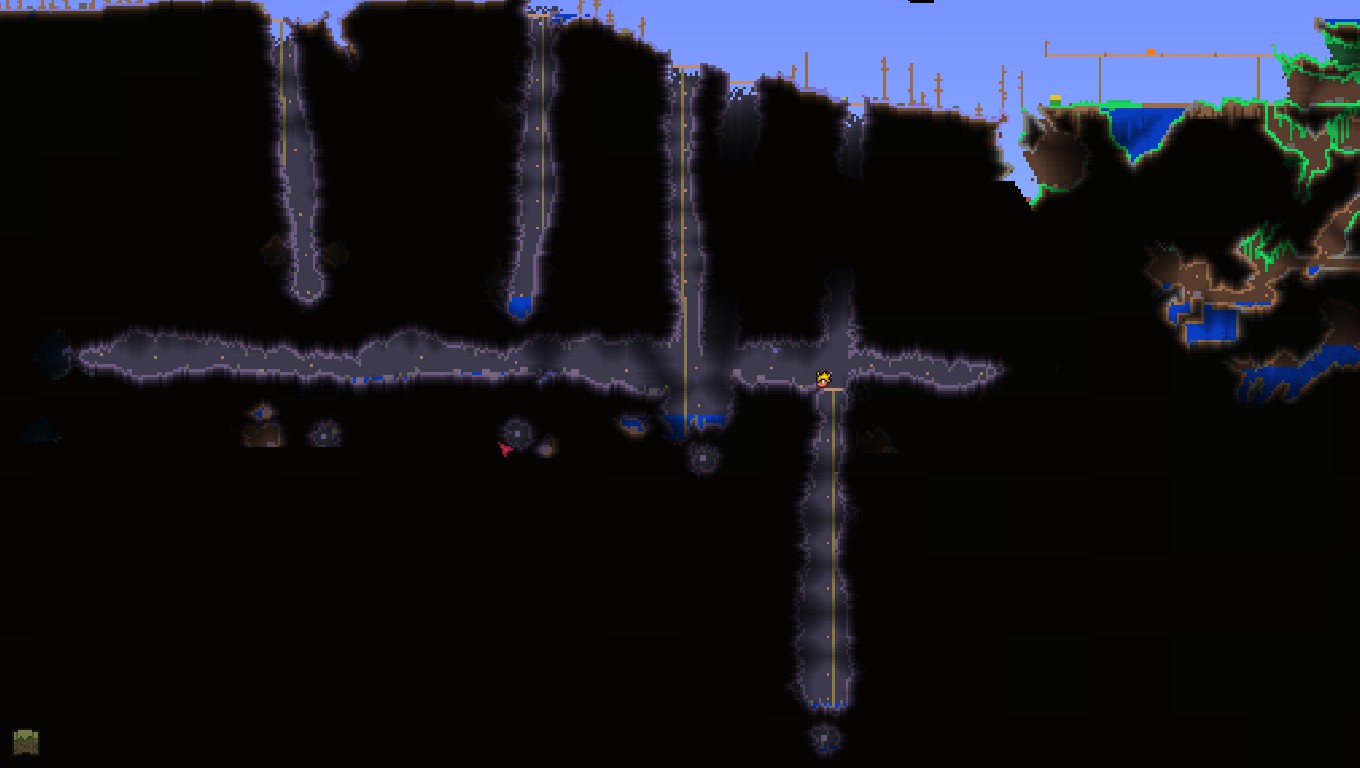
Finally found the horizontal cave system. This setup looks fairly standard, though the 2nd deep hole is a bit uncommon; I've only seen this a couple times. There are only 4 orbs here, however there's another Corruption area on the other end of the map, and I found 5+ more orbs over there.
Once you break an Orb, there's a chance a Meteorite will land, and there's also a chance that a Goblin Army will attack you. These both come with purple warnings in the bottom-right screen.
Go ahead and break a second orb to get another item (hopefully a Vilethorn if you didn't get one the first time), but beware breaking a third orb! As soon as you break the third orb, the Eater of Worlds will spawn and attack you. Tunnel down to the third orb, but DON'T break it yet. Use Ropes and Wooden Platforms to make a quick escape route back up to the horizontal cave, and use wooden platforms to give you a nice wide space to run back and forth on. As for buff potions, you probably shouldn't need them, but you may want to use at least an ironskin potion if you're not sure and have extra materials laying around. Don't bother with Archery Potions, you're not going to be using your bow on this worm. Regeneration Potion is your choice, though if you kill its segments fast enough, it will drop more hearts than you could possibly need.
Once you're ready to fight the worm, go down and break the third Orb, and you'll get the warning that the Eater of Worlds has awoken. Hurry and get to your platform, and equip your Vilethorn. Hopefully by now you have at least 4-5 Mana Stars. The Vilethorn is a short-range projectile that goes through walls, and damages everything that touches it, while it touches it. If you shoot it at the worm so that you hit several segments, you will do astounding damage and kill it very quickly. Each segment killed will drop Demonite Ore, and Shadow Scales, along with a lot of blue stars and hearts. Just wail away with the Vilethorn until it is dead. If you run out of mana, switch to your sword and swing at the segments, but try to avoid its body and especially its head while you fight it.
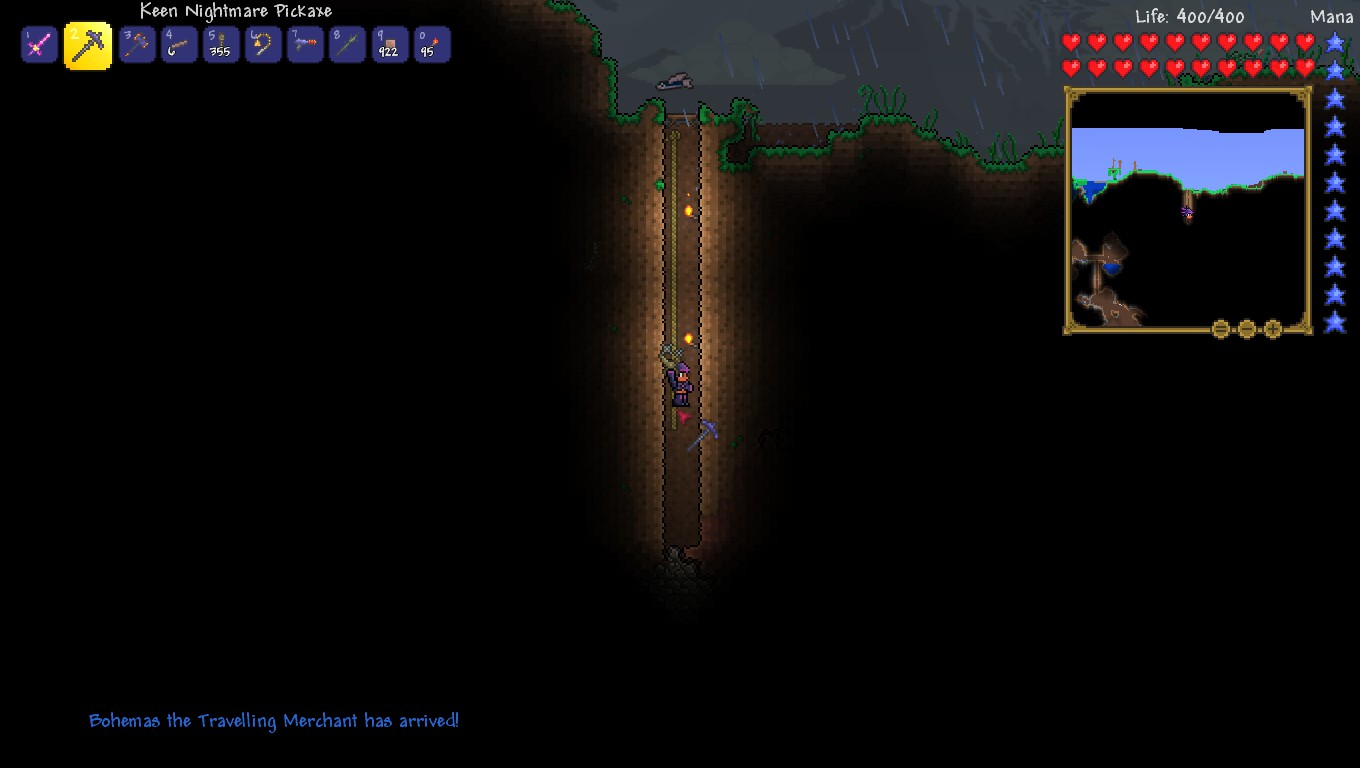
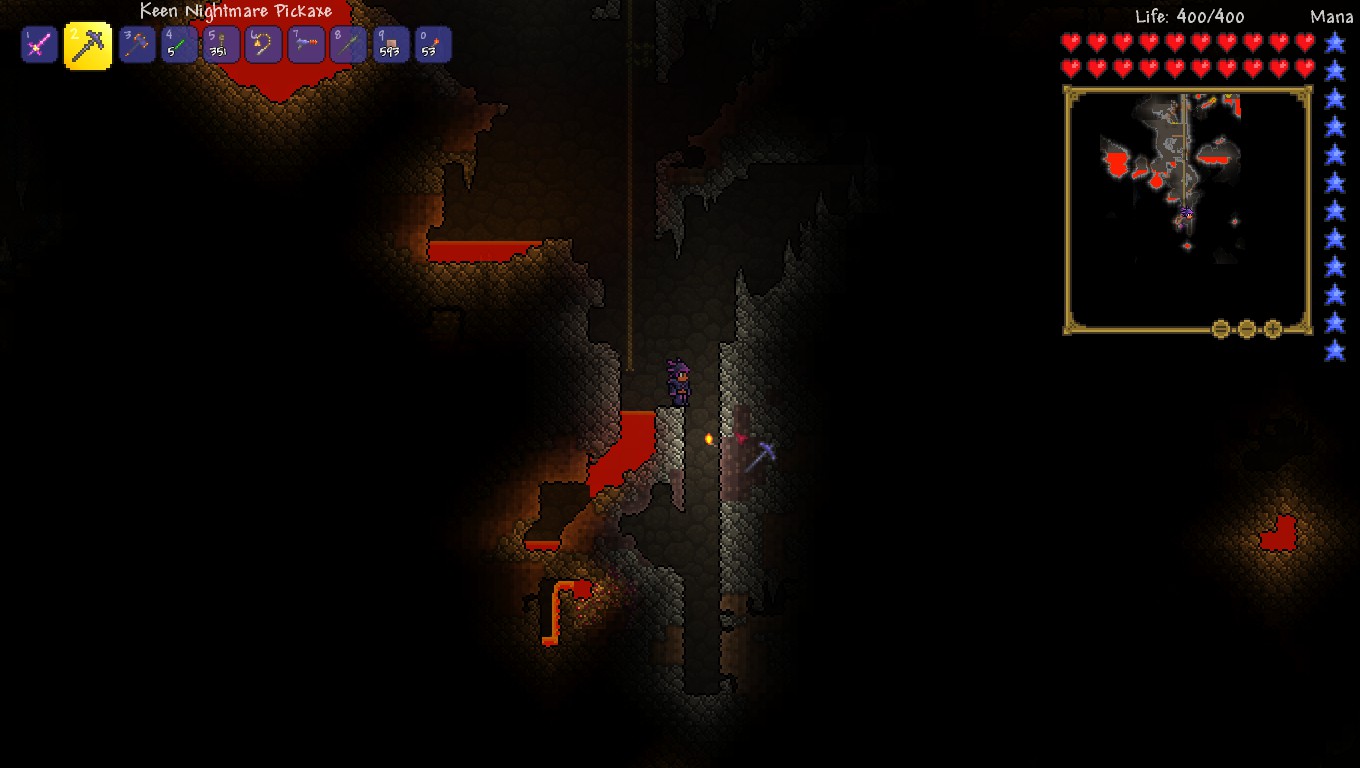
Once you've killed the worm (or you got killed by the worm), go back to your house and smelt all of the Demonite into Bars. The first thing you will want to make is the Nightmare Pickaxe. With this Pickaxe, you can mine Ebonstone without using Purification Powder. It will also mine Hellstone and Dungeon Blocks too, but those will come later. If you have any Demonite/Scales left over, feel free to make yourself some Shadow Armor. Again, don't bother making the Axe or the Hammer.
It is very unlikely, even with a full kill, that you'll have both the Pickaxe and the whole suit of armor. Go back to the Corruption once more after taking care of your inventory, and go smash some more orbs. You'll need to smash another 3 orbs to summon the worm again. If you run out of orbs, you can instead summon the worm by making Worm Food. To make a Worm Food, gather 6 Vile Mushrooms and 15 Rotten Chunks (that are dropped by the flying monsters in the Corruption). Go to your Alchemy Station to craft the Vile Mushrooms into Vile Powder and then find a Demon Altar (there are plenty of them in the Corruption) to make the Worm Food from the 30 Powder and 15 Rotten Chunks. Make sure you are in the Corruption at night before trying to use the Worm Food.
Once you've killed the worm a second time, you should have enough Demonite and Shadow Scales to make the full suit of Shadow Armor. Also note that there's a rare chance random enemies in the Corruption can also drop pieces of this armor that have the same functionality but slightly different coloration.
Once you've made all the armor and your pickaxe, wait a full day before doing anything else: If a Meteorite fell, you will want to go mine it. If a Goblin Army attacks, you'll need to fight them off.
Part 6: Meteorite, Goblin Army, Blood Moons, Sky Islands.
Now that you've broken an Orb, these three things can happen randomly (the chance of it happening is far greater on the first day following breaking an orb, followed by a much smaller chance thereafter). If a Meteorite Falls, you'll have to travel the world looking for it. You'll know when you see it: There'll be lots of brightly glowing orange bars, and the music will change from its normal to something spooky, and flaming chunks of rock will fly at you trying to kill you.
Whatever you do, do not touch the meteorite rocks with your body; use your Nightmare Pickaxe, but don't touch the block with your feet, or any part of your body as it will do damage and set you on fire. Usually, the Nightmare Pickaxe is strong enough to kill the Meteor Heads flying around, but sometimes there's too many of them to kill with the pickaxe. Avoid getting hit by these guys; they hurt. The easiest way to do it is to build a stone cover ontop of the meteorite blocks. While standing on the safe stone, you can mine two blocks underneath the stone platform you just placed. Place a second stone platform ontop of the meteorite blocks, and then mine the first stone platform out, and continue doing that until the meteorite is no more. You may have to switch to your sword occasionally to fend off the Meteor Heads that will attack you until you've mined most of the meteorite out. It may take a few deaths before you get the hang of this; this is good practice for the later dungeon you'll be facing, and also the Underworld.
Well, I found the Meteorite! The orange blocks will set you on fire if you so much as barely touch them. So, we need to carefully mine it. I recommend bringing a bunch of solid blocks (dirt, stone whatever), like so:
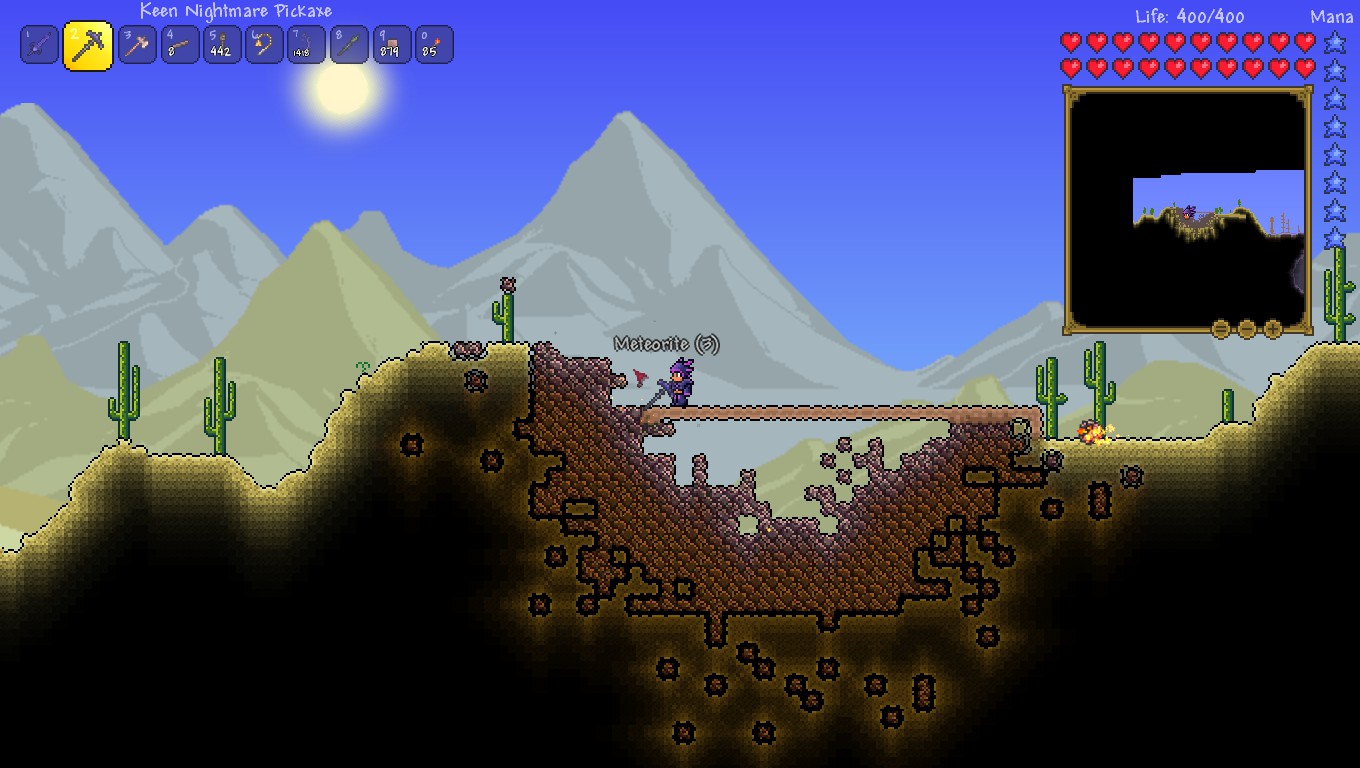
The hardest part is trying to flatten the two ends out, once you have that done, it only gets easier from there:
I'm removing my first safety bridge now that I've built a second. Once I've done that, then I can mine 2 blocks underneath me, and then place another safety bridge, rinse, repeat:
In this Screenshot, I am building a new safety bridge, then I will remove the one I'm currently standing on while fighting the meteor heads off if they get too close that my pickaxe can't fend them off.
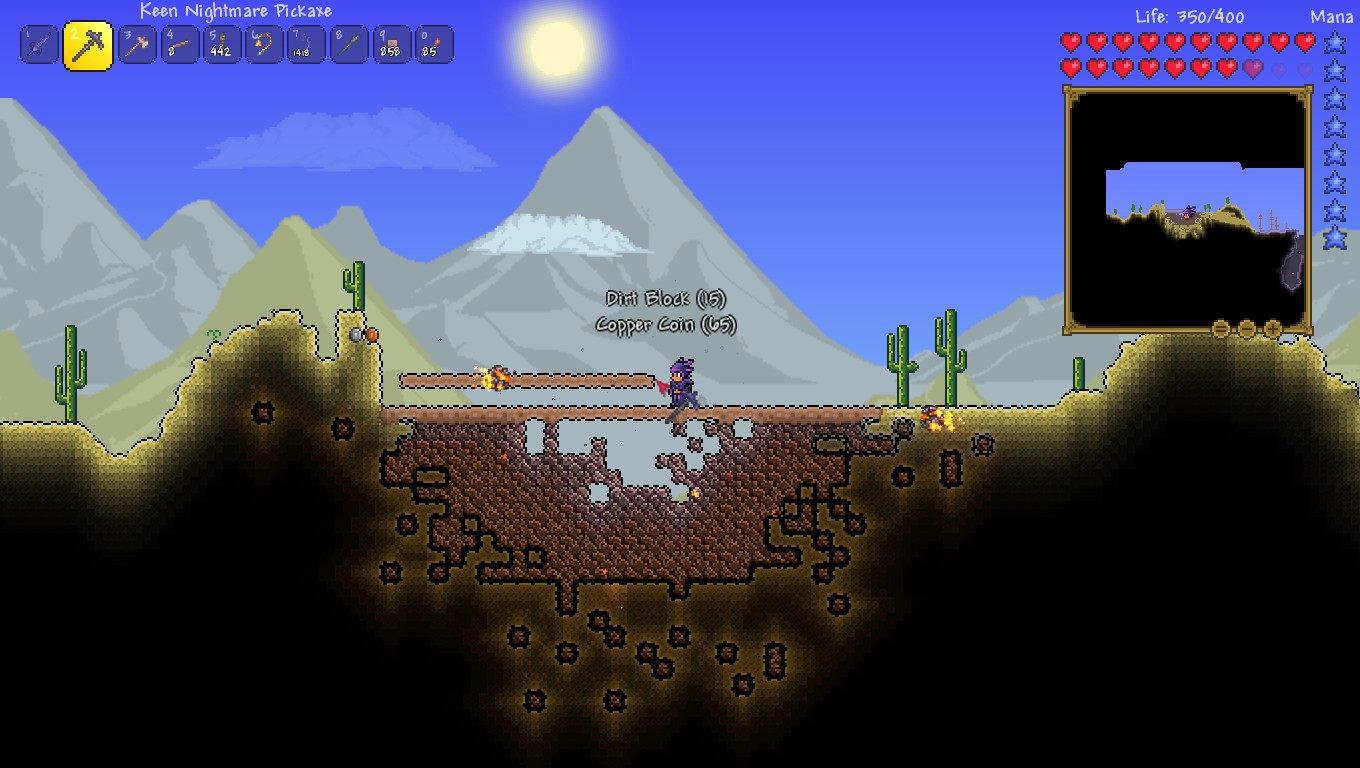
At this point, the meteorite music stopped playing, and the desert theme started playing again. At this point, the meteor heads will no longer spawn, which makes collecting the rest easy. I easily got enough meteorite out of this to make my hamaxe, a space gun, and still have 40 bars left over! While I was doing this, another meteorite landed not too far away. I simply blocked it off with dirt because I didn't really feel like mining it right now.
Once you mined the meteorite out, go back to your house and smelt all the meteorite into bars. Make a Meteor Hamaxe (FINALLY, a New Axe and better Hammer!!) and a Space Gun if you have 2 stars. The Space Gun is a magic damage weapon (which we're not gearing up for), but it has plenty of uses so it is good to keep one on you. It is a ranged weapon that uses mana instead of ammunition, and its lasers will light the way in dark caves. You can also fire the lasers in the air and listen for impacts to help you find the sky islands. There's Meteor Armor that you can make too, but this is a magic-oriented set, and as we are doing a melee character, this guide is going to assume you won't be using that. Crimson Armor is better, anyway.
You might or might want to start your underground house at this point: The meteor hamaxe is why you wanted to wait, and now that you have it, breaking out the natural backwalls to put your own in will be much easier than with any lower hammer. The reasons for doing this now are likely storage clutter; the more boxes you have filled with junk in your temporary house (assuming you want to move your house at all) will take longer to move the longer you wait. If you do wish to start your underground, more permanent house now, scroll down to the "More Hardmode Preparations" section of this guide.
At some point, you may get the message that a Goblin Army is approaching from the East (or West). You will want to find a place with some cover (some small little dips in the terrain) near your house, but not in view of your house. Very shortly, you'll get the boss music, and a LOT of goblins will pile in to attack you. Most of them are no match for your Blood Butcherer/Light's Bane Swords, though the Archers will wear you down with their arrows, and the Sorcerers can shoot through walls. Your sword can break their projectiles before they hit you, though. The Sorcerers are capable of teleporting inside of your house; make sure you keep your house off-screen or your NPCs may end up getting killed to sorcerer magic spells. If you want to make the battle a little easier, you can make and drop a campfire somewhere there's cover from the arrows for some constant HP regen. Once you kill enough of them, the goblins will go limping home and they will stop spawning. When this happens, the game will tell you that the army has been defeated. Defeating the Goblin Army causes the Goblin NPC to spawn in the Dungeon (he can also rarely spawn in random areas underground); you won't find him until you beat the Goblin Army. He won't move into your house until you go to the dungeon and rescue him, but we're not quite ready for that yet, so we'll come back to that later.
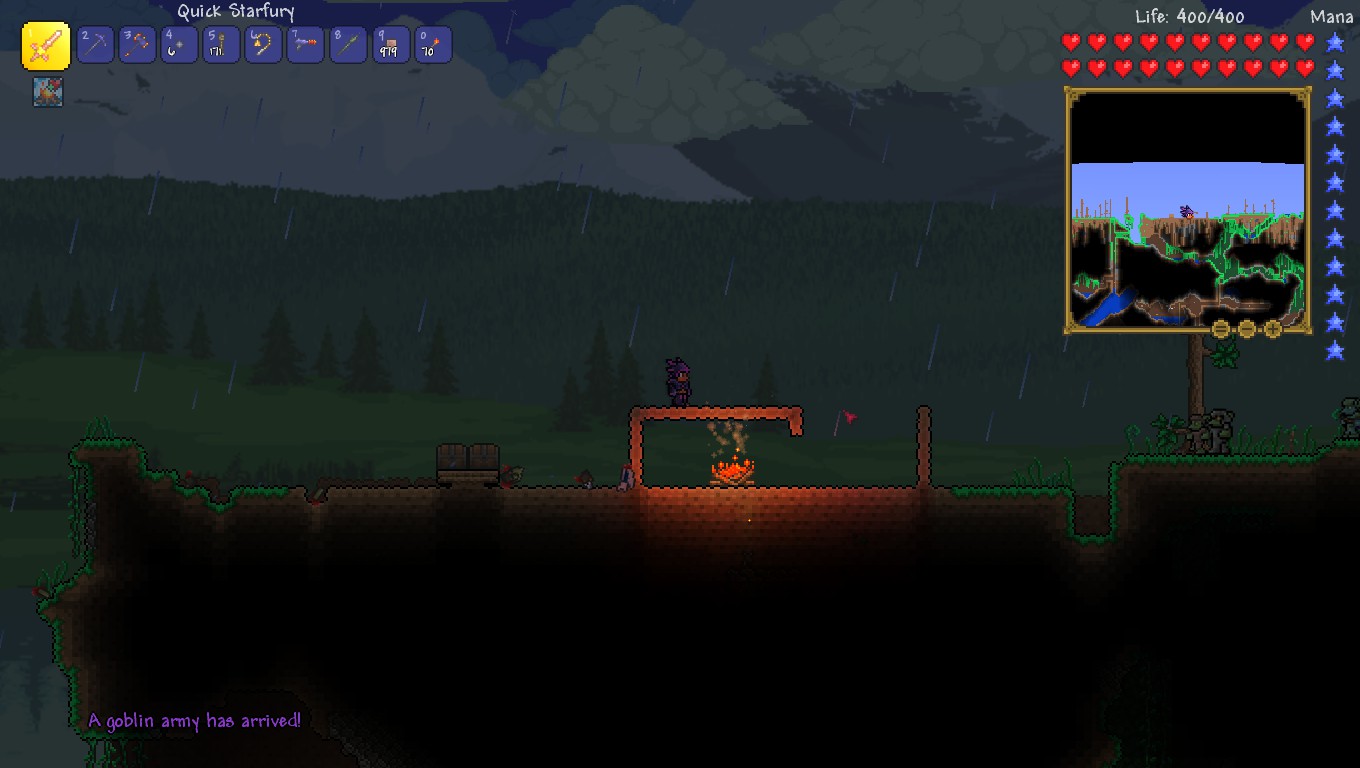
I made myself a quick temporary shelter to recover some health in case I was going to have any trouble with this invasion when it happened (I was building my house at the time). Basically, you just throw up a quick 3-sided enclosure with another wall a little further away to make it impossible for the ranged attackers (except the sorcerer) to shoot at you. Anything that jumps down in there can be killed off quickly with a good sword (like the Starfury!). It turns out I didn't need this little shelter; I never came in danger of dying at all during this particular attack.
Sometimes, during the Night, you'll get a message that "A Blood Moon is on the Rise!". The music will change to the same music you hear near Meteorites, and there'll be a red hue in the sky, as well as the moon. Get back to your house ASAP! Many zombies will appear, and more than usual demon eyes as well. With the sword you made from the Eye's drops, and the Shadow Armor, they have no chance of actually hurting you whatsoever unless you get careless. This is also a good time to practice with the Space Gun -- its projectiles pierce through enemies; you can kill several zombies at once by shooting lasers through them. Killing all of those eyes should net you some Lens, and if you still don't have a Warding Shackle, you might get one by the time Night is over. Once the Night is over, the Blood Moon is done and everything returns to normal. Keep in mind that Blood Moons increase enemy spawns of the area you're in; since you were in the Forest, you got Zombies and Eyes. If you're somewhere dangerous like the Dungeon, Jungle, or the Underworld, the enemies that spawn there will be the normal enemies for the area, and you may end up getting overwhelmed. Once you enter Hardmode, however, Blood Moons are far, far worse no matter where you are....
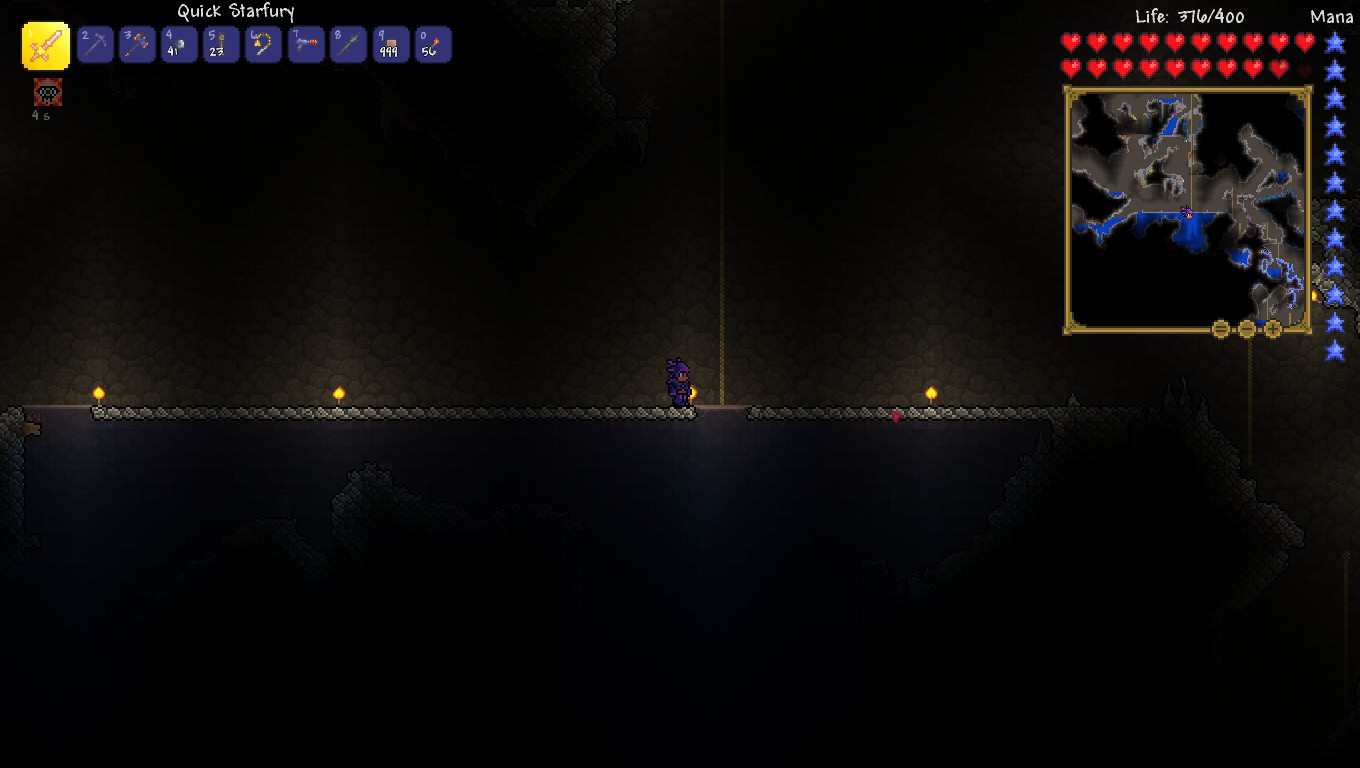
The last thing to do in this part of the guide, is try to locate all of the Sky Islands; there are more of them the larger your world is (3 for a small, and 4-5? for a Large). You can use your Space Gun to fire up into the air and listen for impacts. You can also jump up and try to listen for sound of falling water, or watch for harpies. Once you think you've found a Sky Island, build a Rope straight up and hopefully, you were right! Whatever you do, do NOT use Wood Platforms up here. You'll block Meteorites, and it will be harder to get Falling Stars (since they'll fall on the wood platforms rather than going down to the ground where you're more likely to see them). This is one of the few times I'll recommend using horizontal ropes. Just be careful not to fall off! If you fall and have a Cloud-in-a-Bottle, you can save your double jump for when you almost hit the ground to avoid dying to the fall. Once you find the three Islands, each will have a small shrine with a chest. I recommend taking one of these chests; it will help distinguish it from other chests, making it easier to remember what you put in that chest. There are several items one can get up here: A Sky Mill, A Starfury, A Shiny Red Ballon, and a Lucky Horseshoe. The Balloon and Horseshoe will likely get stashed unless you still have open slots in your accessories. The Sky Mill can be placed in your house as a crafting station (it allows you to make furniture from the unique blocks up there), and the Starfury is quite a powerful sword that can multi-hit and hit multiple enemies nearby.
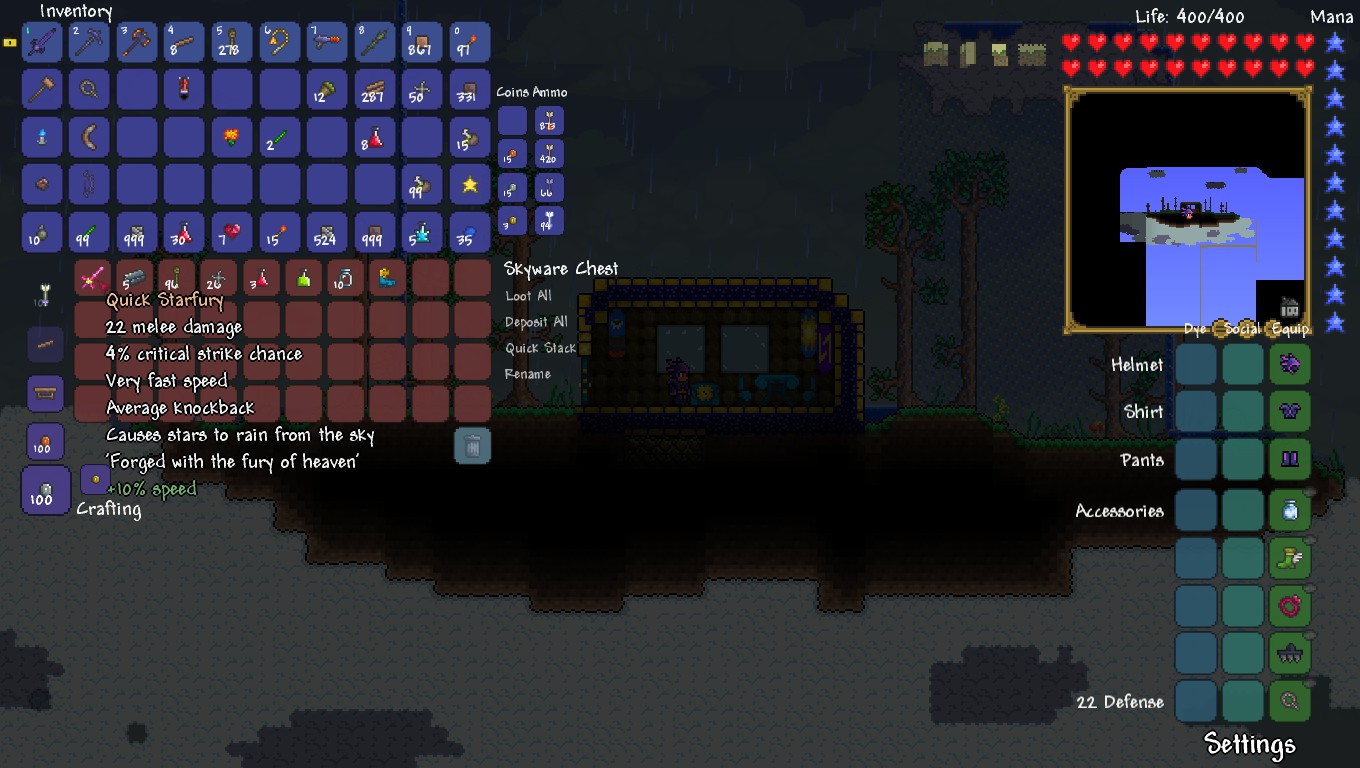
I got incredibly lucky! I suppose this is the game's way for saying "Sorry about that Broken Space Gun and that Small Hamaxe". This is such an awesome weapon, not so much for the stars it rains down (those are nice), but for the fact that when said stars hit the ground, they light up the ground underneath them. This makes it very easy to find underground caves and to map stuff out.
Part 7: The Brain of Cthulhu and the Crimson Armor
Hopefully, you found a Starfury! If not, you can do without it. You have 3 more chances: There should be 3 Sky Islands in the world with the Crimson, so go ahead and find those and open those 3 chests too. Hopefully, if you failed to get a Starfury on the Corruption world, you'll get one in the Crimson World instead.
Once you've opened the Skyware Chests in the Crimson World, now's the time to go find the Crimson. Again, make sure you're well-supplied (bring an Archery Potion this time), and go to the Crimson. The Crimson Tunnels are much easier to navigate than the Corruption Tunnels, though you may still want some ropes and platforms. There'll be a single winding cave that opens into a big round room, and this round room will have several "fingers" that lead to a Demon Heart, which acts the same way the Orbs did. Every 3 Demon Hearts Smashed will summon the Brain of Chulthu, just like the Orbs summoned the Eater of Worlds. Smashing Demon Hearts also causes Meteorites, Blood Moons, and Goblin Invasions just like breaking the Orbs did on the Corruption World, which you should be familiar with already.
To make an Arena for the Brain of Chulthu, you will likely want several "floors" of Wood Platforms with Ropes between each and of course torches to see. The Brain is a significantly harder fight than the Eater of Worlds was, but with Shadow Armor, a Space Gun, the Bow and its Fire Arrows, along with Buff Potions, you should be able to prevail. The brain acts a lot like the Eye of Cthulhu did with one major exception: It can teleport around freely. Once damaged down to half health, it will gain a damage boost and try to attack you physically more often.
Once you kill it, it should drop Crimtane Ore and Tissue Samples. You can use these to make the Crimson Armor (which is why you wanted to fight this boss in the first place). Of the Items you get out of breaking Demon Hearts, only the Panic Necklace is really any good. The gun and spear are both too weak and slow to really bother with. The Panic Necklace is best saved till later, stash it in a chest if you get one.
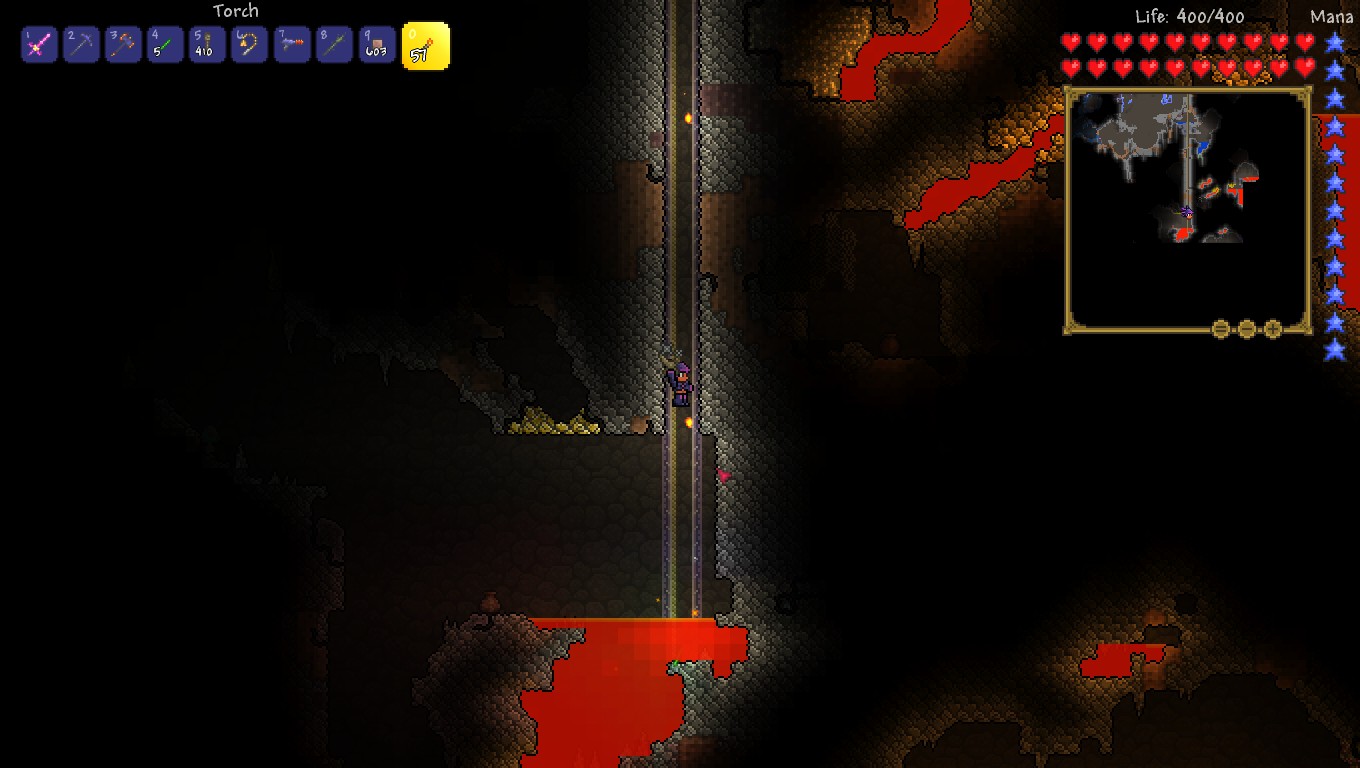
Part 8: Your Hellevator and Obsidian/Hellstone Mining
Usually, people go to the Dungeon Next, but on a few Playthroughs, I was mildly surprised to find that I had an easier time if I went to the Underworld first. Nothing in the Dungeon is going to give you any extra survivability against the enemies in the Underworld, while you can make yourself some incredibly powerful equipment to make the Dungeon (and its entrance boss) far easier.
First thing you will need to do, is begin digging a Hellevator. Shortly offscreen of your house (I recommend 2-3 full screen-lengths away), start digging a two-block wide pit. Make sure this pit is not within view of your house; you don't want Invasion enemies falling down this pit. In fact, if you know you're about to have an invasion, you will probably want to block the pit off with a solid type of block. As you start to dig down, drop ropes down one side of the pit, and place occasional torches on the other side of the pit. Continue digging straight down; this will take a thousand or more rope, so you may need to replenish your rope stock while you do this.
I decided to start my Hellevator here, after looking at the map and looking at different pools of water, cave systems I have already mapped out, etc. Seemed like as good of place as any to start.
If you run into water, try to keep going unless the water is simply too deep. If this occurs, you can dig a large air pocket next to your hellevator and drain the water into it. If you run into a cave room, I recommend building stone or dirt blocks to keep the shaft two-blocks wide (to prevent enemies from spawning and/or knocking you off the rope) but you can leave it open if you want.
Oh no! I hit a HUGE underground lake! What shall we do? We'll start by building vertical walls on either side of the rope:
Then we break the bottom of that and drain the small amount of water that will be in that little tunnel we made.
If there is no air pocket below you, you can simply dig an upside down "L" off to the side of your elevator like I did in this screenshot.
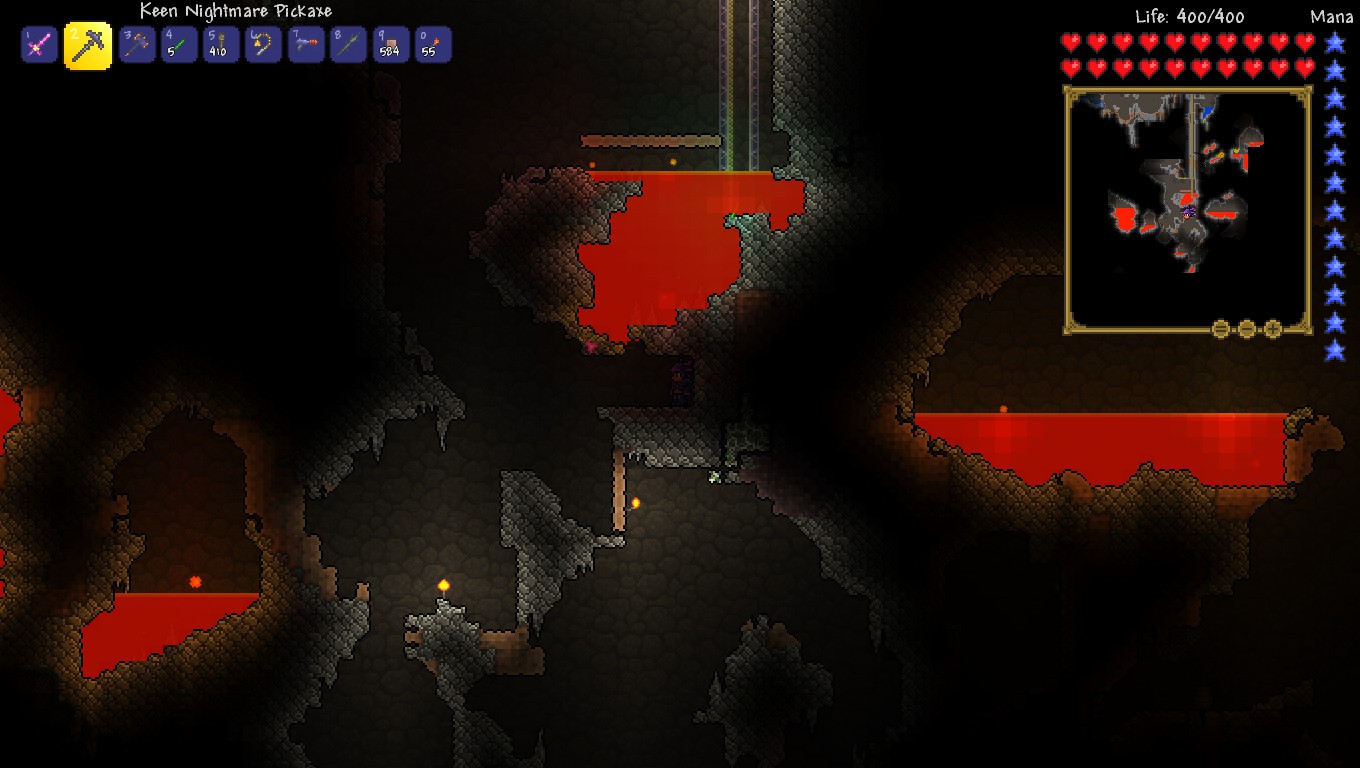
The trickiest part about a Hellevator is dealing with Lava. If you've been following this guide, then you've probably never encountered lava before. Lava acts a lot like water does, only it is "thicker" (it moves slower) and it does a lot of damage and sets you on fire if you touch it. Should you encounter a lava pool on your way down, you will need to find a nearby cave room to get out of the Hellevator and try to approach the lava from below it, and dig a "pipe" for the lava to flow, trying to re-direct the lava to somewhere else. Just make sure you don't break the last block holding the lava pool together until you are ready for it to flow (and you are far away from any possible path the lava could take). It might take some experimentation to do, but you will eventually get the hang of how to do it.
This is the most dangerous thing about building a hellevator. However, this is Terraria, and not even Lava can handle our mighty pickaxes and dirt blocks! Let's prepare a nearby area to hold the lava:
I tunneled underneath the lava some,and I used dirt blocks (see the torch on the vertical dirt block wall) to make sure the lava just doesn't flow everywhere. I left the torch in the middle of the room to show you the room in this screenshot. Normally, you'd want to remove the torch as it will get burned up in the lava. When I'm ready to break the seal, I will need to build a dirt wall right in front of me and break the seal through this wall so I don't touch the lava myself:
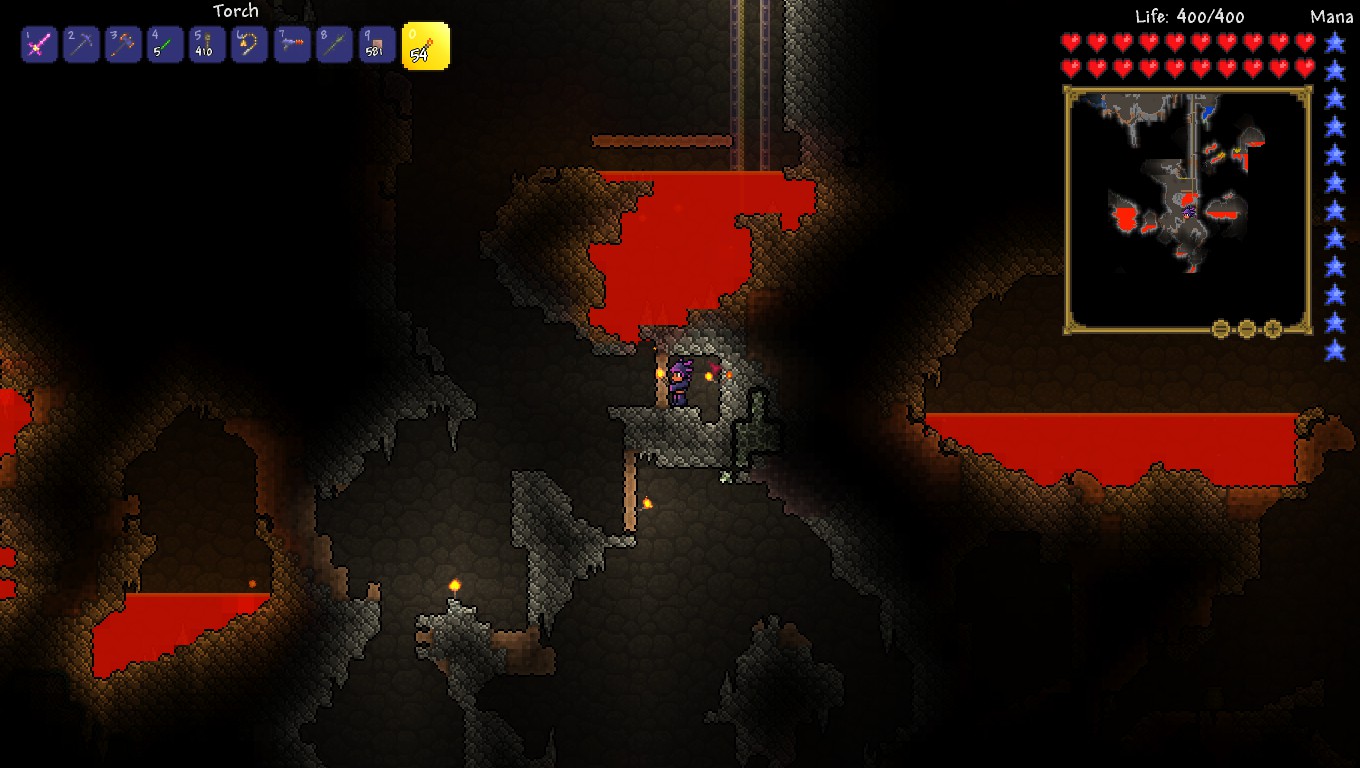
With protections in place, I am ready to break the seal and let the lava flow!
And there we have it. The lava has been drained into three smaller puddles off to the side of where the hellevator will be.
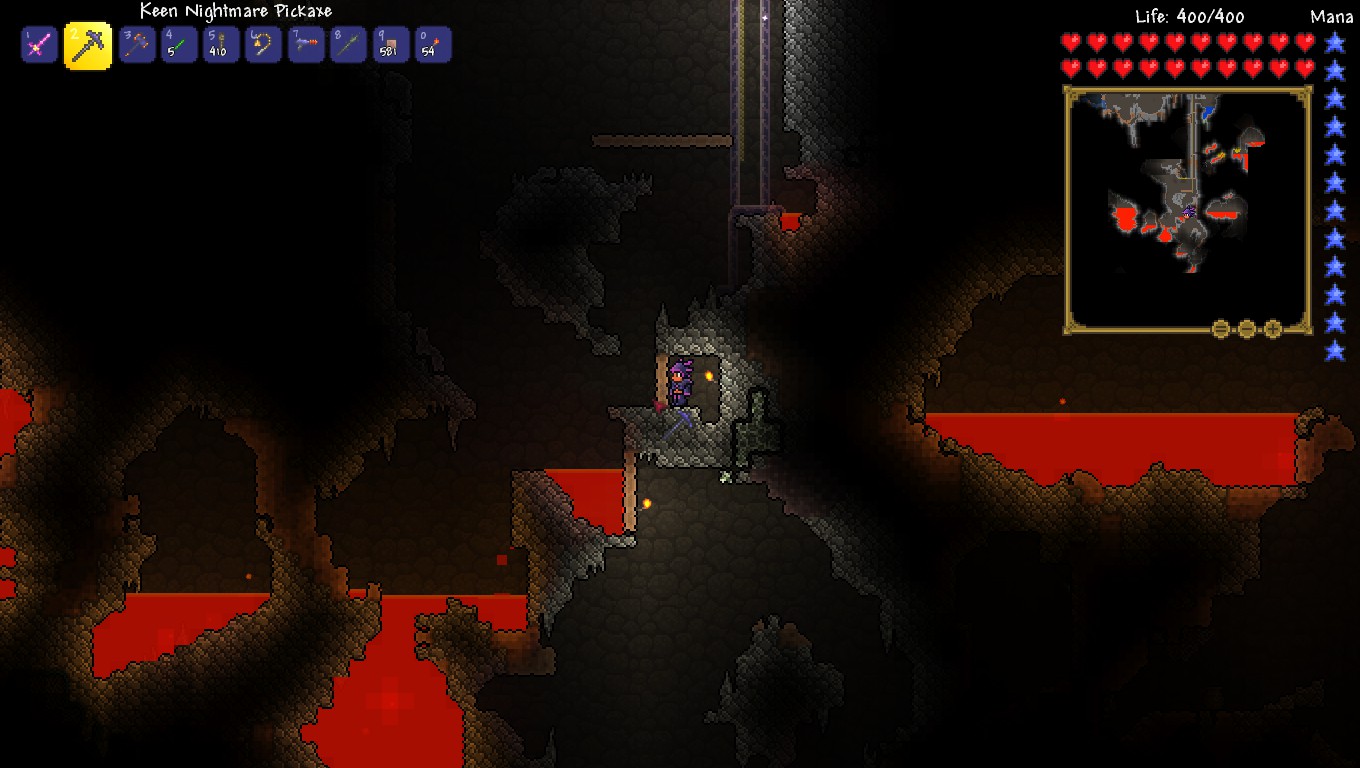
In this screenshot, I ran into another small puddle of lava in my way, but there was no nearby room. Similar to what I did with water above, I dug a hole next to the hellevator (beneath the torch). To do this safely, you merely need to stand where I'm standing, and mine a couple blocks out below you so the lava can flow to the right. Might need to do this a couple times to get all of it.

There. This lava will no longer be a problem; the hellevator will miss this pool now.
And, I ran into ANOTHER one! Well, this is easy to handle, too!
Again, I dug a 2 block wide pit next to the pocket of lava (it was underneath where I'm standing, if you compare the two screenshots) and then mined out the right wall and let it flow into the pit. Nothing to it! Just take it slow and careful, and think about where it will flow and you'll be fine.
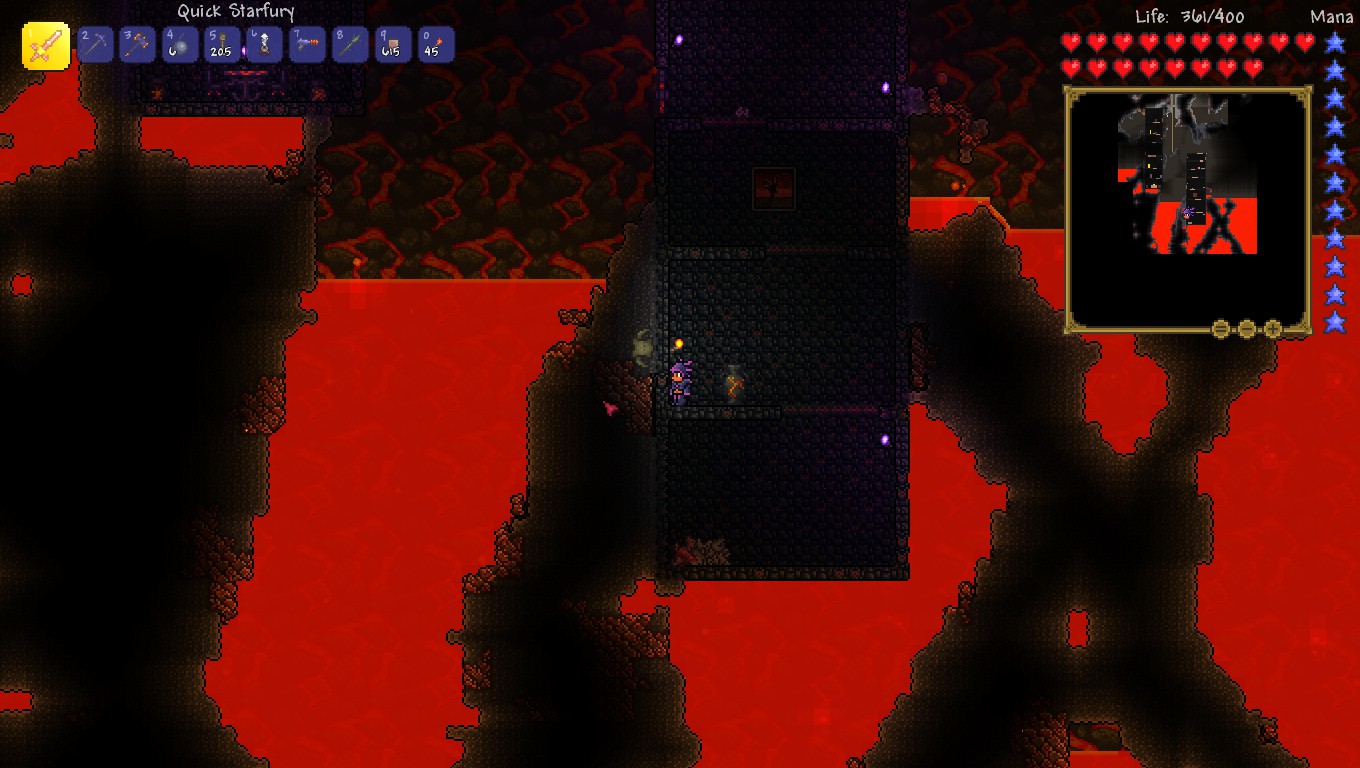
When you arrive in Hell/Underworld, the background will have lava in it, and the music will change to that spooky meteorite/blood moon theme that you heard earlier and you'll see flaming bats, flaming slimes, imps, and demons.
There is one major rule of the Underworld: Do not, under any circumstances, kill a Voodoo Demon while it is near Lava. Voodoo Demons are those Demons you see carrying a familiar-looking doll in their claws. If you kill one, and the doll falls into the lava, it will summon a boss that you are not ready for yet and it will very likely kill you. If this happens, find somewhere easily accessible and let it kill you. Do not attempt to kill the boss: even if you could kill the boss, it would have permanent consequences for you and your world that you cannot undo: it functions as a Point of No Return.
Otherwise, Imps act like the Goblin Sorcerers you fought earlier (assuming you had a goblin army attack by now) which can be annoying but they die easily, and your pickaxe can easily deal with its projectiles. Don't forget that your Vilethorn can go through walls, if it spawns close enough to you, you can kill it with a few swings of the Vilethorn.
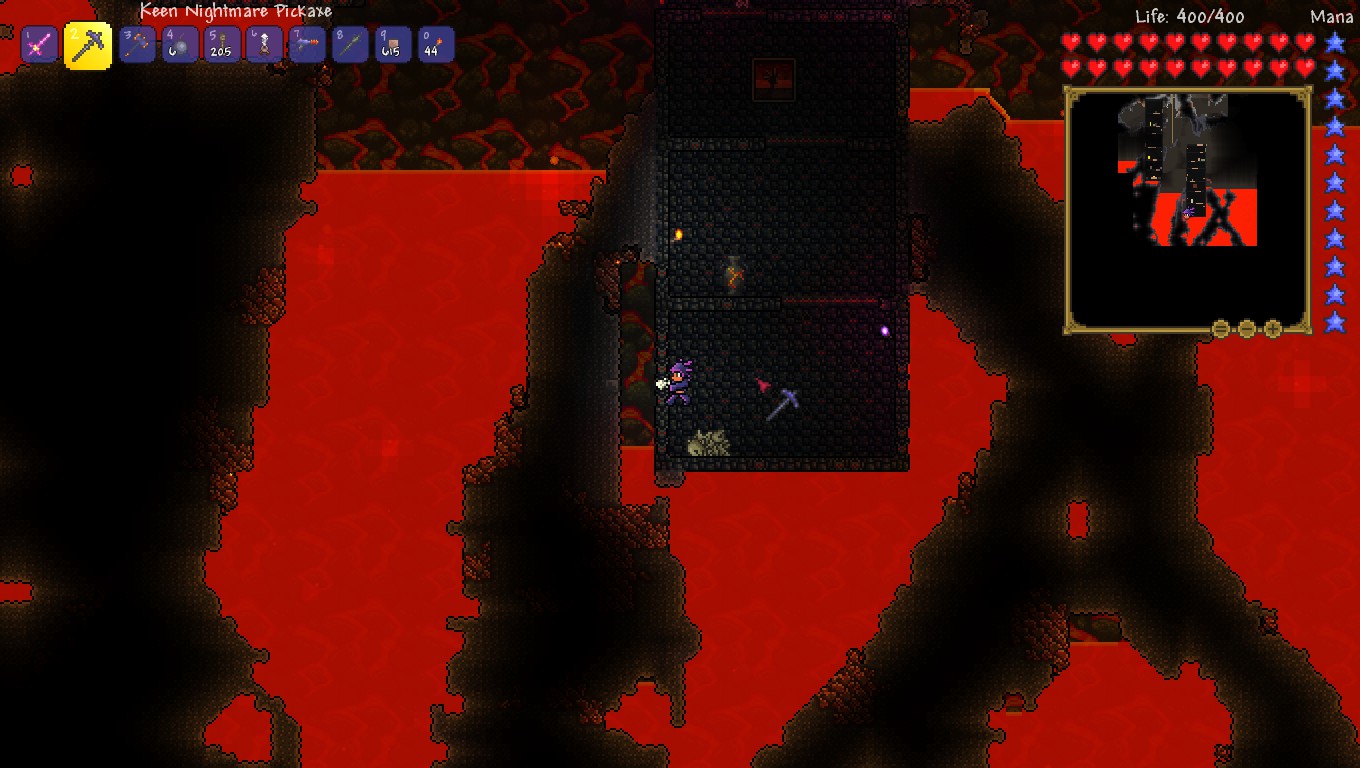
While you're down here, you are looking for two things: Buildings and areas with Dirt that are not covered with Lava. The Buildings will have lots of pots and the occasional Treasure Chest (you can't open these yet, you need a Key that is only found in the Dungeon). You will also see the occasional red-stone Furnace. Use your Nightmare Pickaxe to pick one up (you only need one). This is a Hellforge, and you will need one to make Hellstone Bars.
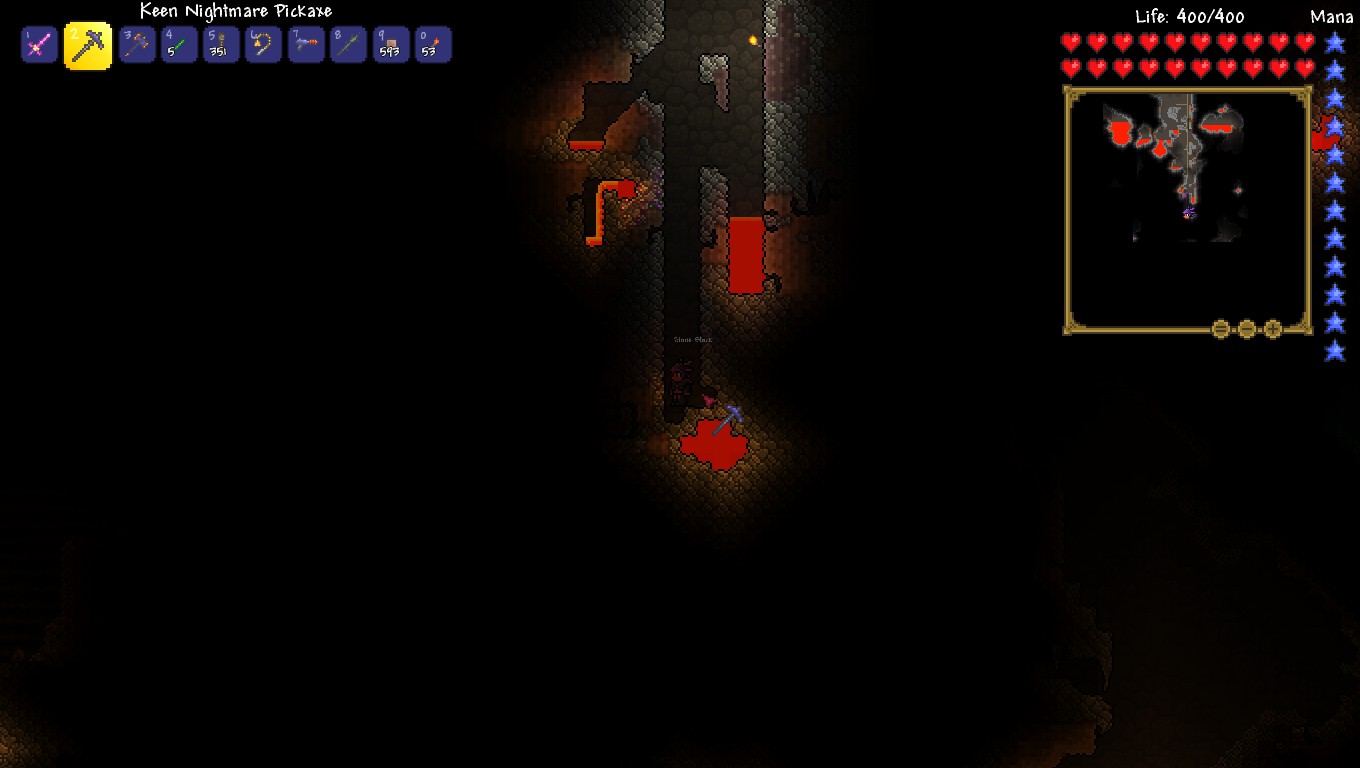
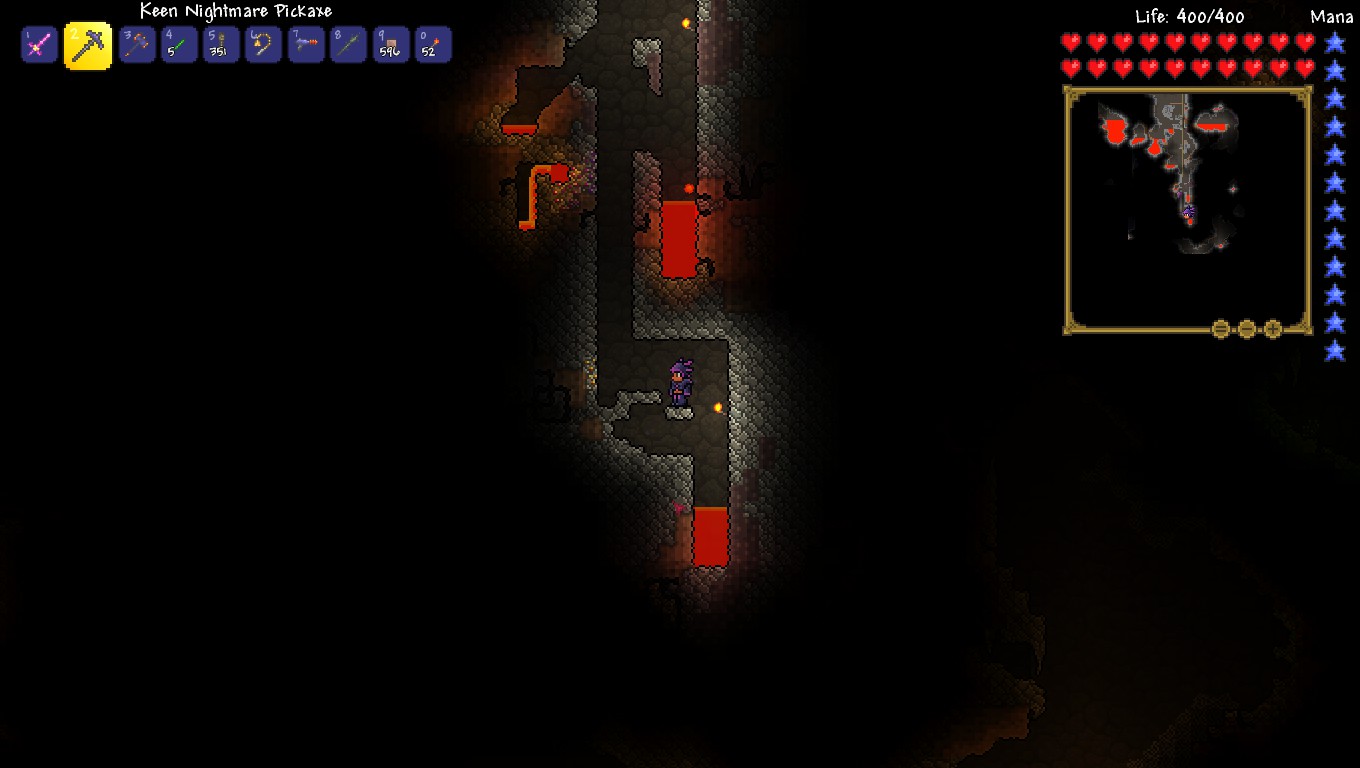
The other thing you're looking for, is Hellstone. You'll see lots of it down here. BEWARE: Mining a Block of Hellstone turns it into Lava which will act exactly like Lava does! Be careful while mining this stuff. The easiest way to get some Hellstone, is to mine it through the buildings: You can reach through a solid wall and mine two blocks horizontally, or directly underneath you. You can also break through the walls and mine the Ash Blocks. A convenient trick, is to dig a large "Reservoir Pit" underneath a vein of Hellstone, so that when you whack the Hellstone, the Lava will fall harmlessly into the pit below and pool up in it. Just don't fall into the pit yourself, and don't be standing too close to the block you're mining and try to catch the Hellstone as it falls. Once you try it a few times, you should see what I mean.
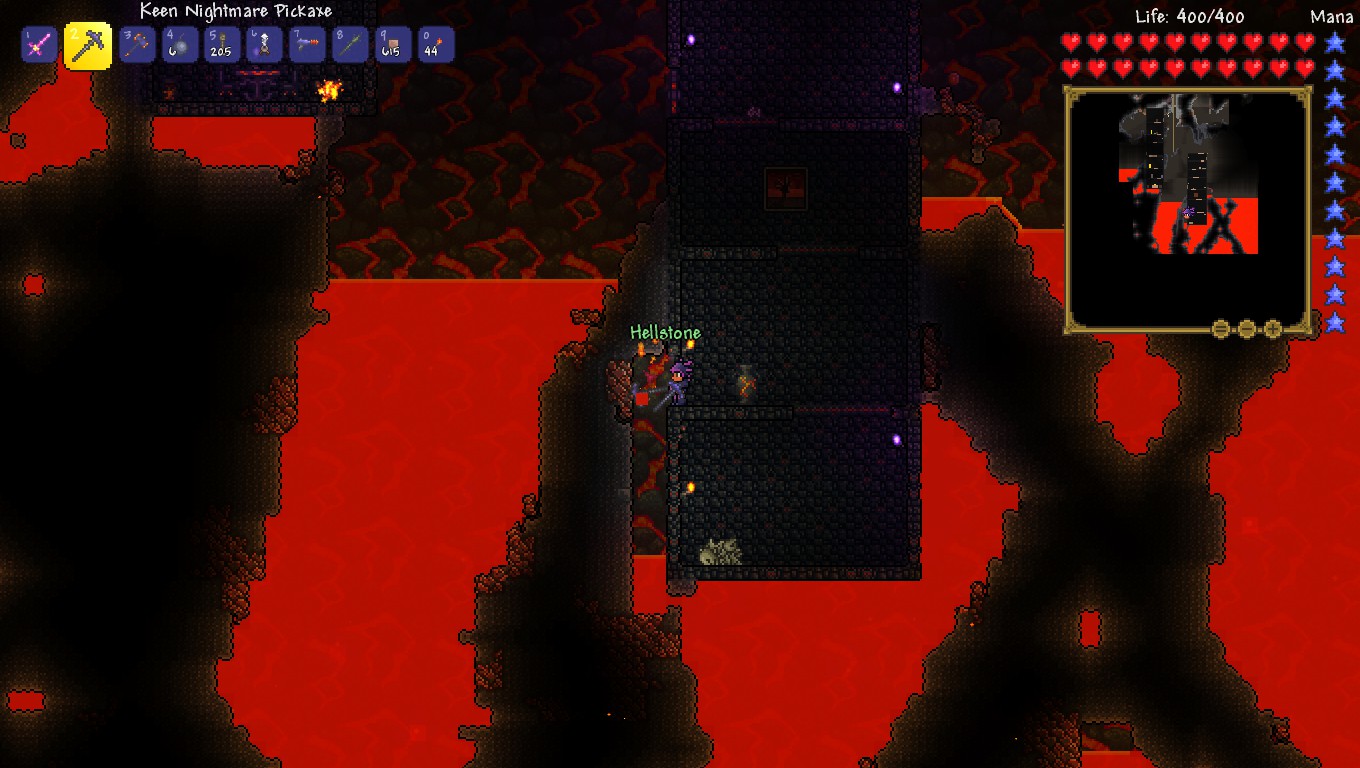
Step 1: Find a Hellforge. Also, note directly to the left is a bed. If you haven't made one by now, you can pickaxe that one, and put it in your house and it will work exactly the same way as any other bed will (and looks somewhat cooler to boot!)
Here, I found a good sized chunk of Hellstone embedded in the Ash near the walls of a building. Let's mine that, shall we?

I mined all the possible hellstone without breaking the wall, but there's more! Since we need a LOT of Hellstone for what we are about to make, I don't want to leave perfectly good Hellstone sitting there, do I? No, I don't, so let's get more.
We're going to start by digging a big hole underneath where the Hellstone is to create a reservoir and to also drain the current lava near the hellstone you saw in the screenshot above. Careful not to break any of the blocks that make up the wall of the building! You don't want to flood your own space with lava.
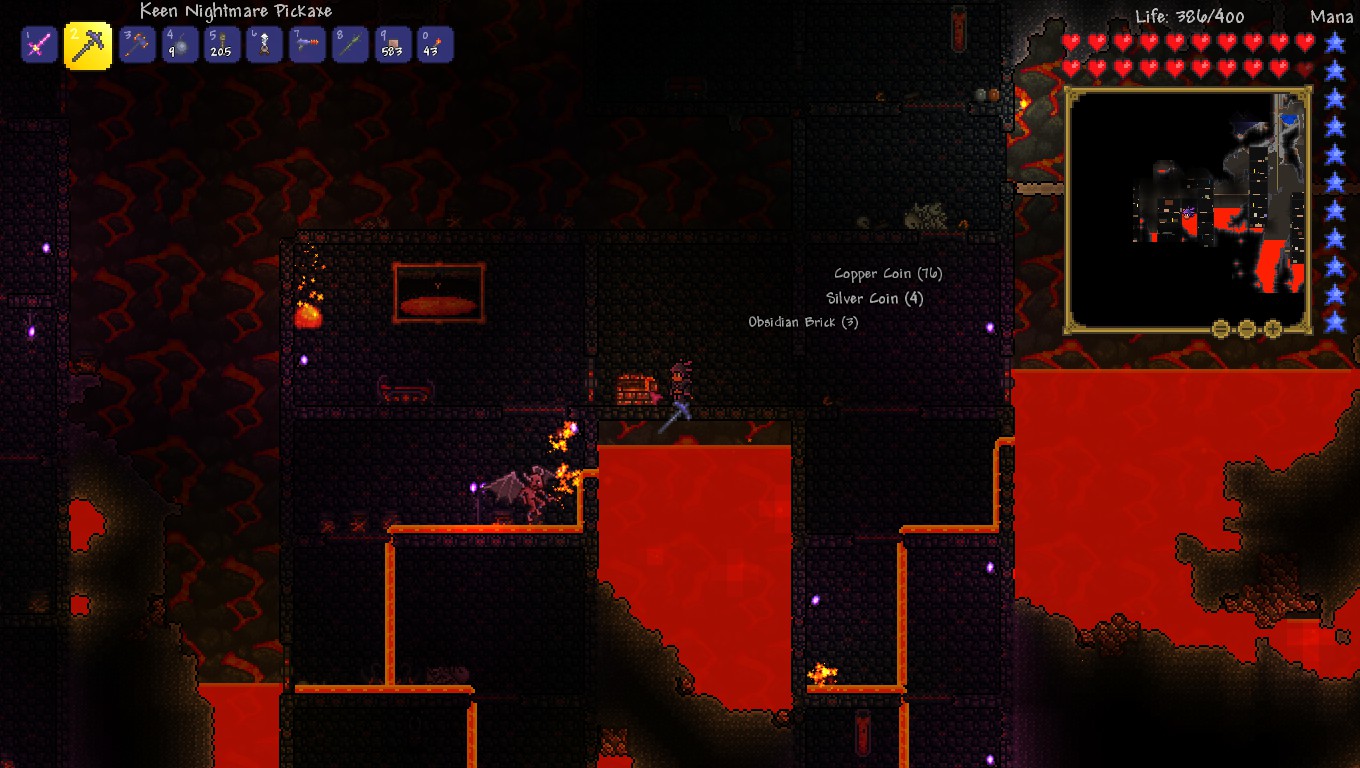
Now, we can break through the obsidian bricks and start mining the hellstone, but be sure to stand back so the lava can fall harmlessly into the pit below.
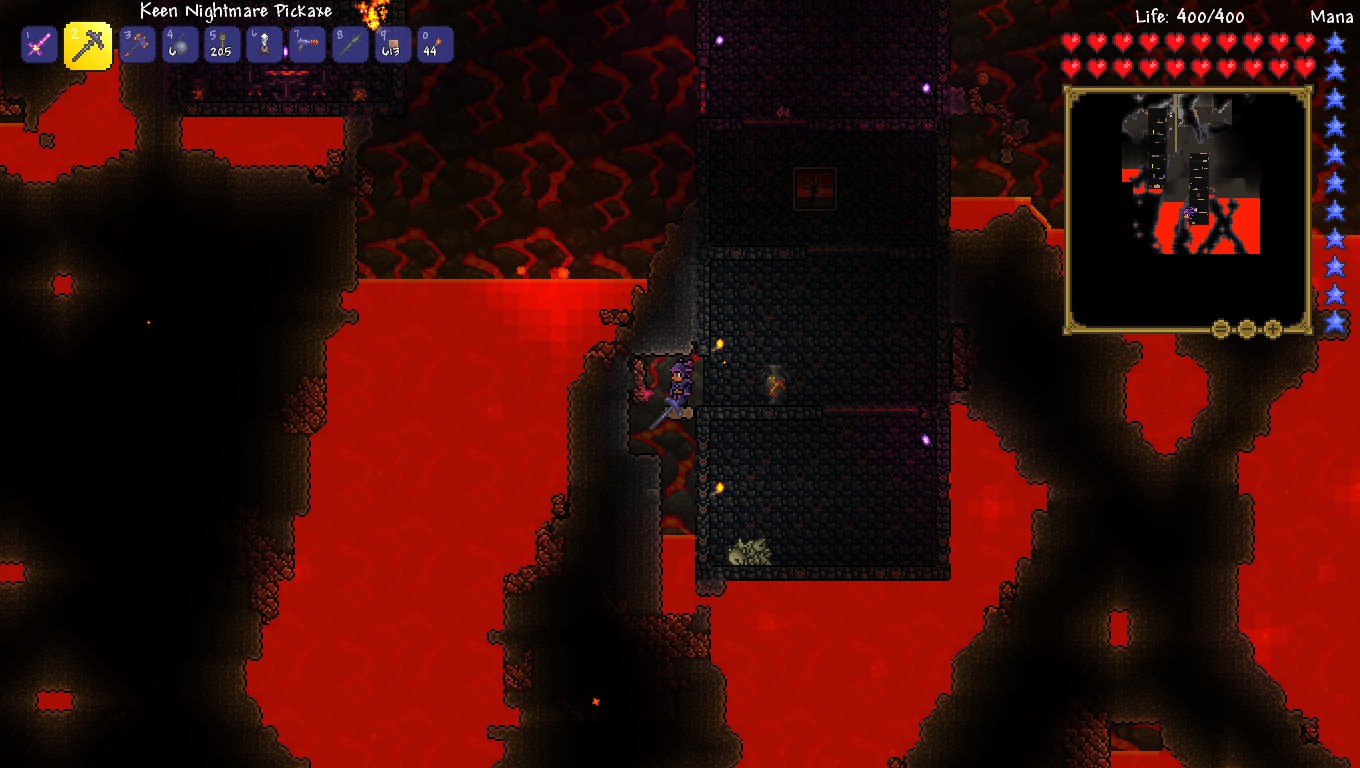
In this screenshot, I used some dirt to build a small platform so I could stand above where the lava would flow while grabbing the remaining Hellstone blocks without touching the resulting lava bits and I also dug out some more room for the lava to flow below.
Once you've got yourself a good bit of Hellstone, you will need Obsidian. To get Obsidian, you need to make Water touch Lava. The easiest way to do this, is to explore the lower caverns and find lava pools. Open your map, and look for a large underground water pool. Once you've found one, navigate to directly underneath it, and without breaking it, dig a two-block wide "pipe" down towards the lava that you found. Make sure you place blocks so that the water cannot escape; once the water touches lava it'll form solid obisidan blocks and then run off to the side, so make sure you place vertical walls to stop the water from escaping once it touches the lava. Once you've done this, break the water pool to drain the water down through your pipe and follow it down to the lava. Anywhere the water touched lava, there will be a black stone block. That's obsidian, and you need that! When you mine an obsidian block and there's water above it, another will immediately form. As you mine the blocks, the Lava and Water will eventually be consumed until you run out of one or the other. Hopefully you got a nice good haul of the stuff; you'll be needing a decent amount.
Once you have that, go back to your house and make an Obsidian Skull and place it in your Treasure Chest. Use the rest of the Obsidian to make Hellstone. From the Hellstone, you will want the following:
1). A Full Set of Hellstone Armor (45 Hellstone Bars)
2). A Molten Pickaxe (20 Hellstone Bars)
3). Fiery Greatsword (20 Hellstone Bars)
4). Molten Fury (15 Hellstone Bars, Optional)
5). Imp Staff (17 Hellstone Bars, highly recommended but Optional)
You might or might not want to keep an extra 10 Hellstone Bars for a Phoenix Blaster, which is a gun you can make once you've been to the Dungeon. It depends if guns are your thing or not. The Molten Fury Bow will make the next boss a pathetic wimp, but with Hellstone Armor he should already be weak already; it is up to you and whether or not you're good at mining Hellstone. The Molten Pickaxe has more Pickaxe Power but swings much slower than the Nightmare Pickaxe; I recommend keeping the Nightmare Pickaxe on you and stashing the Molten Pickaxe (you'll need it a bit later). The Fiery Greatsword does more damage than other swords you may have been using up to this point, but it too is a bit slow. I recommend also stashing this as well. Once you've gotten the above taken care of, it is time for the next part!
Part 9: Bungle in the Jungle (Ivy Whip, Blade of Grass, Bee Queen)
Next, it is time for a trip to the Jungle! What we're looking for, is the materials to make a couple nice pieces of equipment: An Ivy Whip and the Blade of Grass. For the Ivy Whip, you will need to kill Man Eaters (the long vines with jaws on the ends of them) for 3 Vines, and 12 Jungle Spores (those glowing things you find scattered about the Jungle). The Blade of Grass on the other hand takes 15 Stingers (from Bees) and 12 Jungle Spores. Once you get these, you can go back to your House and make the equipment. The Ivy Whip is a Grappling Hook that allows you to fire 3 hooks simultaneously while the Blade of Grass gets stashed in your Treasure Chest for later use.
Sort out your inventory (the Jungle is Notorious for filling you full of junk fast) and go back to the Jungle. This time, you will want to as fully explore it as possible. You should find two major Landmarks in the Jungle: A Beehive and the Lihzarhd Temple. Inside the Beehive, you'll see a Larva. Build a small wooden platform in the beehive, and make sure you have some potions, and then break the Larva which will summon the Queen Bee. If you're wearing Molten Armor like I advised, this boss should be a pushover. Fill her full of arrows when she's floating around, jump to avoid her charge attacks, and stand in the Honey for HP Regen (which stacks with a Campfire, so you can drop one of those somewhere nearby too!). Once she's dead, she has a variety of drops. The Bee Sword is a good alternative to the Starfury, the Bee Gun, and the Honey Comb. She has a few other drops, mostly which are cosmetic. The Honey Comb is an accessory that is best saved till later (especially if you also got a Panic Necklace from breaking Demon Hearts in a Crimson World).
Once you kill the bee, find the Lihzarhd Temple and use Ropes, and your Pickaxe to make a quick way to access it. Note that you won't be able to do anything with the Temple now. Believe it or not, this Temple is the last place in the game you will be going! It is so far away, though. For now, just make sure you have quick access to it. You will also want to map out the rest of the Jungle, placing torches to keep it lit, widening passages between major rooms, adding platforms to make travel fast and easy. You will also want to place Campfires and wooden platform arenas in the major wide open areas for later use. This may take a few hours to do (especially while you're fighting off enemies) but Trust Me -- you'll be glad you did.
Part 10: Skeletron (Finally!) and the Dungeon
Now we are "caught up". Most Players would tell you to do this as soon as you killed the Eater of Worlds and the Brain of Cthulhu and mined the Meteorite, but now you will have a much easier time against Skeletron. Get some Buff Potions, your best Bow (Demonite/Crimtane, or the Molten Fury), your Space Gun, your Starfury/Bee Sword if you have one, and some Torches along with Wooden Platforms. See that Castle Entrance, how it has a ceiling? Go up there, and make a mud block bridge away from the dungeon, about the same size as the one you used for the Eye of Cthulhu. Use blocks to place torches on it, just like you did with the Eye of Cthulhu. Make sure you've got some ropes to climb up onto it fast. The reason I suggest Mud Blocks will come into play later on during Hardmode.
Remember that old guy wearing the red robes, that I said not to talk to? *Now* we are ready for him. Wait until Night, and talk to him. He should have a "Curse" option. When you click that, he will turn into your next boss instantly: a flying skull with two disembodied skeleton hands. The trick to this boss, is you must defeat him before Dawn, or he will kill you instantly, no matter what. With your Molten Armor and/or Molten Bow, this should be pathetically easy, especially if you included an Archery Potion. The Skull acts just like the Eye of Cthulhu did in is second form, and his hands just flop about the place. Kill the hands first, and the skull is pretty much a rehash of the Eye boss's 2nd form, he'll just roar and spin at you over and over again once you get him low. You shouldn't have any trouble if you did all the prep work above that I suggested by this point.
I build the bridge out of Mud and filled some mud in to smooth the structure out to the left. With all of the Hellstone gear, this guy is incredibly easy to kill.
Once he's dead, you are now free to explore the Dungeon. A Tailor (the old man himself!) will also move into your house if you have a room for him to do so.
In the Dungeon, you will find lots of locked golden chests. You need keys to open these. Golden Keys are dropped by Key Slimes (you can see the key in the slime), and you can also find golden keys in brown treasure chests in here. You can find the following in here:
1). A Mechanic (a girl tied up, merely right click her to rescue her. She'll move into a house if you've got one available)
2). A Goblin Tinkerer (if you defeated the Goblin Army. Right click to free him and he'll move in if you have room). Note that the Goblin can ALSO spawn in any underground area, but he seems to be easier to find in the Dungeon.
3). A Muramasa (a sword you'll need here very shortly)
4). A Cobalt Shield (This will come in handy soon)
5). A Handgun (if you decided you wanted to make a Phoenix Blaster; combine the Handgun with 10 Hellstone Bars).
6). Two Magic Weapons that are probably not all that much use to you.
7). Shadow Key (for the chests in the Underworld you could not open earlier).
8). Water Candles (Take a few, but make sure to quickly put them in your inventory, they'll be used later. You'll see them scattered about the dungeon on tables and shelves).
Golden Keys are consumed (the Shadow Key is not) upon use. While navigating the dungeon, watch out for skeleton sorcerers and don't let the floating skulls touch you (they will prevent you from using your weapons for a short time). Watch out for spikes, they will still hurt at this point. Don't be afraid to die a few times in the dungeon; it is a harsh environment. Once you've been in here a few minutes, you'll quickly see why I suggested making Molten Armor before visiting this place.
Part 11: Lots of Errands to Run!
Assuming you've found the Goblin, he should have moved into your house by now. Go pay him a visit; he has incredibly valuable things for you. Buy a pair of Rocket Boots and a Tinkerer's Workshop. This will cost you 15 gold, but after all the fighting you've been doing you should have plenty for that. Note that this guy will also Reforge equipment: Bad Item Prefixes can be removed by him, but for a hefty price. You can also try to fish for good Prefixes but this is *incredibly* expensive and probably out of your reach for now. I'd only advise doing so if you get a bad prefix.
Place your Tinkerer's Workbench, and make the following (if you have the items):
1). Obsidian Shield (Cobalt Shield + Obisidan Skull)
2). Spectre Boots (Rocket Boots + Flurry Boots OR Hermes Shoes)
3). Lightning Boots (Spectre Boots + Aglet + Anklet of the Wind)
4). Frostspark Boots (Lightning Boots + Ice Skates)
5). Sweetheart Necklace (Panic Necklace + Honey Comb)
6). Tiger Climbing Gear (Shoe Spikes + Climbing Claws)
Now you see why I told you to keep all of those accessories, eh? If you're missing some of the above accessories, you can try scouring both worlds top-to-bottom to find some of them (after you make the Night's Edge as described below!).
It is also time to make your Ultimate Weapon (well, for now...): Muramasa + Blade of Grass + Fiery Greatsword + Blood Butcherer/Light's Bane = Night's Edge (Need a Demon/Blood Altar). This sword is the best weapon you can possibly use for awhile; it will absolutely destroy even stuff in the Underworld. Once you have all of this done, you're ready for the Underworld For Real this time!
Part 12: Preparing for the Wall of Flesh
Go down to the Underworld, but bring lots of stone, dirt, ash, mud, anything that's solid (I recommend against using Wood Platforms). The best blocks to use for this is Ash, because Fire Blossoms will randomly grow on the Ash. Alternatively, you could use Dirt and you will find a lot of Blinkroot. Stone won't get you any kind of plants spawning on it whatsoever. You'll need a few thousand blocks (not joking). Once you're down in the Underworld, begin making a straight bridge to the left or right. If there's a "building" in your way, tunnel through it and make sure you can run through it fast. If you must go up or down, step the blocks so that you can still run up or down them without having to stop for any reason. Open any chests you find with the Shadow Key (nothing particularly useful in these). You can also take some of the furniture if you haven't already, the doors look awesome as do some of the chairs, tables, etc. Keep going to the left or right, until you get to the edge of the map while placing blocks and torches to keep everything lit up, and while killing off enemies (again, don't let a doll drop into the lava!). Make sure you acquire a Guide Doll from one of the demons (kill it above the lava platform so the doll falls harmlessly on the solid platform).
I recommend spending some time down here, trying to grab a Demon Scythe, which is actually a spellbook. It casts the same spell the demons are using on you, and it does some decent damage, even if you're not set up for magic. It will be quite useful for the boss to come. Once you've reached near the end of the map (don't go ALL the way over, leave a few blocks above lava open), turn around and go a bit past where you started. While on your way there, start running and just keep running. If you bump into anything that stops your run, smooth it out. You don't want anything interrupting your movement whatsoever. No obstacles, nothing you're forced to jump over, no pits you might accidentally fall into.
Once you've done this, Make Sure you have the following:
1). The Jungle Fully Mapped and Prepped. DO THIS NOW if you haven't already. Do not fight the next boss until this is done. You'll thank me later.
2). Molten Armor, Molten Bow, Molten Pickaxe, Night's Edge, Demon Scythe, Full Life (400), Full Mana (200) Maximums.
3). A 4-5 Block Gap dug underneath your house (it should be floating in the air).
4). Ropes to all 3 Sky Islands for easy access.
If you haven't done it already, go to both of the beaches and extend wooden platforms along the water's surface, and drop a campfire halfway out, and 3-4 lines of rope down into the ocean. There are some treasure chests down there; to get them merely drop some glowsticks down and hop in. Watch your breath meter, kill any sharks that attack and grab the chests if you want. The main item here are the Flippers. A Breathing Reed might help you a little, but by now with the ropes and your boots you shouldn't need it now. It is important you have the bridges done though.
Part 13: More Hardmode Preparations (House, Biomes, etc).
Another thing to consider doing before Hardmode, is preparing a better, more permanent House for Hardmode. Earlier, I instructed you to build a 'floating' house in the air. This works, but the only problem with this (that you probably noticed if you had a Goblin Invasion), is that invasions and such tend to let enemies near your house, and those that have teleporting abilities or block-piercing attacks are capable of hitting your NPCs. Goblin Invasions can't really kill NPCs, but the stuff in Hardmode sure can!
So let's discuss how to make a better house. When you enter Hardmode, you want your house to be:
1). Slightly away from the original spawn point (about 2 full screen lengths away, if not 3) so that mobs will not spawn near your house if you're at the original spawn point.
2). Corruption/Crimson/Hallow-proof (so that your house cannot become corrupted.
3). Completely safe and impervious to any types of enemy attacks.
How do we get such a home? Remember how I told you to dig your Hellevator 2-3 screen lengths away from your starting house? Go down your Hellevator about 2 full screen heights and dig into the wall. You'll want a 3-block deep 'pit' in front of your front door, and once you have that, you can start hollowing out a large area for the house. You can't place your own background blocks until you remove the dirt background blocks that are naturally occurring, and you do that by going to the surface, equipping your Hamaxe and hammer the background blocks from the surface, down your hellevator, to where you're digging out your home. You will want to make 20 living spaces (there are 20 possible NPCs as of 1.2.4, not counting the Truffle which will not likely be at your house) so that you won't have to worry about living space.
Also, you will probably want a greenhouse-like area for potted plants, and a crafting room, and an area near that for chests to store stuff. In most playthroughs I go through, I try to have a chest in the greenhouse area for potions, one for plants, one for seeds, and at least a dozen boxes for crafting materials and another dozen for equipment. Your mileage may vary, but the worst thing is to run out of space to store all of this stuff. I also find it helps if you use different colored boxes for the crafting materials and equipment; I usually use brown boxes for materials and golden ones for equipment. You can also rename them by clicking 'Rename' while you have that box open for an easier time knowing what is in each box.
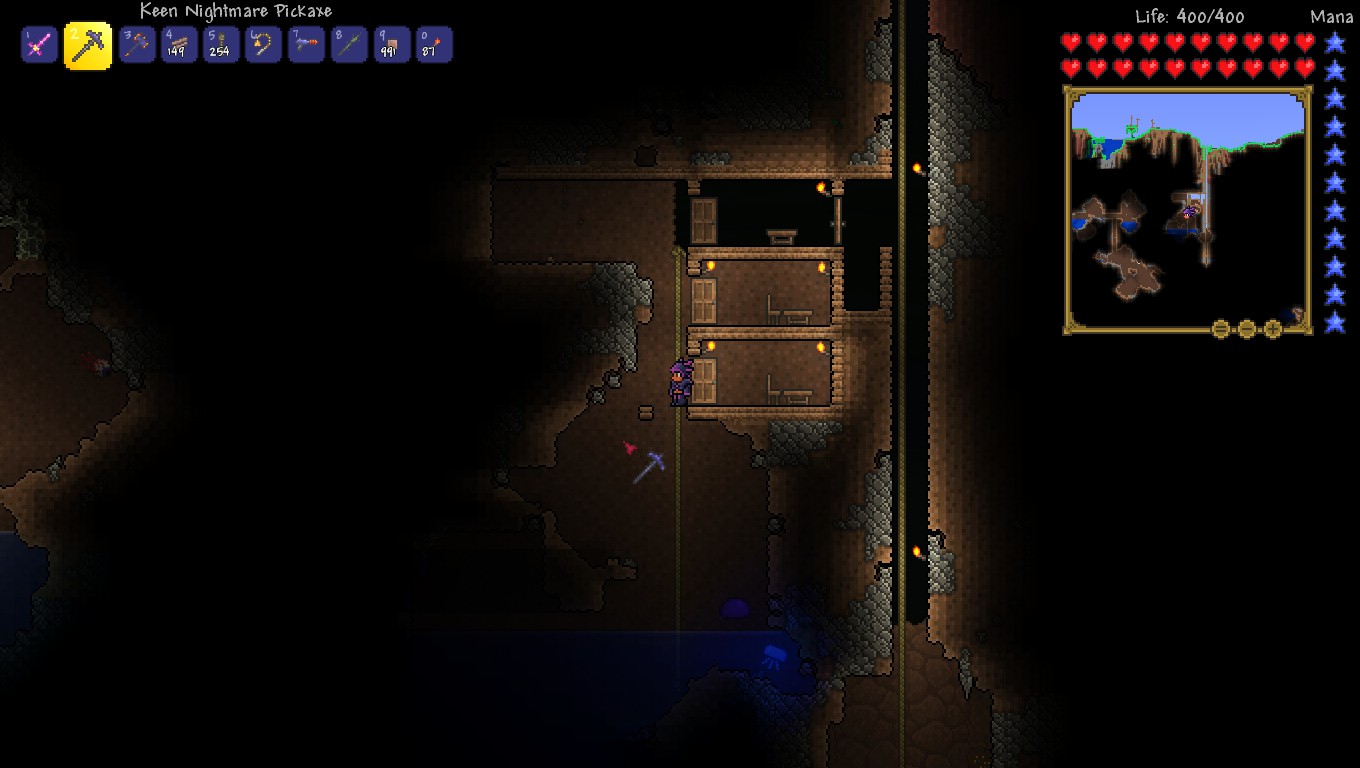
I normally like to start further underground than this. Hopefully it will not be a problem, but for some odd reason, this world has an unusually shallow surface layer (the underground area starts sooner than normal). I will be putting a greenhouse in this home, so having cave walls will kinda kill the mood. So I moved the house up a bit further than I normally would.
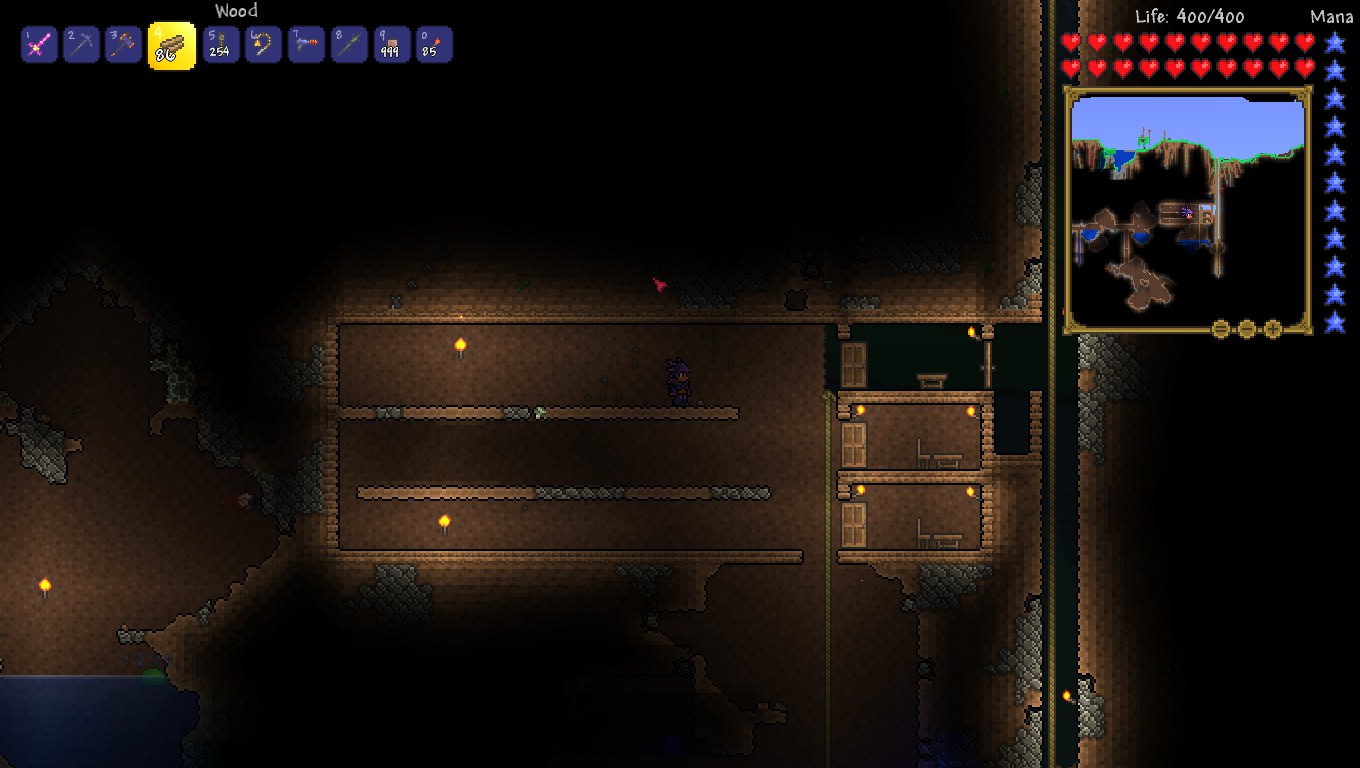
The crafting room about half-done. I forgot that I usually do 4 'sections' down instead of 3 in this screenshot.
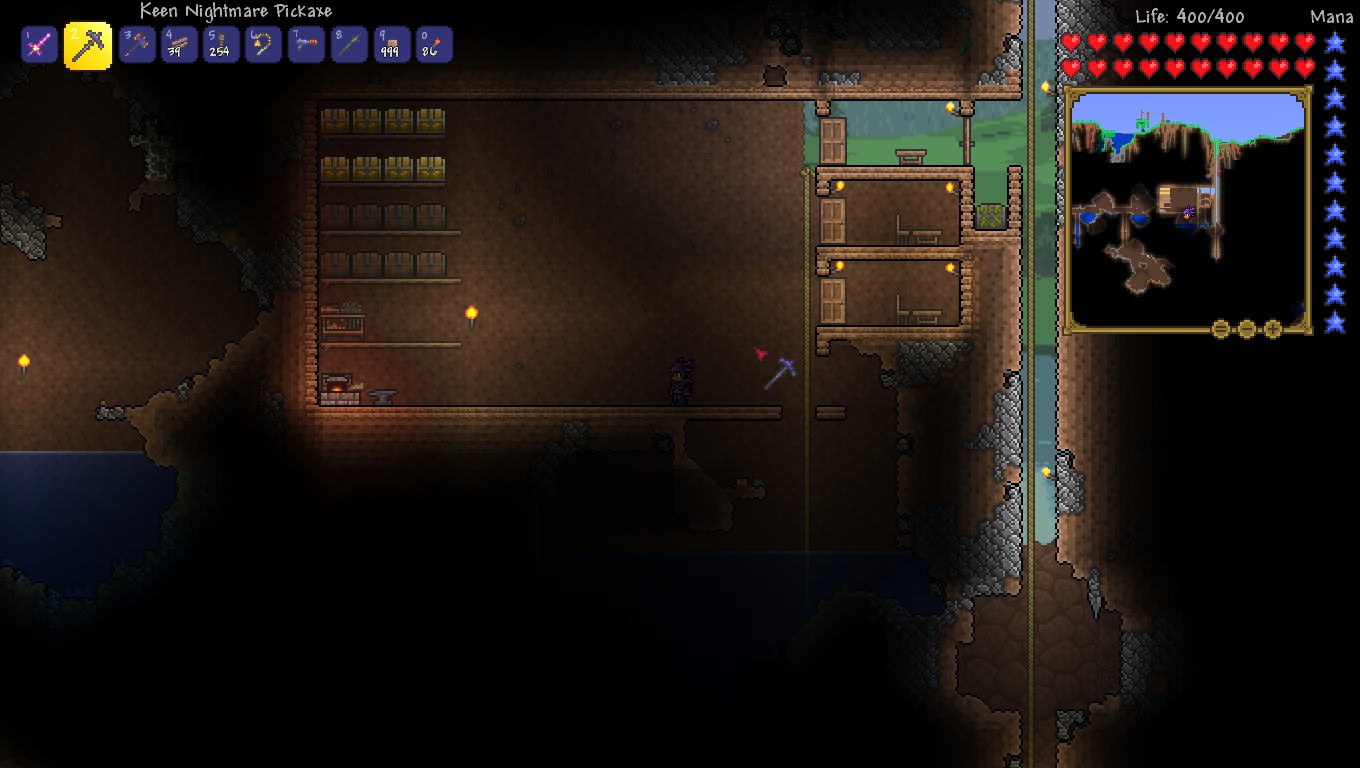
There. That looks better. I enlarged the crafting room to be 4 "sections" (small room heights) high. This will be plenty of room for storage chests and every crafting machine in the game.
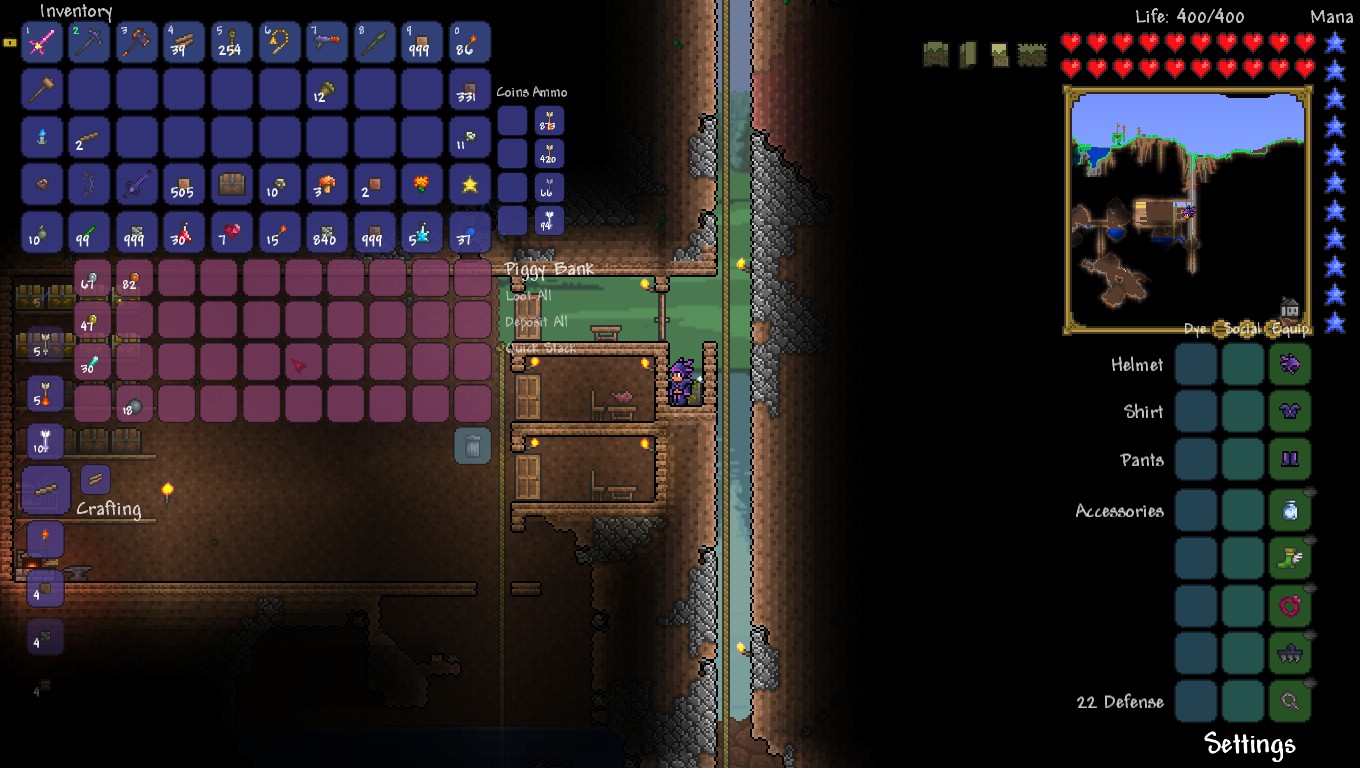
I took this screenshot to demonstrate two things: Where I'm standing, there's a unique chest (I used a Living Wood one here). Firstly, Building materials (background walls, furniture, banners, etc) and furniture-related crafting machines will go in this chest when not in use. Secondly, note the location of the piggybank and how I can access it from the outside of the house while standing in the "zombieproof pit". This makes it very convenient to dump money in a couple seconds without having to actually enter the house.
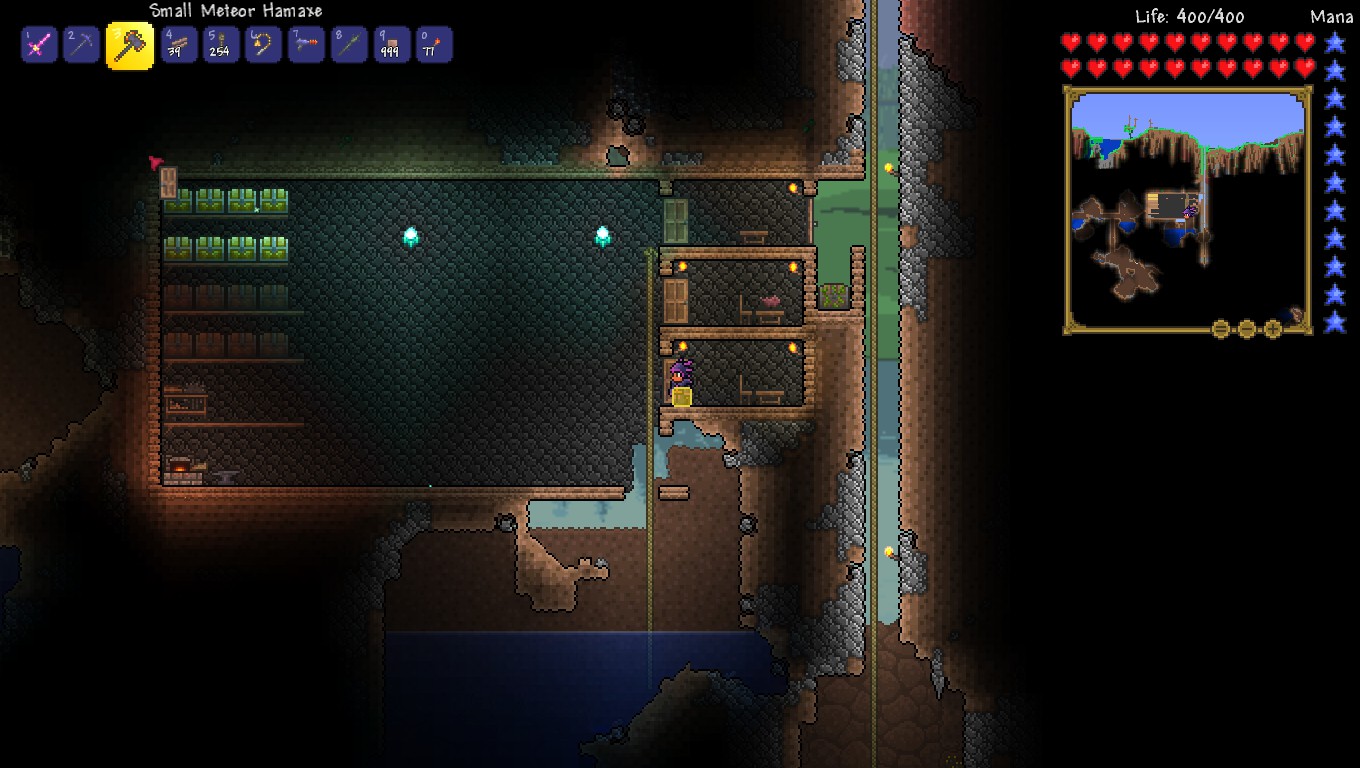
The crafting room and two NPC quarters are done! Note the first room at the very top that does NOT have a chair is not an NPC quarters, because I don't want NPCs opening the door on their own and potentially allowing monsters into the home. This is where I will put the bed to set my spawn point to, that way each time I recall or load the game up, I'm in the safety of my home right next to the crafting/storage room.
When this home is finished, there will be 20 NPC quarters going straight down, just like the two you see there already. Underneath the crafting room will be a huge greenhouse room with wooden platforms to act as shelves for the flower pots and at the very bottom, a small water pool for making bottled water, and an alchemy station with two chests: one for ingredients and one for potions. I also usually place a 3rd room inbetween the greenhouse area and the NPC quarters; I usually stick special furniture, trophies, and banners in there.
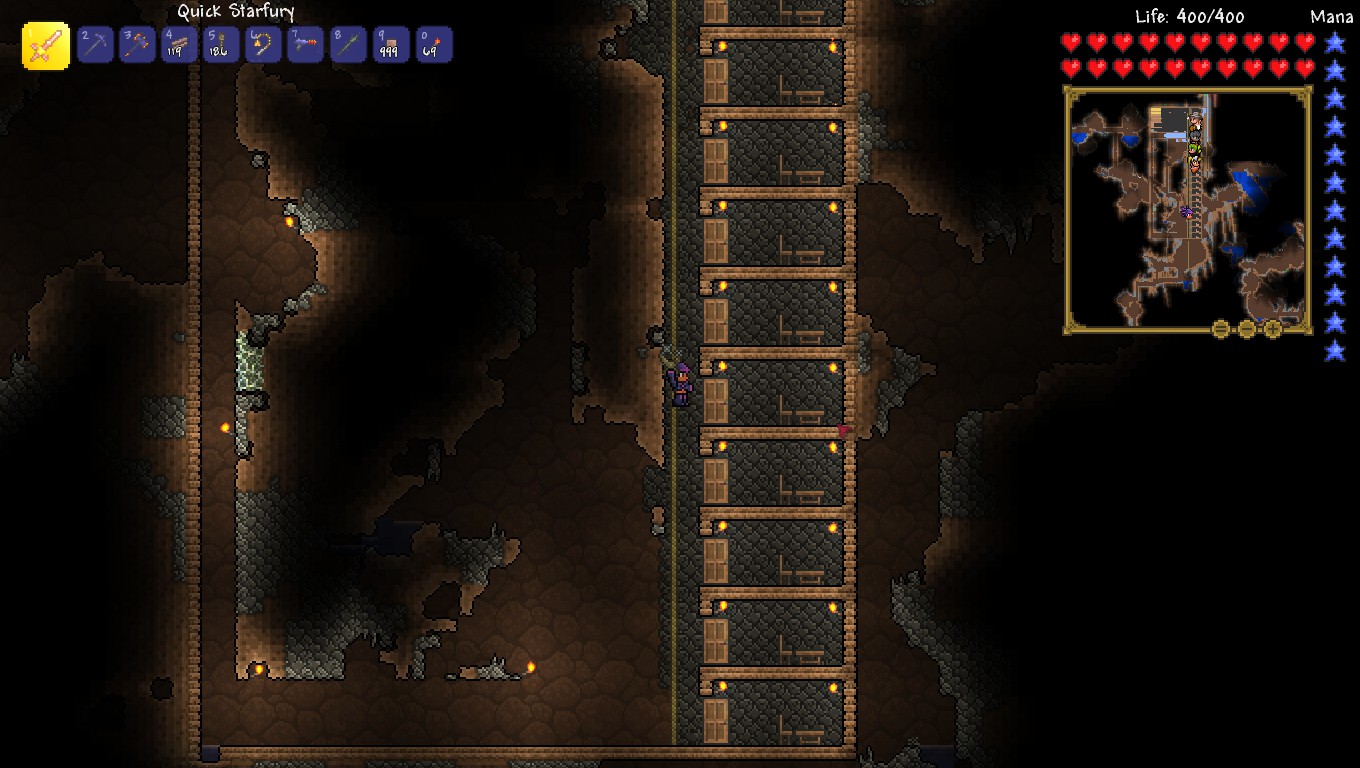
In this screenshot, I finally got all 20 NPC Quarters built! In the lower-left, you will see that tiny pool of water -- that is where the alchemy station goes, so that you can make bottled water which is needed for most potions.
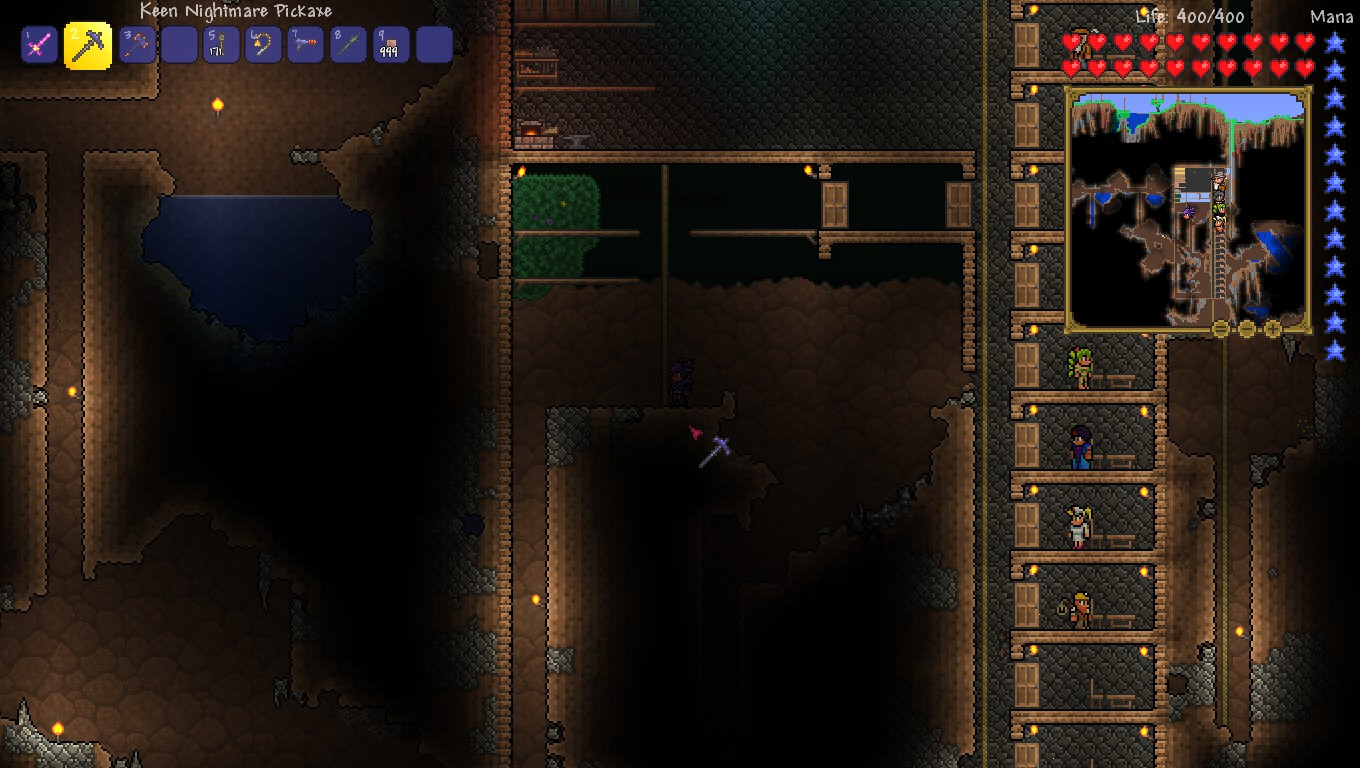
I decided that instead of the glass window I usually use for the greenhouse area, this time I will go for Flower Blocks (purchased from the Dryad) this time instead. This is by far the longest part of the project, trying to hollow out this giant area. Note the wood platforms and rope -- these are "shelves" for the flower pots when I get enough of them to fill the room.
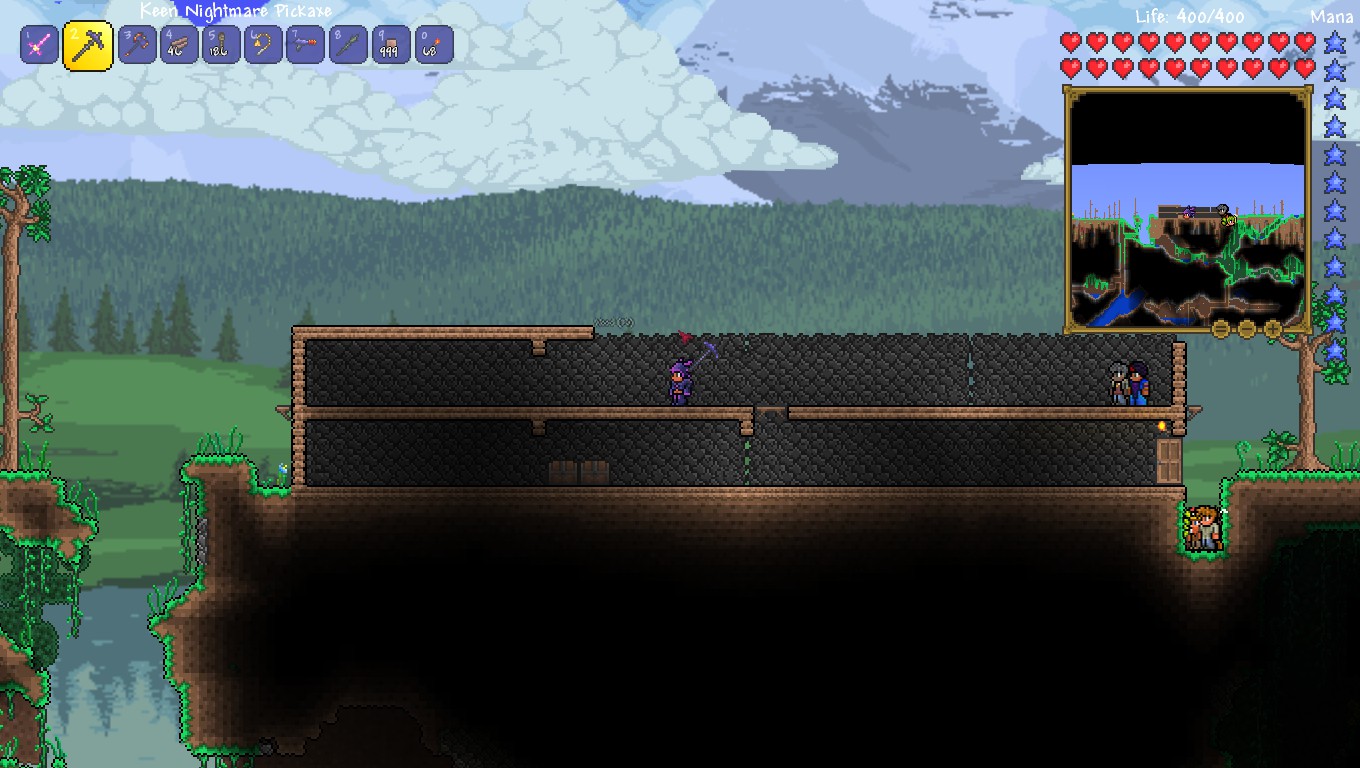
With the new house done, I don't need the old one anymore! That's a lot of flat land that could be used to grow trees, and set up a mob farm arena so I'm going to remove the house, and turn that all into flat grassland and plant some acorns so trees will grow there, especially after how much wood I used building the new house (800+!)
Another thing you ought to do once you get your house done, is go back to the Original Spawn Point. I recommend removing the old house you were living in once the new one is done, and once you've done That, flatten all the land around you. Once you've done that, dig a 5 block wide pit about a screen length deep, and then dig a 5-block high tunnel about a screen length across, and then dig a 5-block wide pit straight up, so that you've carved out a "bowl" of sorts. It should look like a "U" with the center blocks still in there. Get some sort of player-made background blocks (stone works) and fill that 5-block "U" in with the stone background blocks. This will prevent mobs from spawning in that tunnel. Line the 5-block U tunnel with wood.
Once you've done that, hollow out the "U" bowl on the inside, and fill it with snow and red/purple ice. Make sure you have at least 200 Red/Purple Ice. If done right, you should be able to stand in the middle of the structure, see snowfall, and get Corruption/Crimson Music. If you do indeed see snow and hear Corruption/Crimson Music, you've done it right. You will want to dig a 3-block deep hole that is at least 5-6 blocks wide. A campfire and a heart lantern will go in here, and some other modifications will need to be made.
This is your Keymold Farm; you will need this later. Once you kill the next boss, anytime a Goblin Invasion, Blood Moon, Solar Eclipse, or Pirate Attack happens (or if you spawn any of these yourself), you will want to fight them here. This is considered to be a Snow _and_ a Corruption/Crimson Biome so both the Frozen and the Corruption/Crimson Keymolds can drop here once you've entered Hardmode. The construction of the structure (which I will show in a screenshot) will be done as such that only enemies that can go through walls can possibly hurt you, as long as you use some type of sword (Cutlass, Night's Edge, etc). Weapons like Vilethorn can also work, but they don't do as much damage. The enemies that can pass through walls (Wraiths and Reapers mainly) should not do enough damage to you that they could actually kill you unless your equipment is grossly outdated.
One last thing I will suggest doing, is going to the Mushroom Biomes you've found and start mass-chopping down mushrooms with your sword. Do not use your pickaxe! You don't want to destroy the Mushroom Biome, you just want to collect some Mushroom Grass Seeds. Just use a sword to make sure you don't accidentally damage the grass and don't chop down the large mushrooms. Once you get a few Grass Seeds, go to the Dungeon and the Mud Block Bridge I told you to make, and plant some of the seeds on that mud and let it stew for awhile. Check back several game days later and you should have a small mushroom area though you may need to expand it. If you did it right, it should get dark when you get near it and you should hear the Mushroom Biome Music playing and the background will change.
Part 14: Wall of Flesh and Hardmode!
Before doing this next section, keep in mind that this is a Point of No Return. Once you kill the boss, your world will be irrevocably changed. Harder enemies will spawn, harder bosses will come looking for you, and the game will get harder.
Once you're ready, go back down to the Underworld once more, and go all the way to the far edge of that solid bridge you made. Select the Guide Doll, and drop it in the Lava. This will summon the Wall of Flesh. It will slowly move towards you, and do huge damage if it is allowed to touch you (which is why I told you to make sure the bridge is smooth!). You must kill the Wall of Flesh before you run out of room to run away from it. Use Demon Scythes and Arrows to kill the little floater eyes and then aim at the large eyes and mouths on the wall; all of these share the wall's HP. If you did all the prep work I suggested, then you shouldn't have too much trouble with this once you've gotten some practice. If you do die, simply get another Guide Doll and drop it in the lava again. Keep in mind that dropping the doll into Lava kills the Guide. You must wait until the next day for the Guide to respawn (assuming there's no Invasions going on) before you can summon the Wall again.
Once you kill it, a box will appear near you with some items in it, and you'll get a message that ancient spirits have awakened -- Your World is now a Hardmode World. Among the items there, will always be a Pwnhammer. Take the Pwnhammer; you will be using it very shortly. The other items that can drop will vary, none of which are particularly good. Hallow and Corruption (or Crimson) will spread through the world in roughly an "X" formation (the box that had the Pwnhammer is the center of the "X") and these two will spread much more rapidly than before. Newer, harder enemies will spawn, and you will get new surface areas and there's much more to do!
In the meantime if you want to see the screenshots, right click the broken screenshot, click "View Image", and when you get the error message, change "cloud-4.steampowered.com" to "cloud-4.steamusercontent.com" and the screenshot should then display. I'll fix it ASAP.
(Note: This is a WIP, I will be adding screenshots as I find them. Also be wary of some minor inconsistencies; I will hopefully repair those as I get screenshots for the guide itself. The guide was written a few months ago, and some things I've decided to change in it since then.)
v1.5
Guide for Newbies (For PC v1.2.4)
Hello Terrarians!
I've decided to write a guide for newbies, as the game has so much stuff, it can easily leave peole confused and scratching their heads, wondering what they're supposed to do next, or how they are supposed to overcome obstacles, and all of the other things that we experienced players take for granted.
A thing to note while reading this guide: There are many different weapons and armor in Terraria; there are many, many, many ways to kill enemies and bosses. That said, this is mostly for Melee-Heavy Characters and we will not be exploiting terrain, or traps in this guide; this guide is meant to be a "simple" way to progress through the game. I view wiring, traps, and magic spells as a more advanced type of play, something a person may dabble in, once they are comfortable with the game.
This guide also assumes you are playing on PC.
That said, let's get started!
Part 1: The Beginning and Your House
Making a character is very self-explanatory (make SURE you set it to SOFTCORE!): There's no stats to worry about, it is just you, and the items you have on you at any given time, along with your health and mana meters. There are no other traits or stats. So once you've made your character, then you make a world. For newbies, I highly suggest making Medium worlds, especially if you are playing alone, offline. The reason for this is simple: Large maps may have more resources, treasure chests, loot, etc but they also take much, much, much more time to traverse. Ultimately, there are ways to cut down on travel times, but when you're early-game and you've died in the Dungeon (which is always near the edge of the map) and it takes you 15+ minutes to get from your house to your dungeon, then you are going to wish you had created a smaller world. The reason why I suggest Medium, rather than small, is because of issues having to do with the ground level and sky enemies spawning while you're on the ground.
Once you've started your world, the game dumps you in the middle of a Forest with only 3 items on you: A copper shortsword, a copper pickaxe, and a copper axe on your hotbar. The hotbar buttons correspond to the keyboard numbers 1 through 9 as well as "0" being the last item on the hotbar.
To start our adventure, proceed to select the Copper Axe, and click on the very base of the nearest tree, at the center of the trunk. If you are close enough to the tree, you will start to swing your axe; it will take quite a few hits before you finally topple the tree. Repeat this for several trees; you want as much wood as you can find. Keep an eye on the sun above you, though -- when it is about two-thirds of the way across the screen, you need to think about building some kind of shelter for yourself.
While you're chopping down trees, slimes will occasionally spawn and start pestering you; you'll need to switch to your copper shortsword to kill them (your axe will likely only do 1 damage per hit and they have 30+ HP). They will drop gel; you need these.
Once you've found a good flat stretch of land, and you've gotten at least a few hundred wood on you, it is time to think about building a home. Start by selecting the wood (hit Escape to see your full inventory, you might want to move some of those items off the hotbar), and clicking on the ground next to you to start a floor. You can then get up ontop of the wood to place the rest of the floor. How large you make the house is up to you, but you will want at least 6-8 blocks for the floor. Once you've made the floor, go to one end and place 4 blocks of wood ontop of it, vertically. Then once you've done this, start a ceiling ontop of the wall you made, and continue building over towards the other end of the floor. If you did it right, there should be a full block between the top of your head and the ceiling. On the other end, place a single block of wood down from the ceiling so that the end of the floor and the end of the ceiling has a gap of 3 blocks (the exact height of your character).
Once this is done, hit escape. You'll notice a list of items in the bottom-left underneath your inventory. You can scroll this list up or down with the mousewheel; you will want to select a Workbench. Click on this and you will make one Workbench. Place the workbench near the wall (but not up against it). Take a few steps away from the workbench, and then make sure you are facing the workbench and then open your crafting list if it isn't already open, and make a Chair (make sure you are standing next to the workbench, or the chair will not appear in the list of items to make!). Click on the ground right next to the workbench and you should place the chair right next to the workbench, facing it. If you were facing away from the workbench when you placed the chair, the chair will be facing away from the workbench and it might look a touch silly. To fix this, select your pickaxe and hit the chair with it (don't worry, you won't break it!). When you do this, you will pick the chair up just like you did the wood earlier. Then you simply open your inventory, select the chair, and place it again hopefully right this time.
Now, open your inventory again, and craft as many torches as you can; hopefully you've gotten at least a few gel from the slimes you killed. Place two torches -- one in each top corner. Next, stand next to the workbench and make a Door. Placing a door is slightly more tricky than the other items you've placed thusfar -- you need to have exactly a 3-block gap with a solid object at the top and bottom. If you built the room right, you should already have this. Have the door selected, and click on the space just below the top of the gap and you should place the door. To open the door, simply right click on it. Doors open both ways; which way you open the door depends on which way you were facing when you clicked on it. This comes in handy later, if you ever accidentally place a piece of furniture up against a door; simply turn your back to the door to open it the other way.
By the time you've done all of this, it is probably getting dark out! This is dangerous for a newbie with no equipment. Select your pickaxe and dig a hole right in front of your door; it needs to be two blocks wide by at least 3 blocks deep, but don't dig it so deep you can't jump back out of it. The reason why I suggest doing this is simple: Zombies will spawn at night, and they can break your door down. However, they can't if they can't stand right next to it. They'll fall down the hole and try jumping up at the door which will not allow them to break it down which gives you complete safety (at least for now; later enemies will have ways to get into your house).
A house frame with chair, workbench, door, torches, and zombie-proof pit.
If night has indeed fallen (the music will change), go into your house, close the door and go to your workbench and make a Wooden Broadsword. If the name of the broadsword is in grey font and has a word like "Blunt", "Annoying", etc, then make another one. Weapons have random prefixes; some are bad. Also, look at the stats; it'll tell you if it has good or bad stats. If you wanted to, you could try to fish for good stats on your sword but it really isn't necessary. Also, if you have enough torches, make a campfire and stick it somewhere in your house, assuming there is room to do so. This will cause you to regenerate health more quickly if you are near it.
Once you've made your sword, you have a choice: The zombies (and the flying eyes) drop items you need, but they are strong and will probably kill you if you're not experienced or comfortable with the game by now. If you die, you will drop a gravestone and a portion of your money where you died and you'll respawn at your spawn point (which is usually somewhere on the surface at the center of the world), unless you accidentally set your character to Hardcore during character creation. You don't really lose anything by dying (since you have almost no money by this point). You can use a pickaxe on the gravestones to get rid of them. The Zombies can drop a variety of items, but the thing you're looking for is a Shackle; this is an accessory that gives you 1 Defense, and can have up to +4 Defense with the right prefix (Warding). A Warding Shackle gives 5 Defense, which is nearly half of the defense of a suit of Silver/Tungsten Armor! They can also drop Zombie Arms (vary rarely) which does surprising damage. The floating eyes will be much harder for you to kill at this point, but they drop Lens which will be very valuable later; you'll likely need at least 6 eventually. If you don't wish to risk dying, you can simply stay in your house until Night is over.
Once the "Night" Music stops and the "Day Music" starts, any flying eyes will leave, and the zombies will wander around until they eventually go offscreen and eventually disappear. Go out of your house, and look for some stone and use your pickaxe to gather some stone (while killing any slimes you see). You'll want a lot of it; at least 50+ if you can find enough. Go back to your house, make any torches you can, and see if a Furnace is available. You need 3 Torches, 4 Wood, and 20 Stone Blocks to make a Furnace. Once you've made this, place it somewhere in your house. If you're running out of room, you made your house too small. To expand it, simply extend the floor and ceiling past the door 10-20 blocks more, and put another door in there (leave the first door there!), along with another workbench, and another chair, and more torches.
Go to a workbench, and if you've any stone left, you'll see "Stone Wall" listed in your craftable materials. Make as many of those as you can, and start placing them. These are background walls; you can place them inbehind the walls, and furniture without disturbing them. You'll want to fill the entire house with this wall material. Once you've done so, you may notice that the guy that was next to you (the Guide) will eventually wander into the house. You can also hit escape and click on the little house icon near the equipment boxes on the right side of the screen and then click on the inside of the two rooms, it'll say whether or not it is valid housing.
A finished house, with background wall. The NPC will move into the house whenever I save & exit, or, when you go offscreen. During Nighttime and Rain, the NPC will stand in one spot somewhere in the house, but will wander around during the daytime.
The next thing you should do at this point, is make some more rooms; you'll want at least 5 rooms. If you want to build horizontally, simply extend the walls and ceiling, put another door in, chairs, workbenches, etc. For a house to be valid it needs the following:
-1 Chair
-1 Table-type object (I recommend workbenches; having a workbench in every room allows you to craft basic items nearly anywhere in your house)
-1 Light Source (torches are easiest)
-1 Entrance (Doors or Wooden Platform floor/ceiling)
-1 1 Solid Block to stand on that isn't occupied by furniture (wood platforms do not work for this purpose).
-Must be entirely enclosed, including background wall.
A house may be made of anything, but I highly recommend against making your house out of Dirt, or Stone. The reason comes into play later in the game, when Corruption, Crimson, and Hallow begins to spread through your world. If your house becomes Corrupted with Corruption or Crimson, your NPCs will move out. Dirt and Stone are Corruptable if used as walls; Wood is not. Stone background walls made by the player are not corruptable.
Merely add another 'frame', then mine out the first 3 wooden blocks and place a door.
To build vertically, you need to knock out portions of the ceiling and replace them with Wooden Platforms. Wooden Platforms can be jumped through, but also stood upon. To go down through a wooden platform, simply press the down key while standing on it and they also count as an "entrance". I recommend making these two blocks wide to make them easier to go through. Once you've built vertically, you may want to place wooden platforms on the outside walls of your house, otherwise you won't be able to go around your house without going through it.
Note that I placed 1 block in the center downwards; I'm actually building two rooms here. I just simply need to place a door and furniture, like so:
Note that the Stone Background Blocks are not finished; I ran out of stone and I will need to wait until morning to get some more. Also note the zombie in the pit; he cannot break my door down at all no matter what he tries to do. He'll just harmlessly jump up at the side of the house, as long as the door stays shut (this is why you don't want to make more than one exit from your home so you don't forget to close doors and let monsters into your house). This house will now support 4 NPCs and has a large area for crafting machines.
One final tip about your house: Only make 1 exit door for now. Later on, when invasions happen, you don't want NPCs opening doors and allowing monsters into the home. If you only have 1 entrance, you can easily keep that guarded. Just keep in mind that you will be expanding your house quite often as there are a lot of NPCs you will want to accomodate. You will likely want 1 easily-accessible room to act as your "crafting center"; you'll need some room for all the different crafting machines to be found in the game, as well as space to place treasure chests for item storage. I normally make this "crafting center" room as the entire length of the house, and build smaller rooms above it for the NPCs to move into, but that is of course your decision how you wish to do it.
Once you've gotten a few rooms, it is time to attract the first couple NPCs! NPCs will appear under various conditions, but they will only appear if you have a house available for them to move into (which is why I told you to make all of those houses/rooms above). Start exploring the surface to either side of your house, and if you should come across a large round orange flower, or a blueberry bush, use your pickaxe to harvest it to get either a marigold or blueberries. This should cause the Dye Trader to arrive (if it is currently daytime). Once he arrives, you can now sell all of your useless junk to him: Sell the Marigold/Blueberry (because it is worth a lot of cash at this point), your old copper shortsword if you kept it as well. Hopefully you have at least 50 silver by now. If you do, the Merchant should spawn as well, which is the last major goal of this section of the walkthrough. The Merchant sells you two very important items: A Piggybank (which you may or may not be able to afford yet), and Rope. You can find Rope in various vases and treasure chests, but the bulk of it will come from this very helpful guy. Buy 400-500 rope, or however many you can afford and stick this rope on a hotkey slot. It stacks to 999 and you should always have a good healthy supply of it on you at all times. You could farm some slimes for some money to buy more rope if you wish.
A Marigold! One of these is worth 20 silver alone, almost half of the amount you need to spawn the Merchant. This will also spawn the Dye Trader as noted above, whom you can sell more stuff to (shuriken, etc) to, to get more money.
To use some Rope, select it and click on an empty square right next to a solid object (dirt/stone walls, trees, wooden platforms, nearly anything works). Continue to click that square to add more rope (which will extend the rope downwards until it hits a solid object). You can also build rope upwards by clicking an empty square above the rope, too! Once you've a rope set, you merely need to hold the "up" key while near the rope to latch onto it, which allows you to move up and down freely. You can also build side-to-side using ropes, but wooden platforms are far better for this purpose, as your movement speed side-to-side is slow and enemies can knock you off the ropes until you get an item that prevents knockback.
So there you have it, you are now ready to do some serious exploring. While going through the rest of this guide, I am going to assume that you will be continuing to expand your house; always leave at least 2-3 empty "houses" open for NPCs you meet while you explore, so that they can move in when you meet their conditions. If you get an NPC, build another house so that more can arrive. If an NPC gets killed for any reason, they will spawn the next day provided you continue to meet their conditions.
Part 2: Getting to Know Your World/Gathering
Every world is unique, as Terraria has "Procedurally Generated Worlds". What this means, is that the game randomly creates a world with certain parameters in mind. Assuming you chose a small world as I recommended, your world will always have the following:
1). A Forest Biome near the Center (where you started).
2). Two Oceans, one at either edge of the map.
3). One Dungeon, which is near one of the Oceans.
4). A Jungle (sometimes multiple jungles can spawn).
5). A Corruption, -or- A Crimson, but never both. Sometimes multiples can spawn, and Corruption areas seem to love spawning near Jungles.
6). At least one small desert area.
7). A Lihzarhd Temple (deep in the Jungle)
8). Hell/Underworld (the very bottom of the map)
9). 3 Sky Islands
10). A Snow Biome (Common)
In addition to that, you might get:
1). One or more Beehives
2). A Pyramid (Rare, spawns in the desert)
As you explore, use Ropes and Wooden Platforms (Don't forget to keep your supply of wood flowing!) to bridge large gaps, and to create ways to pass steep cliffs and dangerous drop-offs. Open any treasure chests you can find, preferably emptying the chest altogether even if the items are bad. You can use your pickaxe on the chest to take the chest and place it in your house; I recommend getting several of these to make a storage area.
A Few things to note while exploring the surface:
1). If you run into the Dungeon (it will look somewhat like a castle and have an old man wearing red in it), whatever you do, *do not* go down into the dungeon or you will die, and *do not* talk to the Old Man at night, or he will murder you horribly at this point.
2). If you run into Crimson or Corruption, turn back. These areas are very dangerous at this point and you would very likely get killed.
3). Snow and Ice areas are slippery as they should be; be careful of cliffs and deep holes.
4). If you find a Jungle, make sure you stay at the surface. I recommend turning back for now, if you find one. The enemies in the Jungle Underground are very powerful and would make short work of you.
5). Grab any ore you find: Copper, Tin, Iron, Lead, Silver, Tungsten, Gold, Platinum. You'll occasionally find small bits of these at the surface level.
6). Fallen Stars at Night: 5 Stars makes 1 Mana Crystal. Use this, to permanently increase your mana maximum by 20 (1 blue star). Maximum of 200.
This is the Corruption. You are not ready for this; going in here will very likely get you killed at this point unless you seriously know what you're doing. A Crimson area looks very similar, only the trees are red instead of purple and the background is a bit different. They both have their unique music that plays when you get close.
If you find a Desert Area, use your axe on some cactus if it is safe to do so (some desert enemies spawn that hurt nearly as much as demon eyes do, but sometimes you can grab a few cactus plants with minimal trouble). Take these cactus blocks back to your workbench to make a Cactus Sword, which has 2 more damage and slightly better knockback and range!
Once you've mapped out as much of the surface as is safe, you should have found at least one or two entrances to caves by now. Make sure you've a stack of 99 torches, some gel and wood to make more, and clear out all of your excess items and dive right in! Here are some things to note while you do:
1). Ropes, ropes, ropes. Don't try to dive in without first dropping a rope.
2). Torches are required; this game is very realistic about light. You can't see without light.
3). Be careful of water, drowning is very easy to do if you're not avoiding the big water pools.
4). Sometimes you need to tunnel with your pickaxe, just be careful you're not about to dig into a huge underground lake that will flood your tunnel. If this happens, try to very quickly dig two blocks directly above you. If done correctly, this will make an air pocket that you can catch your breath with. While tunnelling horizontally, it is a good idea to place several of these air pockets (along with a torch to keep it lit) along the way in case you do accidentally break into a large pocket of water.
5). Keep your eye out for anything that looks like a log cabin. These almost always have golden treasure chests inside (or ice chests if you're in the ice underground). These usually have incredibly valuable items in them (usually accessories).
With that in mind, gather all the ore and items you can. If you are getting full, you can return to your house by either using a Return Potion, the Magic Mirror if you find one, or you can hit escape, go into Settings, and click Save and Exit, and then reload your character and your world. Be warned, doing this will cause any items laying around on the ground that aren't placed to disappear forever.
You will get a ton of items while exploring the underground:
1). Ore: Smelt all ore into bars (open your crafting window while standing near a furnace) except Iron or Lead. Do not smelt any more iron/lead than you need. You will want to smelt 8 Iron/Lead Bars: 5 of these are for an Iron/Lead Anvil, 1 of them is for Chains, and the last two are for a Sawmill.
2). Throwing Knives/Shurken/Bombs: I always sell these. You can try using them if you want, but I normally find the money more valuable. You will want to keep at least 1 bomb, grenade, or dynamite in one of your treasure chests at all times. Picking any sort of explosive up will spawn the Demolitionist NPC who will move into a house provided you have one available. Keep a bomb in one of your treasure chests in case he gets killed, that way you can merely retrieve the bomb to cause him to spawn again.
3). Gemstones: There are a variety of gemstones; keep all gemstones you get until you have 15 of any given color. Once you have those, you can create a grappling hook made of that kind of gemstone. If you find a Hook (dropped from Skeletons and Piranhas) you can instead use 3 chains to make a grappling hook instead. Once you have a grappling hook, you can sell the gemstones or keep them in a chest, either/or. They are used in a few recipes, show them to the Guide and then decide for yourself if you wish to keep them or not.
4). Accessories: You will want to equip accessories as you find them until your accessory slots are full. Some of the more valuable ones at this point in the game include Cloud-in-a-Bottle, Hermes Shoes, Flurry Boots, Shoe Spikes, Climbing Claws, Band of Regeneration. There are also Aglets in some of these chests; you will want to keep one in your treasure chest (unless you have an open slot for it, might as well wear it). Aglets don't give you that much of a boost (unless it has +Defense on it!), so it is probably not worth using one over the other accessories I listed above. It is used in a crafting recipe, however, and you will want to hang onto it.
5). Glowsticks: You might find shallow pools of water with jellyfish, or you might find these in vases or treasure chests. You'll want to keep a full stack on you. When you select them and click, you'll toss one and it will stay lit for several minutes and unlike torches, they work underwater. You can also hold the Shift key down to pull out a glowstick temporarily without using it to light the area around you if you fell into water and can't see. Like torches, they only stack to 99. If you get more than that, you can sell the excess as there's really no reason to keep more than 99 glowsticks.
6). Enchanted/Ice Boomerang: This is a fairly nice early-game re-usable ranged weapon. It will likely do far more damage than your wooden sword is capable of doing and can provide small amounts of light temporarily while you throw it if you should happen to end up needing to see what you can't reach with a torch.
7). Life Crystals. These are red heart-shaped stones that pulsate. Whack it with your pickaxe and it will drop a Life Crystal. Use this to increase your maximum HP. Beware: *do not* increase your HP maximum past 180 yet. If you are lucky enough to find more crystals, hang onto them. Increasing your HP to 120 will cause the Nurse to spawn and move into your house if there's one available.
8). Bone Sword. Rare drop off of skeletons. If you get one of these, consider yourself very lucky.
9). Cobwebs: Save these for later; stick em in a treasure chest. They'll stack to 999 so you won't need more than 1 slot to carry them for a long time.
10). Glass Bottles: Keep these, you'll need lots of them later.
11). Clay: You'll want to keep some of this for later.
12). Glowing Mushrooms: Keep some of these, you'll need them later too.
So after you've done some exploring of the underground, you will hopefully have a good bit of ore. Other than making an Anvil, and a Sawmill, you will want to make the following:
1). A new Pickaxe. I recommend spending your Gold/Platinum on this first. The sooner you get a good pickaxe, the faster you'll be able to explore the underground.
2). A bow. You will need a bow very shortly. If you don't have any more Gold/Platinum left, then I recommend using Silver/Tungsten instead.
3). Armor. This will likely take you the longest to get ahold of: Armor takes a Lot of bars. Don't bother using Copper for armor; the defense is simply too low. Don't waste Iron or Lead on it either; you'd be far better off to use it for Ironskin Potions instead. Most likely, you'll use Tungsten or Silver; make the Body First, then the Helmet, and Then the Legs if you happen to have enough ore laying around.
4). A Sword. I wouldn't bother making a sword; you'll be replacing it very soon.
Once you've gotten a Pickaxe, a Bow, and some Armor, you may want to take a side-road and make yourself some furniture: Assuming you've made a Sawmill, standing near it will allow you to make a Loom. Once you've made a Loom, you can now make Silk out of Cobwebs. Once you've made those, you can now make a Bed. Assuming you've placed the Bed in a valid house, you can right-click the bed to set this as your new spawn point (whenever you load the game up, if you get killed, or if you use a Return Potion/Magic Mirror).
With that done, here's a checklist of things you should have:
1). A Gold or Platinum Pickaxe.
2). A Gold/Platinum, or, Silver/Tungsten Bow.
3). A Suit of Armor made of Gold/Platinum or Silver/Tungsten.
4). At least 160 maximum health.
5). At least 12 Lens.
6). 100+ Stone.
7). 300+ Wood.
8). 100+ Gel.
9). Some Healing Potions.
Now it is time to make some arrows. Standing near a Workbench, you can combine a stone and a wood to make 5 arrows. The amounts of materials I listed above is generous, especially since you should have found several wooden arrows in vases and chests, but it still can't hurt to be cautious. You will want to make wooden arrows until you have 500-700 of them. Once you've made those, make sure you have lots of Torches, and then make Fire Arrows (1 torch + 5 Wooden Arrows = 5 Fire Arrows). Alternatively, you can buy arrows (and torches!) from the Merchant NPC if you don't mind spending a bit of cash.
Go out and replenish your stock of wood and torches if you're running low at this point, and then go left or right of your house, and look for a cliff or some other raised landmark, and build a wooden platform bridge, but this time, you will want to place a stone, dirt, or wood block every 10 wooden platforms or so, and stick a torch on that one block. Drop some rope down from the platform on either end of it. Ideally, you'll want the platform to be about a screen length and a half, and on either end, place 2-3 blocks high so that you do not accidentally run off either end of this platform (which will cause you to fall and hurt yourself). This will be your first "Boss Arena". Place a Campfire in the middle of this bridge.
Not the best place to put an Arena for two reasons: 1, I like the ground to be just slightly off-screen and 2, too close to the Corruption area. But for now, this location will do as it was one of the only viable places to put one on this particular world.
Here is the Arena, finished and ready for the first boss. Note, I filled in the lake completely so that I will not accidentally fall into it, and the torches are spaced to where they will keep the whole area lit so I can see the battle raging on and I can see my enemy at all times during even a New Moon night.
With that, you're ready for the next part!
Part 3: Your First Boss!
With the Boss Arena complete, there is only one more thing you need to do: You will want a few buff potions. To make Potions, you need to make an Alchemy Station. To do this, take a Glass Bottle and place it ontop of any workbench. If you haven't found any glass bottles, mine some sand and make glass at the furnace, and then turn the glass into bottles. You'll want 10+ bottles for now. Go find some water, and stand near it. Open your crafting inventory and you should be able to make Bottles of Water. Once you've done that, it is time to look for some Dayblooms. Only do this during the day! Use your pickaxe on the small round yellow flowers you see scattered around (NOT the ones taller than you, those are Sunflowers and you will want to leave those alone!). You should get Dayblooms and Daybloom Seeds. If you found any Clay, make some Pots. Place the Pots somewhere near your house and then place the Daybloom Seeds on the Pots to start growing Dayblooms. You'll want to only harvest the Dayblooms during the day, to get seeds back from them. If you harvest them at night, you won't get any seeds.
With Dayblooms, you can make many Potions:
1). Archery Potion: Bottle of Water + Daybloom + Lens (Make sure to keep at least 12 of these!)
2). Ironskin Potion: Iron/Lead Ore + Bottle of Water + Daybloom
3). Regeneration Potion: Bottle of Water + Mushroom + Daybloom
4). Lesser Healing Potion: Bottle of Water + 2 Gel + Mushroom
5). Healing Potion: Lesser Healing Potion + Glowing Mushroom
I wouldn't bother making Healing Potions unless you had less than 10 of them or if you really have extra bottles of water laying around or something. Opening treasure chests and breaking vases should easily get you the maximum stack of 30 easily.
With at least 1 of each buff potion on hand, and some healing potions, now it is time to fight your first boss. Get your 12 Lens, and find a Demon/Blood Altar. There's usually one underground near your house. Keep looking until you find one. While standing near it, open your craft window, and you should see the option to craft a Suspicious Looking Eye. Make two of those now, with the 12 Lens I told you to save.
Yay! I found a Demon Altar, finally! (took a good 45min of looking for it to find it) There's only one problem though: it is submerged in Water. We'll have to see about That, won't we?
I simply enlarged the pit underneath (see minimap), then used some stone to block the passage behind me so that it doesn't get flooded. The chamber I dug out wasn't quite big enough, so I had to dig another one on the other side of the altar, like so:
Last step, put a stone floor so I don't accidentally fall into the water reservoir, and Voila! Done. Afterwards, I simply dug upwards so I don't have to navigate a maze of tunnels anytime I need to use this altar for anything.
This map screenshot gives you an idea of how far away from the center of the world this altar was. I built my house right next to my spawn point and you'll note the depth -- almost deep enough to get Underground music, but not quite. Most worlds spawn at least 1 altar in such a location and you can see them from a good distance away, so keep searching for it!
You should have at least 1 gold on you by now. If you haven't bought a Piggy Bank yet, do so now. Once you've bought a Piggy Bank, place it on a workbench like you did the Bottle. You can now use that Piggy Bank as a storage chest; I highly recommend regularly dumping your money in here before going out on a trip, or doing anything remotely dangerous. If you die, money will not be taken out of your Piggy Bank. You can also buy a 2nd Piggy Bank to carry around on you, along with a workbench; you can access the Piggy Bank's contents using any Piggy Bank -- the one in your house, and the one you carry around on you act as one and the same, which is convenient for increasing your carrying capacity.
Go back to your house, get rid of all mushrooms and lesser healing potions and if you have 180 Health and some Life Crystals from exploring the underground, go ahead and use those Life Crystals now to boost your health up. Once you've done this, go to your Boss Arena, and wait for Night to fall. If you have 200+ Health Maximum, the Boss (Eye of Cthulhu) can now spawn randomly until you kill him (which is why you didn't want to increase your life this high earlier). Wait about 30 or seconds after the Night music begins to play and if you don't see a message that you are being watched, go ahead and use one of the Suspicious-Looking Eyes. You will only want to use *one*, and this causes the boss to spawn immediately and he will attack you within seconds. Hit the "B" key to drink all 3 of your buff potions simultaneously and Select your Bow.
Killing the Eye is pretty easy; merely run back and forth on the platform while shooting arrows at him. If you made Fire Arrows like I suggested, you'll set the boss on fire and he will continually take damage. A Silver/Tungsten Bow is strong enough to kill the little eyes in one shot usually, and they can drop hearts. Use a Healing Potion by hitting the "H" key anytime you fall 100 health below your maximum health. Don't wait until you're about to die; potions have a cooldown. Once you reduce him to 1400 (Half) of his health, he'll spin around and change; he'll have teeth where his eye was. The little eyes will cease to spawn, but he will try to ram you over and over again and you will take more damage. If you used an Ironskin Potion, and are wearing Silver/Tungsten or better armor, you still shouldn't take much of any damage. Just keep plugging him with arrows until he dies. Once he dies, he will drop a large number of Money, Unholy Arrows, Demonite/Crimtane Ore, and a bunch of Hearts.
The Eye's second form. I actually fought the eye twice in this night, with nothing but a normal Tungsten Bow and Fire Arrows, easily killing the Eye both times, with at least 2+ minutes to spare. I started about 10 seconds after the music changed to the BGM heard at Night.
Take the Demonite/Crimtane back to your house, smelt it into bars and make yourself a Demon/Tendon Bow. If it comes with bad stats, you'll have to make another one if you have enough Ore. If the Bow turned out good, and if you have enough, make yourself a Sword as well. There's no need to make the Axe. I know that copper axe is getting old, but trust me, you'll have a much better one soon without wasting Demonite/Crimtane.
Wait for the rest of Night to pass, optionally killing more zombies and eyes trying to get a Warding Shackle and/or more Lens. Once Morning Comes, pick up any arrows laying around from your battle, replenish your stock of Fire Arrows, and kill some Slimes while waiting for Night to fall again. The Dryad should move in during the day if you've a house open for her. Once you've fought the eye, you might not need buff potions again (especially now that you've got a significantly more powerful bow which should kill it noticeably faster), but that is up to you. When Night comes again, go to your Arena, and use the other Suspicious-Looking Eye to summon the Boss again, and proceed to kill him again, collecting the drops. Smelt your Bars, and stick the bars in storage for now.
With that, you're done with this part!
Part 4: Getting the Other Half (World #2).
Every World in Terraria can be placed into two groups: Crimson Worlds, and Corrupted Worlds. Your World can only be one, *or* the other, but never both as I've said above. If you started with a Corruption World, now would be an excellent time to start a new world with the same character (don't worry about your other world, it will continue to remain in the same condition you left it!). Start a new world, and go left or right of your starting location until you reach a Crimson or Corrupted Area. If you had a Corruption on your first world, you'll want to find some Crimson in this world and vice-versa: If you started with Crimson, you're looking for a Corruption. If you got the same thing again, you can delete the world and make another one, and keep doing this until it gives you the right one. Note you will have to chop trees down and build houses in this new world if you want to actually do any long-term work in this world.
So, why two worlds?
There are several reasons:
1). The Crimson Armor is much more powerful and effective than the Shadow Armor.
2). The Vilethorn is an excellent early-game magic weapon, and is only available in Corrupted Worlds (The Crimson Equivalent is a spear that doesn't have anything special).
3). The Panic Necklace, when combined with a Honeycomb, is a decent early-game accessory but is only available in Crimson Worlds.
4). Two Endgame Weapons: Vampire Knives and Scourge of the Corruptor can only be obtained in Crimson and Corrupted Worlds respectively.
With this in mind, I highly recommend that you do the next part in a Corrupted World first, and then a Crimson World later. The 2nd boss in the Corrupted World (Eater of Worlds) is a much, much easier fight than the Brain of Cthulhu, and wearing the Shadow Armor while fighting the Brain will give you a much better chance at defeating it the first time.
With that said, if your first world was a Crimson World, go ahead and start a Corrupted World (making/deleting new worlds until you get one). Build a good starting house with enough houses for everybody to move in, and take some bombs with you so the demolitionist will spawn, and make sure you've got 50 silver so the Merchant will spawn. If you kept a Marigold or Blueberry, you can spawn the Painter too. You'll have to kill the Eye of Cthulhu again to get the Dryad to spawn again. Keep in mind the Eye can spawn at any nighttime if you have 200 or more Maximum Life, so you might want to build a Boss Arena (like you did earlier) before starting on your house in case you get that "You are being watched!" message. You also might want to make sure you have enough arrows to kill it, too.
Part 5: The Eater of Worlds, Nightmare Pickaxe, Shadow Armor.
Now that you've got a house, you've killed the Eye of Chulthu in a Corruption World (assuming your first wasn't the Corruption), you're ready to take on the 2nd boss. Go to the Dryad, and buy 30-50 Purification Powders. This will take a small chunk of cash to do, but you'll be needing them as you can't go on without them. Make sure you have no less than 300 ropes and a whole stack of wood platforms, along with a full stack of torches. You also need a Grappling Hook, I highly recommend against attempting this without one. You will also need to make a Wooden Hammer, do this before leaving your house. If you don't have at least 4-5 Mana Stars, I suggest farming them at night, every 5 Fallen Stars will make 1 Mana Star. Make it, and use it to permanently boost your MP Maximum.
Go to the Corruption Area. You'll notice there are many chasms going straight down; build Wooden Platforms over the top of each, and drop ropes down them. Place torches on the background wall to keep things lit. Most of these will be dead-ends, some of them having water at the bottom. You're looking for a horizontal cave system, and it might take a few holes until you find which one leads to the horizontal cave. Once you've found it, look for orbs in the wall; they'll have a hole in the wall around them. Use your Purification Powder to turn the Purple Ebonstone Blocks into regular Stone Blocks that you can mine with your pickaxe. Once you reach the Orb, use the Wooden Hammer on it to break it and receive one of four items: A Vilethorn, a Musket, a Shadow Orb, or a Ball o' Hurt. The Shadow Orb is mildly useful, but doesn't provide enough light to be that valuable of an item. The Vilethorn is insanely useful; equip that to a hotbar slot ASAP. The Musket will cause the Arms Dealer to spawn, so you will want to hold onto this for your other world and/or if the Arms Dealer gets killed.
Use your sword to cut the thorny vines you see to my left in the screenshot. Might also want to pick up the fire arrows, and don't forget to collect any mushrooms (like the one you see near the 2nd tree from the left).
Whoops, dead end. Wrong Guess. Gotta try another hole.
Finally found the horizontal cave system. This setup looks fairly standard, though the 2nd deep hole is a bit uncommon; I've only seen this a couple times. There are only 4 orbs here, however there's another Corruption area on the other end of the map, and I found 5+ more orbs over there.
Once you break an Orb, there's a chance a Meteorite will land, and there's also a chance that a Goblin Army will attack you. These both come with purple warnings in the bottom-right screen.
Go ahead and break a second orb to get another item (hopefully a Vilethorn if you didn't get one the first time), but beware breaking a third orb! As soon as you break the third orb, the Eater of Worlds will spawn and attack you. Tunnel down to the third orb, but DON'T break it yet. Use Ropes and Wooden Platforms to make a quick escape route back up to the horizontal cave, and use wooden platforms to give you a nice wide space to run back and forth on. As for buff potions, you probably shouldn't need them, but you may want to use at least an ironskin potion if you're not sure and have extra materials laying around. Don't bother with Archery Potions, you're not going to be using your bow on this worm. Regeneration Potion is your choice, though if you kill its segments fast enough, it will drop more hearts than you could possibly need.
Once you're ready to fight the worm, go down and break the third Orb, and you'll get the warning that the Eater of Worlds has awoken. Hurry and get to your platform, and equip your Vilethorn. Hopefully by now you have at least 4-5 Mana Stars. The Vilethorn is a short-range projectile that goes through walls, and damages everything that touches it, while it touches it. If you shoot it at the worm so that you hit several segments, you will do astounding damage and kill it very quickly. Each segment killed will drop Demonite Ore, and Shadow Scales, along with a lot of blue stars and hearts. Just wail away with the Vilethorn until it is dead. If you run out of mana, switch to your sword and swing at the segments, but try to avoid its body and especially its head while you fight it.
Once you've killed the worm (or you got killed by the worm), go back to your house and smelt all of the Demonite into Bars. The first thing you will want to make is the Nightmare Pickaxe. With this Pickaxe, you can mine Ebonstone without using Purification Powder. It will also mine Hellstone and Dungeon Blocks too, but those will come later. If you have any Demonite/Scales left over, feel free to make yourself some Shadow Armor. Again, don't bother making the Axe or the Hammer.
It is very unlikely, even with a full kill, that you'll have both the Pickaxe and the whole suit of armor. Go back to the Corruption once more after taking care of your inventory, and go smash some more orbs. You'll need to smash another 3 orbs to summon the worm again. If you run out of orbs, you can instead summon the worm by making Worm Food. To make a Worm Food, gather 6 Vile Mushrooms and 15 Rotten Chunks (that are dropped by the flying monsters in the Corruption). Go to your Alchemy Station to craft the Vile Mushrooms into Vile Powder and then find a Demon Altar (there are plenty of them in the Corruption) to make the Worm Food from the 30 Powder and 15 Rotten Chunks. Make sure you are in the Corruption at night before trying to use the Worm Food.
Once you've killed the worm a second time, you should have enough Demonite and Shadow Scales to make the full suit of Shadow Armor. Also note that there's a rare chance random enemies in the Corruption can also drop pieces of this armor that have the same functionality but slightly different coloration.
Once you've made all the armor and your pickaxe, wait a full day before doing anything else: If a Meteorite fell, you will want to go mine it. If a Goblin Army attacks, you'll need to fight them off.
Part 6: Meteorite, Goblin Army, Blood Moons, Sky Islands.
Now that you've broken an Orb, these three things can happen randomly (the chance of it happening is far greater on the first day following breaking an orb, followed by a much smaller chance thereafter). If a Meteorite Falls, you'll have to travel the world looking for it. You'll know when you see it: There'll be lots of brightly glowing orange bars, and the music will change from its normal to something spooky, and flaming chunks of rock will fly at you trying to kill you.
Whatever you do, do not touch the meteorite rocks with your body; use your Nightmare Pickaxe, but don't touch the block with your feet, or any part of your body as it will do damage and set you on fire. Usually, the Nightmare Pickaxe is strong enough to kill the Meteor Heads flying around, but sometimes there's too many of them to kill with the pickaxe. Avoid getting hit by these guys; they hurt. The easiest way to do it is to build a stone cover ontop of the meteorite blocks. While standing on the safe stone, you can mine two blocks underneath the stone platform you just placed. Place a second stone platform ontop of the meteorite blocks, and then mine the first stone platform out, and continue doing that until the meteorite is no more. You may have to switch to your sword occasionally to fend off the Meteor Heads that will attack you until you've mined most of the meteorite out. It may take a few deaths before you get the hang of this; this is good practice for the later dungeon you'll be facing, and also the Underworld.
Well, I found the Meteorite! The orange blocks will set you on fire if you so much as barely touch them. So, we need to carefully mine it. I recommend bringing a bunch of solid blocks (dirt, stone whatever), like so:
The hardest part is trying to flatten the two ends out, once you have that done, it only gets easier from there:
I'm removing my first safety bridge now that I've built a second. Once I've done that, then I can mine 2 blocks underneath me, and then place another safety bridge, rinse, repeat:
In this Screenshot, I am building a new safety bridge, then I will remove the one I'm currently standing on while fighting the meteor heads off if they get too close that my pickaxe can't fend them off.
At this point, the meteorite music stopped playing, and the desert theme started playing again. At this point, the meteor heads will no longer spawn, which makes collecting the rest easy. I easily got enough meteorite out of this to make my hamaxe, a space gun, and still have 40 bars left over! While I was doing this, another meteorite landed not too far away. I simply blocked it off with dirt because I didn't really feel like mining it right now.
Once you mined the meteorite out, go back to your house and smelt all the meteorite into bars. Make a Meteor Hamaxe (FINALLY, a New Axe and better Hammer!!) and a Space Gun if you have 2 stars. The Space Gun is a magic damage weapon (which we're not gearing up for), but it has plenty of uses so it is good to keep one on you. It is a ranged weapon that uses mana instead of ammunition, and its lasers will light the way in dark caves. You can also fire the lasers in the air and listen for impacts to help you find the sky islands. There's Meteor Armor that you can make too, but this is a magic-oriented set, and as we are doing a melee character, this guide is going to assume you won't be using that. Crimson Armor is better, anyway.
You might or might want to start your underground house at this point: The meteor hamaxe is why you wanted to wait, and now that you have it, breaking out the natural backwalls to put your own in will be much easier than with any lower hammer. The reasons for doing this now are likely storage clutter; the more boxes you have filled with junk in your temporary house (assuming you want to move your house at all) will take longer to move the longer you wait. If you do wish to start your underground, more permanent house now, scroll down to the "More Hardmode Preparations" section of this guide.
At some point, you may get the message that a Goblin Army is approaching from the East (or West). You will want to find a place with some cover (some small little dips in the terrain) near your house, but not in view of your house. Very shortly, you'll get the boss music, and a LOT of goblins will pile in to attack you. Most of them are no match for your Blood Butcherer/Light's Bane Swords, though the Archers will wear you down with their arrows, and the Sorcerers can shoot through walls. Your sword can break their projectiles before they hit you, though. The Sorcerers are capable of teleporting inside of your house; make sure you keep your house off-screen or your NPCs may end up getting killed to sorcerer magic spells. If you want to make the battle a little easier, you can make and drop a campfire somewhere there's cover from the arrows for some constant HP regen. Once you kill enough of them, the goblins will go limping home and they will stop spawning. When this happens, the game will tell you that the army has been defeated. Defeating the Goblin Army causes the Goblin NPC to spawn in the Dungeon (he can also rarely spawn in random areas underground); you won't find him until you beat the Goblin Army. He won't move into your house until you go to the dungeon and rescue him, but we're not quite ready for that yet, so we'll come back to that later.
I made myself a quick temporary shelter to recover some health in case I was going to have any trouble with this invasion when it happened (I was building my house at the time). Basically, you just throw up a quick 3-sided enclosure with another wall a little further away to make it impossible for the ranged attackers (except the sorcerer) to shoot at you. Anything that jumps down in there can be killed off quickly with a good sword (like the Starfury!). It turns out I didn't need this little shelter; I never came in danger of dying at all during this particular attack.
Sometimes, during the Night, you'll get a message that "A Blood Moon is on the Rise!". The music will change to the same music you hear near Meteorites, and there'll be a red hue in the sky, as well as the moon. Get back to your house ASAP! Many zombies will appear, and more than usual demon eyes as well. With the sword you made from the Eye's drops, and the Shadow Armor, they have no chance of actually hurting you whatsoever unless you get careless. This is also a good time to practice with the Space Gun -- its projectiles pierce through enemies; you can kill several zombies at once by shooting lasers through them. Killing all of those eyes should net you some Lens, and if you still don't have a Warding Shackle, you might get one by the time Night is over. Once the Night is over, the Blood Moon is done and everything returns to normal. Keep in mind that Blood Moons increase enemy spawns of the area you're in; since you were in the Forest, you got Zombies and Eyes. If you're somewhere dangerous like the Dungeon, Jungle, or the Underworld, the enemies that spawn there will be the normal enemies for the area, and you may end up getting overwhelmed. Once you enter Hardmode, however, Blood Moons are far, far worse no matter where you are....
The last thing to do in this part of the guide, is try to locate all of the Sky Islands; there are more of them the larger your world is (3 for a small, and 4-5? for a Large). You can use your Space Gun to fire up into the air and listen for impacts. You can also jump up and try to listen for sound of falling water, or watch for harpies. Once you think you've found a Sky Island, build a Rope straight up and hopefully, you were right! Whatever you do, do NOT use Wood Platforms up here. You'll block Meteorites, and it will be harder to get Falling Stars (since they'll fall on the wood platforms rather than going down to the ground where you're more likely to see them). This is one of the few times I'll recommend using horizontal ropes. Just be careful not to fall off! If you fall and have a Cloud-in-a-Bottle, you can save your double jump for when you almost hit the ground to avoid dying to the fall. Once you find the three Islands, each will have a small shrine with a chest. I recommend taking one of these chests; it will help distinguish it from other chests, making it easier to remember what you put in that chest. There are several items one can get up here: A Sky Mill, A Starfury, A Shiny Red Ballon, and a Lucky Horseshoe. The Balloon and Horseshoe will likely get stashed unless you still have open slots in your accessories. The Sky Mill can be placed in your house as a crafting station (it allows you to make furniture from the unique blocks up there), and the Starfury is quite a powerful sword that can multi-hit and hit multiple enemies nearby.
I got incredibly lucky! I suppose this is the game's way for saying "Sorry about that Broken Space Gun and that Small Hamaxe". This is such an awesome weapon, not so much for the stars it rains down (those are nice), but for the fact that when said stars hit the ground, they light up the ground underneath them. This makes it very easy to find underground caves and to map stuff out.
Part 7: The Brain of Cthulhu and the Crimson Armor
Hopefully, you found a Starfury! If not, you can do without it. You have 3 more chances: There should be 3 Sky Islands in the world with the Crimson, so go ahead and find those and open those 3 chests too. Hopefully, if you failed to get a Starfury on the Corruption world, you'll get one in the Crimson World instead.
Once you've opened the Skyware Chests in the Crimson World, now's the time to go find the Crimson. Again, make sure you're well-supplied (bring an Archery Potion this time), and go to the Crimson. The Crimson Tunnels are much easier to navigate than the Corruption Tunnels, though you may still want some ropes and platforms. There'll be a single winding cave that opens into a big round room, and this round room will have several "fingers" that lead to a Demon Heart, which acts the same way the Orbs did. Every 3 Demon Hearts Smashed will summon the Brain of Chulthu, just like the Orbs summoned the Eater of Worlds. Smashing Demon Hearts also causes Meteorites, Blood Moons, and Goblin Invasions just like breaking the Orbs did on the Corruption World, which you should be familiar with already.
To make an Arena for the Brain of Chulthu, you will likely want several "floors" of Wood Platforms with Ropes between each and of course torches to see. The Brain is a significantly harder fight than the Eater of Worlds was, but with Shadow Armor, a Space Gun, the Bow and its Fire Arrows, along with Buff Potions, you should be able to prevail. The brain acts a lot like the Eye of Cthulhu did with one major exception: It can teleport around freely. Once damaged down to half health, it will gain a damage boost and try to attack you physically more often.
Once you kill it, it should drop Crimtane Ore and Tissue Samples. You can use these to make the Crimson Armor (which is why you wanted to fight this boss in the first place). Of the Items you get out of breaking Demon Hearts, only the Panic Necklace is really any good. The gun and spear are both too weak and slow to really bother with. The Panic Necklace is best saved till later, stash it in a chest if you get one.
Part 8: Your Hellevator and Obsidian/Hellstone Mining
Usually, people go to the Dungeon Next, but on a few Playthroughs, I was mildly surprised to find that I had an easier time if I went to the Underworld first. Nothing in the Dungeon is going to give you any extra survivability against the enemies in the Underworld, while you can make yourself some incredibly powerful equipment to make the Dungeon (and its entrance boss) far easier.
First thing you will need to do, is begin digging a Hellevator. Shortly offscreen of your house (I recommend 2-3 full screen-lengths away), start digging a two-block wide pit. Make sure this pit is not within view of your house; you don't want Invasion enemies falling down this pit. In fact, if you know you're about to have an invasion, you will probably want to block the pit off with a solid type of block. As you start to dig down, drop ropes down one side of the pit, and place occasional torches on the other side of the pit. Continue digging straight down; this will take a thousand or more rope, so you may need to replenish your rope stock while you do this.
I decided to start my Hellevator here, after looking at the map and looking at different pools of water, cave systems I have already mapped out, etc. Seemed like as good of place as any to start.
If you run into water, try to keep going unless the water is simply too deep. If this occurs, you can dig a large air pocket next to your hellevator and drain the water into it. If you run into a cave room, I recommend building stone or dirt blocks to keep the shaft two-blocks wide (to prevent enemies from spawning and/or knocking you off the rope) but you can leave it open if you want.
Oh no! I hit a HUGE underground lake! What shall we do? We'll start by building vertical walls on either side of the rope:
Then we break the bottom of that and drain the small amount of water that will be in that little tunnel we made.
If there is no air pocket below you, you can simply dig an upside down "L" off to the side of your elevator like I did in this screenshot.
The trickiest part about a Hellevator is dealing with Lava. If you've been following this guide, then you've probably never encountered lava before. Lava acts a lot like water does, only it is "thicker" (it moves slower) and it does a lot of damage and sets you on fire if you touch it. Should you encounter a lava pool on your way down, you will need to find a nearby cave room to get out of the Hellevator and try to approach the lava from below it, and dig a "pipe" for the lava to flow, trying to re-direct the lava to somewhere else. Just make sure you don't break the last block holding the lava pool together until you are ready for it to flow (and you are far away from any possible path the lava could take). It might take some experimentation to do, but you will eventually get the hang of how to do it.
This is the most dangerous thing about building a hellevator. However, this is Terraria, and not even Lava can handle our mighty pickaxes and dirt blocks! Let's prepare a nearby area to hold the lava:
I tunneled underneath the lava some,and I used dirt blocks (see the torch on the vertical dirt block wall) to make sure the lava just doesn't flow everywhere. I left the torch in the middle of the room to show you the room in this screenshot. Normally, you'd want to remove the torch as it will get burned up in the lava. When I'm ready to break the seal, I will need to build a dirt wall right in front of me and break the seal through this wall so I don't touch the lava myself:
With protections in place, I am ready to break the seal and let the lava flow!
And there we have it. The lava has been drained into three smaller puddles off to the side of where the hellevator will be.
In this screenshot, I ran into another small puddle of lava in my way, but there was no nearby room. Similar to what I did with water above, I dug a hole next to the hellevator (beneath the torch). To do this safely, you merely need to stand where I'm standing, and mine a couple blocks out below you so the lava can flow to the right. Might need to do this a couple times to get all of it.
There. This lava will no longer be a problem; the hellevator will miss this pool now.
And, I ran into ANOTHER one! Well, this is easy to handle, too!
Again, I dug a 2 block wide pit next to the pocket of lava (it was underneath where I'm standing, if you compare the two screenshots) and then mined out the right wall and let it flow into the pit. Nothing to it! Just take it slow and careful, and think about where it will flow and you'll be fine.
When you arrive in Hell/Underworld, the background will have lava in it, and the music will change to that spooky meteorite/blood moon theme that you heard earlier and you'll see flaming bats, flaming slimes, imps, and demons.
There is one major rule of the Underworld: Do not, under any circumstances, kill a Voodoo Demon while it is near Lava. Voodoo Demons are those Demons you see carrying a familiar-looking doll in their claws. If you kill one, and the doll falls into the lava, it will summon a boss that you are not ready for yet and it will very likely kill you. If this happens, find somewhere easily accessible and let it kill you. Do not attempt to kill the boss: even if you could kill the boss, it would have permanent consequences for you and your world that you cannot undo: it functions as a Point of No Return.
Otherwise, Imps act like the Goblin Sorcerers you fought earlier (assuming you had a goblin army attack by now) which can be annoying but they die easily, and your pickaxe can easily deal with its projectiles. Don't forget that your Vilethorn can go through walls, if it spawns close enough to you, you can kill it with a few swings of the Vilethorn.
While you're down here, you are looking for two things: Buildings and areas with Dirt that are not covered with Lava. The Buildings will have lots of pots and the occasional Treasure Chest (you can't open these yet, you need a Key that is only found in the Dungeon). You will also see the occasional red-stone Furnace. Use your Nightmare Pickaxe to pick one up (you only need one). This is a Hellforge, and you will need one to make Hellstone Bars.
The other thing you're looking for, is Hellstone. You'll see lots of it down here. BEWARE: Mining a Block of Hellstone turns it into Lava which will act exactly like Lava does! Be careful while mining this stuff. The easiest way to get some Hellstone, is to mine it through the buildings: You can reach through a solid wall and mine two blocks horizontally, or directly underneath you. You can also break through the walls and mine the Ash Blocks. A convenient trick, is to dig a large "Reservoir Pit" underneath a vein of Hellstone, so that when you whack the Hellstone, the Lava will fall harmlessly into the pit below and pool up in it. Just don't fall into the pit yourself, and don't be standing too close to the block you're mining and try to catch the Hellstone as it falls. Once you try it a few times, you should see what I mean.
Step 1: Find a Hellforge. Also, note directly to the left is a bed. If you haven't made one by now, you can pickaxe that one, and put it in your house and it will work exactly the same way as any other bed will (and looks somewhat cooler to boot!)
Here, I found a good sized chunk of Hellstone embedded in the Ash near the walls of a building. Let's mine that, shall we?
I mined all the possible hellstone without breaking the wall, but there's more! Since we need a LOT of Hellstone for what we are about to make, I don't want to leave perfectly good Hellstone sitting there, do I? No, I don't, so let's get more.
We're going to start by digging a big hole underneath where the Hellstone is to create a reservoir and to also drain the current lava near the hellstone you saw in the screenshot above. Careful not to break any of the blocks that make up the wall of the building! You don't want to flood your own space with lava.
Now, we can break through the obsidian bricks and start mining the hellstone, but be sure to stand back so the lava can fall harmlessly into the pit below.
In this screenshot, I used some dirt to build a small platform so I could stand above where the lava would flow while grabbing the remaining Hellstone blocks without touching the resulting lava bits and I also dug out some more room for the lava to flow below.
Once you've got yourself a good bit of Hellstone, you will need Obsidian. To get Obsidian, you need to make Water touch Lava. The easiest way to do this, is to explore the lower caverns and find lava pools. Open your map, and look for a large underground water pool. Once you've found one, navigate to directly underneath it, and without breaking it, dig a two-block wide "pipe" down towards the lava that you found. Make sure you place blocks so that the water cannot escape; once the water touches lava it'll form solid obisidan blocks and then run off to the side, so make sure you place vertical walls to stop the water from escaping once it touches the lava. Once you've done this, break the water pool to drain the water down through your pipe and follow it down to the lava. Anywhere the water touched lava, there will be a black stone block. That's obsidian, and you need that! When you mine an obsidian block and there's water above it, another will immediately form. As you mine the blocks, the Lava and Water will eventually be consumed until you run out of one or the other. Hopefully you got a nice good haul of the stuff; you'll be needing a decent amount.
Once you have that, go back to your house and make an Obsidian Skull and place it in your Treasure Chest. Use the rest of the Obsidian to make Hellstone. From the Hellstone, you will want the following:
1). A Full Set of Hellstone Armor (45 Hellstone Bars)
2). A Molten Pickaxe (20 Hellstone Bars)
3). Fiery Greatsword (20 Hellstone Bars)
4). Molten Fury (15 Hellstone Bars, Optional)
5). Imp Staff (17 Hellstone Bars, highly recommended but Optional)
You might or might not want to keep an extra 10 Hellstone Bars for a Phoenix Blaster, which is a gun you can make once you've been to the Dungeon. It depends if guns are your thing or not. The Molten Fury Bow will make the next boss a pathetic wimp, but with Hellstone Armor he should already be weak already; it is up to you and whether or not you're good at mining Hellstone. The Molten Pickaxe has more Pickaxe Power but swings much slower than the Nightmare Pickaxe; I recommend keeping the Nightmare Pickaxe on you and stashing the Molten Pickaxe (you'll need it a bit later). The Fiery Greatsword does more damage than other swords you may have been using up to this point, but it too is a bit slow. I recommend also stashing this as well. Once you've gotten the above taken care of, it is time for the next part!
Part 9: Bungle in the Jungle (Ivy Whip, Blade of Grass, Bee Queen)
Next, it is time for a trip to the Jungle! What we're looking for, is the materials to make a couple nice pieces of equipment: An Ivy Whip and the Blade of Grass. For the Ivy Whip, you will need to kill Man Eaters (the long vines with jaws on the ends of them) for 3 Vines, and 12 Jungle Spores (those glowing things you find scattered about the Jungle). The Blade of Grass on the other hand takes 15 Stingers (from Bees) and 12 Jungle Spores. Once you get these, you can go back to your House and make the equipment. The Ivy Whip is a Grappling Hook that allows you to fire 3 hooks simultaneously while the Blade of Grass gets stashed in your Treasure Chest for later use.
Sort out your inventory (the Jungle is Notorious for filling you full of junk fast) and go back to the Jungle. This time, you will want to as fully explore it as possible. You should find two major Landmarks in the Jungle: A Beehive and the Lihzarhd Temple. Inside the Beehive, you'll see a Larva. Build a small wooden platform in the beehive, and make sure you have some potions, and then break the Larva which will summon the Queen Bee. If you're wearing Molten Armor like I advised, this boss should be a pushover. Fill her full of arrows when she's floating around, jump to avoid her charge attacks, and stand in the Honey for HP Regen (which stacks with a Campfire, so you can drop one of those somewhere nearby too!). Once she's dead, she has a variety of drops. The Bee Sword is a good alternative to the Starfury, the Bee Gun, and the Honey Comb. She has a few other drops, mostly which are cosmetic. The Honey Comb is an accessory that is best saved till later (especially if you also got a Panic Necklace from breaking Demon Hearts in a Crimson World).
Once you kill the bee, find the Lihzarhd Temple and use Ropes, and your Pickaxe to make a quick way to access it. Note that you won't be able to do anything with the Temple now. Believe it or not, this Temple is the last place in the game you will be going! It is so far away, though. For now, just make sure you have quick access to it. You will also want to map out the rest of the Jungle, placing torches to keep it lit, widening passages between major rooms, adding platforms to make travel fast and easy. You will also want to place Campfires and wooden platform arenas in the major wide open areas for later use. This may take a few hours to do (especially while you're fighting off enemies) but Trust Me -- you'll be glad you did.
Part 10: Skeletron (Finally!) and the Dungeon
Now we are "caught up". Most Players would tell you to do this as soon as you killed the Eater of Worlds and the Brain of Cthulhu and mined the Meteorite, but now you will have a much easier time against Skeletron. Get some Buff Potions, your best Bow (Demonite/Crimtane, or the Molten Fury), your Space Gun, your Starfury/Bee Sword if you have one, and some Torches along with Wooden Platforms. See that Castle Entrance, how it has a ceiling? Go up there, and make a mud block bridge away from the dungeon, about the same size as the one you used for the Eye of Cthulhu. Use blocks to place torches on it, just like you did with the Eye of Cthulhu. Make sure you've got some ropes to climb up onto it fast. The reason I suggest Mud Blocks will come into play later on during Hardmode.
Remember that old guy wearing the red robes, that I said not to talk to? *Now* we are ready for him. Wait until Night, and talk to him. He should have a "Curse" option. When you click that, he will turn into your next boss instantly: a flying skull with two disembodied skeleton hands. The trick to this boss, is you must defeat him before Dawn, or he will kill you instantly, no matter what. With your Molten Armor and/or Molten Bow, this should be pathetically easy, especially if you included an Archery Potion. The Skull acts just like the Eye of Cthulhu did in is second form, and his hands just flop about the place. Kill the hands first, and the skull is pretty much a rehash of the Eye boss's 2nd form, he'll just roar and spin at you over and over again once you get him low. You shouldn't have any trouble if you did all the prep work above that I suggested by this point.
I build the bridge out of Mud and filled some mud in to smooth the structure out to the left. With all of the Hellstone gear, this guy is incredibly easy to kill.
Once he's dead, you are now free to explore the Dungeon. A Tailor (the old man himself!) will also move into your house if you have a room for him to do so.
In the Dungeon, you will find lots of locked golden chests. You need keys to open these. Golden Keys are dropped by Key Slimes (you can see the key in the slime), and you can also find golden keys in brown treasure chests in here. You can find the following in here:
1). A Mechanic (a girl tied up, merely right click her to rescue her. She'll move into a house if you've got one available)
2). A Goblin Tinkerer (if you defeated the Goblin Army. Right click to free him and he'll move in if you have room). Note that the Goblin can ALSO spawn in any underground area, but he seems to be easier to find in the Dungeon.
3). A Muramasa (a sword you'll need here very shortly)
4). A Cobalt Shield (This will come in handy soon)
5). A Handgun (if you decided you wanted to make a Phoenix Blaster; combine the Handgun with 10 Hellstone Bars).
6). Two Magic Weapons that are probably not all that much use to you.
7). Shadow Key (for the chests in the Underworld you could not open earlier).
8). Water Candles (Take a few, but make sure to quickly put them in your inventory, they'll be used later. You'll see them scattered about the dungeon on tables and shelves).
Golden Keys are consumed (the Shadow Key is not) upon use. While navigating the dungeon, watch out for skeleton sorcerers and don't let the floating skulls touch you (they will prevent you from using your weapons for a short time). Watch out for spikes, they will still hurt at this point. Don't be afraid to die a few times in the dungeon; it is a harsh environment. Once you've been in here a few minutes, you'll quickly see why I suggested making Molten Armor before visiting this place.
Part 11: Lots of Errands to Run!
Assuming you've found the Goblin, he should have moved into your house by now. Go pay him a visit; he has incredibly valuable things for you. Buy a pair of Rocket Boots and a Tinkerer's Workshop. This will cost you 15 gold, but after all the fighting you've been doing you should have plenty for that. Note that this guy will also Reforge equipment: Bad Item Prefixes can be removed by him, but for a hefty price. You can also try to fish for good Prefixes but this is *incredibly* expensive and probably out of your reach for now. I'd only advise doing so if you get a bad prefix.
Place your Tinkerer's Workbench, and make the following (if you have the items):
1). Obsidian Shield (Cobalt Shield + Obisidan Skull)
2). Spectre Boots (Rocket Boots + Flurry Boots OR Hermes Shoes)
3). Lightning Boots (Spectre Boots + Aglet + Anklet of the Wind)
4). Frostspark Boots (Lightning Boots + Ice Skates)
5). Sweetheart Necklace (Panic Necklace + Honey Comb)
6). Tiger Climbing Gear (Shoe Spikes + Climbing Claws)
Now you see why I told you to keep all of those accessories, eh? If you're missing some of the above accessories, you can try scouring both worlds top-to-bottom to find some of them (after you make the Night's Edge as described below!).
It is also time to make your Ultimate Weapon (well, for now...): Muramasa + Blade of Grass + Fiery Greatsword + Blood Butcherer/Light's Bane = Night's Edge (Need a Demon/Blood Altar). This sword is the best weapon you can possibly use for awhile; it will absolutely destroy even stuff in the Underworld. Once you have all of this done, you're ready for the Underworld For Real this time!
Part 12: Preparing for the Wall of Flesh
Go down to the Underworld, but bring lots of stone, dirt, ash, mud, anything that's solid (I recommend against using Wood Platforms). The best blocks to use for this is Ash, because Fire Blossoms will randomly grow on the Ash. Alternatively, you could use Dirt and you will find a lot of Blinkroot. Stone won't get you any kind of plants spawning on it whatsoever. You'll need a few thousand blocks (not joking). Once you're down in the Underworld, begin making a straight bridge to the left or right. If there's a "building" in your way, tunnel through it and make sure you can run through it fast. If you must go up or down, step the blocks so that you can still run up or down them without having to stop for any reason. Open any chests you find with the Shadow Key (nothing particularly useful in these). You can also take some of the furniture if you haven't already, the doors look awesome as do some of the chairs, tables, etc. Keep going to the left or right, until you get to the edge of the map while placing blocks and torches to keep everything lit up, and while killing off enemies (again, don't let a doll drop into the lava!). Make sure you acquire a Guide Doll from one of the demons (kill it above the lava platform so the doll falls harmlessly on the solid platform).
I recommend spending some time down here, trying to grab a Demon Scythe, which is actually a spellbook. It casts the same spell the demons are using on you, and it does some decent damage, even if you're not set up for magic. It will be quite useful for the boss to come. Once you've reached near the end of the map (don't go ALL the way over, leave a few blocks above lava open), turn around and go a bit past where you started. While on your way there, start running and just keep running. If you bump into anything that stops your run, smooth it out. You don't want anything interrupting your movement whatsoever. No obstacles, nothing you're forced to jump over, no pits you might accidentally fall into.
Once you've done this, Make Sure you have the following:
1). The Jungle Fully Mapped and Prepped. DO THIS NOW if you haven't already. Do not fight the next boss until this is done. You'll thank me later.
2). Molten Armor, Molten Bow, Molten Pickaxe, Night's Edge, Demon Scythe, Full Life (400), Full Mana (200) Maximums.
3). A 4-5 Block Gap dug underneath your house (it should be floating in the air).
4). Ropes to all 3 Sky Islands for easy access.
If you haven't done it already, go to both of the beaches and extend wooden platforms along the water's surface, and drop a campfire halfway out, and 3-4 lines of rope down into the ocean. There are some treasure chests down there; to get them merely drop some glowsticks down and hop in. Watch your breath meter, kill any sharks that attack and grab the chests if you want. The main item here are the Flippers. A Breathing Reed might help you a little, but by now with the ropes and your boots you shouldn't need it now. It is important you have the bridges done though.
Part 13: More Hardmode Preparations (House, Biomes, etc).
Another thing to consider doing before Hardmode, is preparing a better, more permanent House for Hardmode. Earlier, I instructed you to build a 'floating' house in the air. This works, but the only problem with this (that you probably noticed if you had a Goblin Invasion), is that invasions and such tend to let enemies near your house, and those that have teleporting abilities or block-piercing attacks are capable of hitting your NPCs. Goblin Invasions can't really kill NPCs, but the stuff in Hardmode sure can!
So let's discuss how to make a better house. When you enter Hardmode, you want your house to be:
1). Slightly away from the original spawn point (about 2 full screen lengths away, if not 3) so that mobs will not spawn near your house if you're at the original spawn point.
2). Corruption/Crimson/Hallow-proof (so that your house cannot become corrupted.
3). Completely safe and impervious to any types of enemy attacks.
How do we get such a home? Remember how I told you to dig your Hellevator 2-3 screen lengths away from your starting house? Go down your Hellevator about 2 full screen heights and dig into the wall. You'll want a 3-block deep 'pit' in front of your front door, and once you have that, you can start hollowing out a large area for the house. You can't place your own background blocks until you remove the dirt background blocks that are naturally occurring, and you do that by going to the surface, equipping your Hamaxe and hammer the background blocks from the surface, down your hellevator, to where you're digging out your home. You will want to make 20 living spaces (there are 20 possible NPCs as of 1.2.4, not counting the Truffle which will not likely be at your house) so that you won't have to worry about living space.
Also, you will probably want a greenhouse-like area for potted plants, and a crafting room, and an area near that for chests to store stuff. In most playthroughs I go through, I try to have a chest in the greenhouse area for potions, one for plants, one for seeds, and at least a dozen boxes for crafting materials and another dozen for equipment. Your mileage may vary, but the worst thing is to run out of space to store all of this stuff. I also find it helps if you use different colored boxes for the crafting materials and equipment; I usually use brown boxes for materials and golden ones for equipment. You can also rename them by clicking 'Rename' while you have that box open for an easier time knowing what is in each box.
I normally like to start further underground than this. Hopefully it will not be a problem, but for some odd reason, this world has an unusually shallow surface layer (the underground area starts sooner than normal). I will be putting a greenhouse in this home, so having cave walls will kinda kill the mood. So I moved the house up a bit further than I normally would.
The crafting room about half-done. I forgot that I usually do 4 'sections' down instead of 3 in this screenshot.
There. That looks better. I enlarged the crafting room to be 4 "sections" (small room heights) high. This will be plenty of room for storage chests and every crafting machine in the game.
I took this screenshot to demonstrate two things: Where I'm standing, there's a unique chest (I used a Living Wood one here). Firstly, Building materials (background walls, furniture, banners, etc) and furniture-related crafting machines will go in this chest when not in use. Secondly, note the location of the piggybank and how I can access it from the outside of the house while standing in the "zombieproof pit". This makes it very convenient to dump money in a couple seconds without having to actually enter the house.
The crafting room and two NPC quarters are done! Note the first room at the very top that does NOT have a chair is not an NPC quarters, because I don't want NPCs opening the door on their own and potentially allowing monsters into the home. This is where I will put the bed to set my spawn point to, that way each time I recall or load the game up, I'm in the safety of my home right next to the crafting/storage room.
When this home is finished, there will be 20 NPC quarters going straight down, just like the two you see there already. Underneath the crafting room will be a huge greenhouse room with wooden platforms to act as shelves for the flower pots and at the very bottom, a small water pool for making bottled water, and an alchemy station with two chests: one for ingredients and one for potions. I also usually place a 3rd room inbetween the greenhouse area and the NPC quarters; I usually stick special furniture, trophies, and banners in there.
In this screenshot, I finally got all 20 NPC Quarters built! In the lower-left, you will see that tiny pool of water -- that is where the alchemy station goes, so that you can make bottled water which is needed for most potions.
I decided that instead of the glass window I usually use for the greenhouse area, this time I will go for Flower Blocks (purchased from the Dryad) this time instead. This is by far the longest part of the project, trying to hollow out this giant area. Note the wood platforms and rope -- these are "shelves" for the flower pots when I get enough of them to fill the room.
With the new house done, I don't need the old one anymore! That's a lot of flat land that could be used to grow trees, and set up a mob farm arena so I'm going to remove the house, and turn that all into flat grassland and plant some acorns so trees will grow there, especially after how much wood I used building the new house (800+!)
Another thing you ought to do once you get your house done, is go back to the Original Spawn Point. I recommend removing the old house you were living in once the new one is done, and once you've done That, flatten all the land around you. Once you've done that, dig a 5 block wide pit about a screen length deep, and then dig a 5-block high tunnel about a screen length across, and then dig a 5-block wide pit straight up, so that you've carved out a "bowl" of sorts. It should look like a "U" with the center blocks still in there. Get some sort of player-made background blocks (stone works) and fill that 5-block "U" in with the stone background blocks. This will prevent mobs from spawning in that tunnel. Line the 5-block U tunnel with wood.
Once you've done that, hollow out the "U" bowl on the inside, and fill it with snow and red/purple ice. Make sure you have at least 200 Red/Purple Ice. If done right, you should be able to stand in the middle of the structure, see snowfall, and get Corruption/Crimson Music. If you do indeed see snow and hear Corruption/Crimson Music, you've done it right. You will want to dig a 3-block deep hole that is at least 5-6 blocks wide. A campfire and a heart lantern will go in here, and some other modifications will need to be made.
This is your Keymold Farm; you will need this later. Once you kill the next boss, anytime a Goblin Invasion, Blood Moon, Solar Eclipse, or Pirate Attack happens (or if you spawn any of these yourself), you will want to fight them here. This is considered to be a Snow _and_ a Corruption/Crimson Biome so both the Frozen and the Corruption/Crimson Keymolds can drop here once you've entered Hardmode. The construction of the structure (which I will show in a screenshot) will be done as such that only enemies that can go through walls can possibly hurt you, as long as you use some type of sword (Cutlass, Night's Edge, etc). Weapons like Vilethorn can also work, but they don't do as much damage. The enemies that can pass through walls (Wraiths and Reapers mainly) should not do enough damage to you that they could actually kill you unless your equipment is grossly outdated.
One last thing I will suggest doing, is going to the Mushroom Biomes you've found and start mass-chopping down mushrooms with your sword. Do not use your pickaxe! You don't want to destroy the Mushroom Biome, you just want to collect some Mushroom Grass Seeds. Just use a sword to make sure you don't accidentally damage the grass and don't chop down the large mushrooms. Once you get a few Grass Seeds, go to the Dungeon and the Mud Block Bridge I told you to make, and plant some of the seeds on that mud and let it stew for awhile. Check back several game days later and you should have a small mushroom area though you may need to expand it. If you did it right, it should get dark when you get near it and you should hear the Mushroom Biome Music playing and the background will change.
Part 14: Wall of Flesh and Hardmode!
Before doing this next section, keep in mind that this is a Point of No Return. Once you kill the boss, your world will be irrevocably changed. Harder enemies will spawn, harder bosses will come looking for you, and the game will get harder.
Once you're ready, go back down to the Underworld once more, and go all the way to the far edge of that solid bridge you made. Select the Guide Doll, and drop it in the Lava. This will summon the Wall of Flesh. It will slowly move towards you, and do huge damage if it is allowed to touch you (which is why I told you to make sure the bridge is smooth!). You must kill the Wall of Flesh before you run out of room to run away from it. Use Demon Scythes and Arrows to kill the little floater eyes and then aim at the large eyes and mouths on the wall; all of these share the wall's HP. If you did all the prep work I suggested, then you shouldn't have too much trouble with this once you've gotten some practice. If you do die, simply get another Guide Doll and drop it in the lava again. Keep in mind that dropping the doll into Lava kills the Guide. You must wait until the next day for the Guide to respawn (assuming there's no Invasions going on) before you can summon the Wall again.
Once you kill it, a box will appear near you with some items in it, and you'll get a message that ancient spirits have awakened -- Your World is now a Hardmode World. Among the items there, will always be a Pwnhammer. Take the Pwnhammer; you will be using it very shortly. The other items that can drop will vary, none of which are particularly good. Hallow and Corruption (or Crimson) will spread through the world in roughly an "X" formation (the box that had the Pwnhammer is the center of the "X") and these two will spread much more rapidly than before. Newer, harder enemies will spawn, and you will get new surface areas and there's much more to do!
Last edited:
